

You hit the reset button and nothing. No click, no light, no power. If you’ve been living with a dead GFCI outlet for days, wondering if you caused it or if it just gave up, you’re not alone. The good news is most GFCI failures follow a predictable pattern, and you can usually figure out what’s wrong by checking a few specific spots in order. We’ll walk you through what kills these outlets, how to test them safely, and when it makes sense to replace one yourself versus calling someone in.
Step-by-Step Diagnostic Process for a Powerless GFCI Outlet
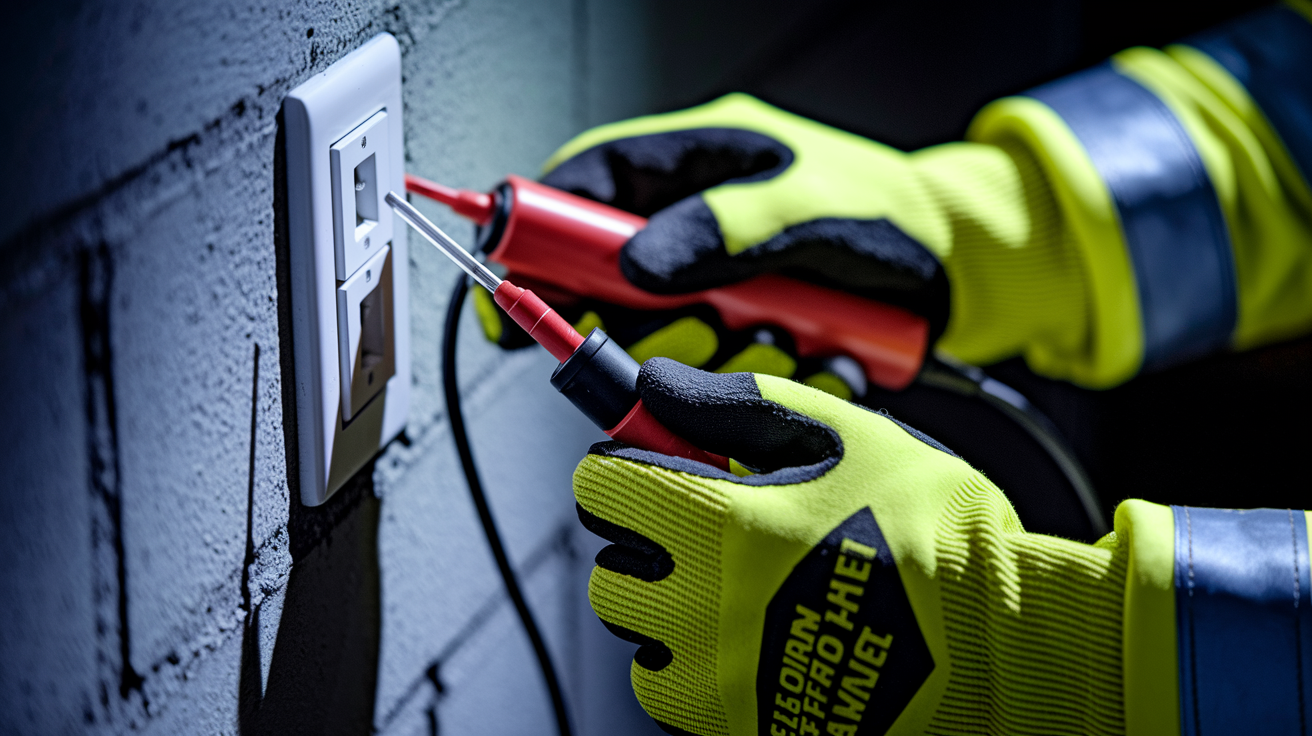
When you press that reset button and nothing happens, it helps to follow a clear path from the simplest fix to the more technical tests. This four phase approach moves from quick checks anyone can do to testing that requires a bit more attention and the right tools.
Check the Circuit Breaker at Your Electrical Panel
Walk to your electrical panel and look for the breaker that controls the outlet. You’re searching for one that’s shifted to the middle position, between on and off. That’s the tripped position.
To reset it properly, push the breaker handle all the way to the off position first, then flip it back to on. If it clicks and stays, you’ve likely restored power.
If your home has an older fuse panel instead, look for blown fuses with visible damage: a scorched appearance or a broken filament, similar to what you’d see in a burnt light bulb. Replace any blown fuses with ones that match the same amperage rating.
Test and Reset the GFCI Outlet Itself
Head back to the outlet and press the reset button firmly until you hear or feel a click. If it works, you might see the indicator light turn on or at least notice a solid engagement when the button stays in place.
If the reset button immediately pops back out after you press it, stop. That’s a clear sign the outlet has failed internally or there’s a wiring fault that needs professional attention. Don’t keep trying.
Locate and Check Upstream GFCI Outlets
One GFCI outlet often protects several regular outlets on the same circuit. If an upstream GFCI trips, every outlet it protects downstream loses power too.
Check other GFCI outlets in common locations: bathrooms (especially near sinks), kitchen countertops, garage walls, outdoor outlet boxes, laundry rooms, and unfinished basements. Press the reset button on any you find.
You might discover the real problem was never the outlet you were staring at, just the one feeding power to it.
Advanced Testing with Voltage Tester and Multimeter
A non contact voltage tester is the safest starting point. Hold it near the outlet slots without touching anything. It’ll beep or light up if power is present.
Test both slots, the smaller one (hot) and the larger one (neutral). If you get a signal from the hot slot, power is reaching the outlet but the GFCI mechanism itself has failed.
For a more precise reading, use a multimeter set to AC voltage, typically in the 120V range. Insert the black probe into the larger neutral slot and the red probe into the smaller hot slot. A working circuit should read between 110 and 120 volts. Zero voltage means no power is reaching the outlet, so your problem is upstream, either at the breaker, a tripped GFCI, or a wiring break somewhere in between.
A three prong outlet tester is another helpful tool. Plug it in and it’ll show a pattern of lights indicating wiring faults like open ground, reversed polarity, or open neutral. If no lights come on at all, there’s no power at all.
| Test Type | Expected Result | What It Means |
|---|---|---|
| Voltage test showing 120V | Power present at outlet | Outlet has failed internally and needs replacement |
| Voltage test showing 0V | No power reaching outlet | Check breaker or upstream GFCI for power loss |
| Continuity test showing infinite resistance | Open circuit detected | Failed outlet, broken wire, or loose connection |
| Outlet tester showing no lights | Complete power loss | Circuit breaker tripped, upstream GFCI tripped, or wiring fault |
If you have a GFCI tester designed for this purpose, the procedure is straightforward. Plug the tester into the outlet and press its test button. The GFCI should trip immediately and the indicator light should turn off. Then press the reset button to restore power. If the GFCI doesn’t trip during this test, the outlet isn’t providing the protection it’s supposed to and needs replacement.
Safety First: Essential Precautions Before Troubleshooting Your Outlet
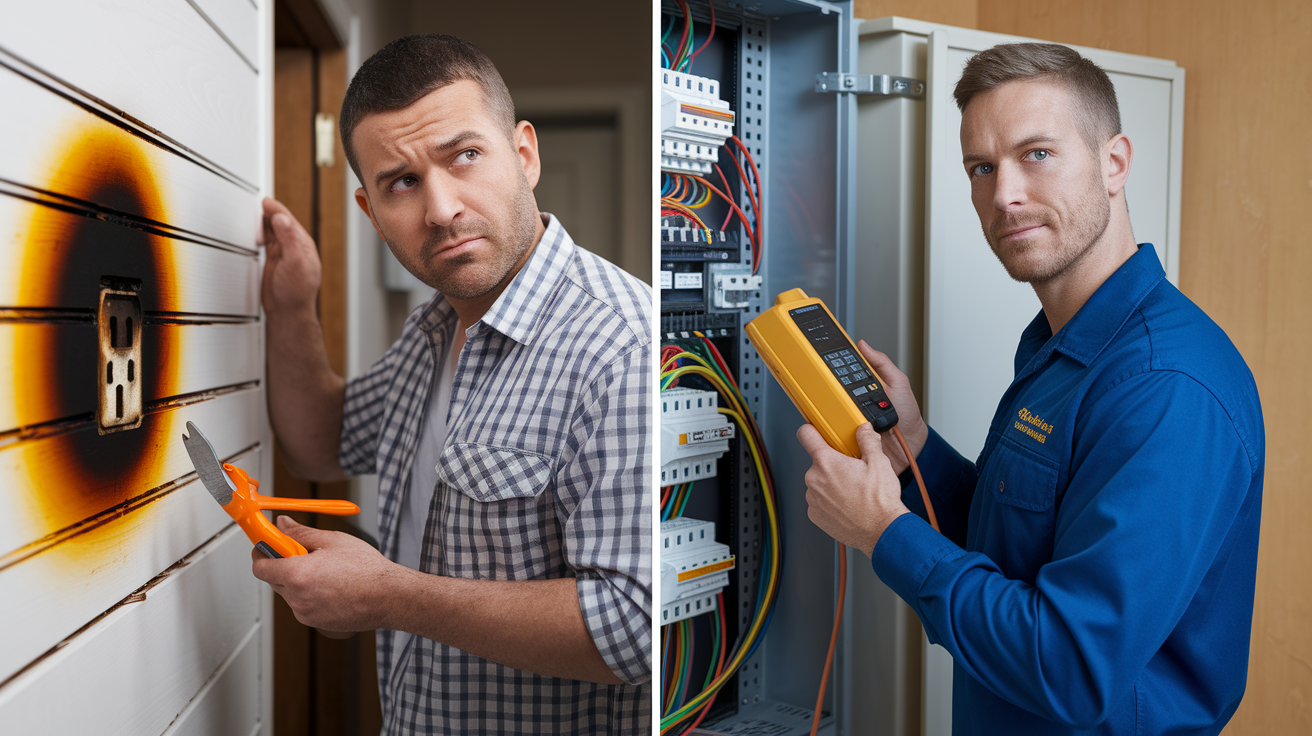
Electricity doesn’t give warnings before it causes harm. Every year, people get shocked or worse because they skipped basic safety steps while trying to fix something themselves.
Before you touch any wiring or even remove the outlet cover, turn off the circuit breaker that controls that outlet. Find it in your electrical panel, flip it to the off position, and then verify the power is actually off using a voltage tester. Don’t rely on the reset button or indicator light to tell you the outlet is safe.
Follow these safety actions every time:
- Turn off the circuit breaker controlling the outlet
- Verify power is off using a voltage tester
- Never touch wet or damaged outlets
- Keep the work area dry
- Wear rubber soled shoes
- Have a flashlight ready if working in dim areas
There are some situations where you should stop immediately and call a licensed electrician. If you see visible burn marks on the outlet or wall plate, hear buzzing or sizzling sounds, smell burning plastic, notice cracks in the outlet housing, see moisture inside the electrical box when you remove the cover, or feel any uncertainty about what you’re doing, don’t go further. Those conditions mean there’s damage or danger beyond basic troubleshooting. Turn off the breaker, step back, and get professional help.
Common Causes Behind GFCI Outlet Failure and No Indicator Light
(((alt-img3)))
GFCI outlets fail for dozens of reasons, from simple wear and tear to complicated wiring faults that take a trained eye to spot.
The most common cause is straightforward age. GFCI outlets have a typical lifespan of 10 to 15 years. The internal components wear out, especially if the outlet has been tripping frequently over the years. You might notice the buttons feel different, the reset doesn’t click as firmly, or the outlet starts tripping for no clear reason. Those are signs it’s reaching the end.
Environmental factors speed up the aging process. Moisture is the main enemy, especially in bathrooms, kitchens, and outdoor installations. Water vapor works its way into the outlet box and causes corrosion on the wire connections and internal components. Dirt and dust buildup create another problem by interfering with the sensitive mechanism inside the outlet. Temperature extremes in garages and outdoor locations cause the plastic housing and metal connections to expand and contract, loosening connections over time.
Wiring Faults That Prevent GFCI Operation
Loose connections are more common than most people realize. Terminal screws that held wires tightly during installation can back out slightly over years of use. Copper wire develops oxidation that creates resistance, especially at connection points. Backstab connections, those push in terminals on the back of the outlet, are notorious for loosening and failing more often than screw terminals. That’s why electricians prefer the pigtail method when connecting multiple wires, using a wire nut to join wires together with a short lead going to the outlet terminal.
Reversed polarity happens when the hot and neutral wires get swapped during installation. The outlet might seem to work at first, but it won’t detect ground faults properly and the reset function fails.
An open ground, where the ground wire is missing or disconnected, eliminates a critical safety path. Without it, the GFCI can’t function as designed.
Homes built before the 1970s sometimes have aluminum wiring, which requires special connection methods and anti oxidant compound. If an outlet was replaced without following those requirements, connections fail.
Undersized wire gauge is another culprit. If the wire is too thin for the circuit’s amperage, it creates heat and resistance that eventually damages connections.
Here are specific failure causes we see regularly:
Reversed line and load wiring during installation. Power surge damage to the internal circuit board. Corroded wire connections from moisture. Worn out mechanical spring mechanism in the reset button. Damaged internal sensor that detects ground faults. Scorched wiring from loose terminal screws.
Location matters more than you’d think. Bathroom and kitchen GFCIs face constant moisture exposure from steam and splashing water. Humidity works into the electrical box and corrodes connections over time. Outdoor and garage GFCIs need weather resistant (WR) ratings because they endure temperature swings that cause connections to expand and contract. Direct water exposure is a given for outdoor outlets. They need in use covers that protect the outlet even while something is plugged in. Insects and debris find their way into outdoor boxes more easily than indoor ones. Sometimes the GFCI protecting outdoor outlets isn’t even located outside. It might be installed inside the garage, basement, or electrical panel instead, which helps with longevity but makes troubleshooting less obvious.
When any of these wiring issues exist, the GFCI can’t complete its internal circuit. That’s why the indicator light stays off and the reset button won’t engage. These aren’t problems you can see from the outside, and fixing them safely requires someone who knows how to identify wiring faults and make proper repairs without creating shock or fire hazards.
How to Replace a Failed GFCI Outlet Yourself
(((alt-img4)))
Replacing a GFCI outlet yourself is manageable if you’re comfortable working methodically and following electrical safety rules.
You’ll need a flathead and Phillips screwdriver, a non contact voltage tester, wire strippers, needle nose pliers, a new GFCI outlet that matches the circuit’s amperage (either 15 amp or 20 amp), and electrical tape. Have everything ready before you start.
- Turn off the circuit breaker and verify power is off with your voltage tester
- Remove the wall plate and the two outlet mounting screws
- Pull the outlet from the electrical box without touching bare wires
- Photograph the existing wire connections so you have a reference
- Disconnect the wires from the old outlet, starting with the ground wire
- Identify which wires are LINE (coming from the breaker) and which are LOAD (going to downstream outlets), using the labels from the old outlet or a tester if needed
- Connect the LINE hot wire (black) to the brass LINE terminal and the LINE neutral wire (white) to the silver LINE terminal
- Connect LOAD wires to the corresponding LOAD terminals if you’re protecting downstream outlets
- Attach the ground wire (bare copper or green) to the green ground screw
- Carefully fold the wires back into the box and secure the outlet with the mounting screws
Understanding LINE and LOAD Terminal Connections
GFCIs have two sets of terminals, LINE and LOAD, unlike standard outlets that just have one set for each wire. This confuses a lot of people during replacement.
LINE terminals receive the incoming power from the electrical panel or circuit breaker. These must be connected for the GFCI itself to function. The back of the outlet usually has these terminals marked with tape or printed labels saying “LINE.”
LOAD terminals send protected power to additional downstream outlets. These are optional. You only use them when the GFCI is protecting multiple outlets on the same circuit. If this GFCI only protects itself and nothing else, leave the LOAD terminals empty.
When LINE and LOAD connections get reversed, you’ll see some strange behavior. The GFCI appears to have power initially, but the reset button won’t stay pressed or won’t function correctly. Downstream outlets might have power but they’re not actually protected by the GFCI anymore. The outlet can’t detect ground faults properly in this state.
Use the wiring diagram that comes with the new GFCI. Better yet, label each wire with tape before you disconnect the old outlet so you know exactly where everything goes. “LINE hot,” “LINE neutral,” “LOAD hot,” “LOAD neutral,” and “Ground” written on small pieces of tape makes reconnection simple.
After you’ve made the connections and secured the outlet in the box, attach the wall plate, restore power at the breaker, and press the reset button. You should hear a click and see the indicator light come on. Press the test button next to confirm the outlet trips properly. If you have downstream outlets connected to the LOAD terminals, check those too to make sure they’re working.
If you’d rather have peace of mind knowing the job was done right the first time, professional installation through Home Recovery Pro Services is an option worth considering.
Electrical Code Requirements and GFCI Protection Standards
(((alt-img5)))
National Electrical Code (NEC) standards determine where GFCI protection is required and what features outlets must have.
Current code requires GFCI protection in specific locations throughout your home. All bathroom receptacles need GFCI protection, no exceptions. Kitchen countertop outlets within 6 feet of the sink require it. Every outdoor outlet, whether it’s on the front porch or back patio, needs a GFCI. Garage outlets and receptacles in unfinished basements must have GFCI protection. Crawl spaces, laundry areas, and any outlet within 6 feet of wet bars or utility sinks fall under the same requirement.
Modern GFCIs come with features that older models didn’t have. Tamper resistant (TR) shutters that prevent children from inserting objects into the slots. Self test functionality that automatically checks the internal circuitry every month or so. Weather resistant (WR) construction required for outdoor installations. Proper amperage rating that matches the circuit, either 15A or 20A. LED indicator lights showing operational status and making it obvious when the outlet is working.
These aren’t just recommendations. Many of these features are code requirements now, especially tamper resistance in areas accessible to children and weather resistance for outdoor locations.
When you replace an old GFCI with a current code compliant model, you’re getting maximum protection and meeting standards that might be checked if you sell the home or have an electrical inspection. Code compliance isn’t just about passing inspection. It’s about having outlets that work reliably and protect your family from electrical shock and fire hazards.
Professional Electrician Repairs vs. DIY Troubleshooting
(((alt-img6)))
Basic troubleshooting, resetting breakers, pressing reset buttons, checking other GFCIs, is safe for most homeowners. But certain conditions mean it’s time to stop and bring in a licensed electrician.
You need professional help when the outlet shows burn marks or melted plastic. When you hear buzzing or sizzling sounds from the outlet or electrical box. When the GFCI trips frequently even when nothing is plugged in. When multiple rooms lose power at the same time. If your home has aluminum wiring or old knob and tube wiring. When the GFCI trips immediately every time you press reset. If you don’t feel confident or don’t have proper testing tools. When the repair requires opening the electrical panel or working with main feeds.
Professional electricians bring more than just experience. They have specialized testing equipment that measures voltage and current precisely, circuit mapping tools that trace power loss through walls, and thermal imaging cameras that detect overheating connections you can’t see. They know local code requirements, carry liability insurance, and hold current licensing. When work requires a permit, they can pull it and ensure the inspection passes.
Typical professional repair costs give you a realistic picture of what to expect. Simple outlet replacement in an easily accessible location usually runs $150 to $250. Circuit troubleshooting and repair, where the electrician has to track down a fault, costs $200 to $400. Complete circuit rewiring for a bathroom or kitchen ranges from $400 to $800. Electrical panel work, like replacing a breaker or adding capacity, falls between $500 and $1,500 depending on complexity.
For persistent GFCI issues you can’t resolve safely on your own, reaching out through Home Recovery Pro Contact gets you a licensed electrician who can diagnose and fix the problem correctly.
Preventive Maintenance to Extend GFCI Outlet Lifespan
(((alt-img7)))
Monthly testing is the single most important thing you can do to keep your GFCI outlets working properly.
Press the test button firmly. Verify power cuts off immediately and the indicator light goes out. Check that any plugged in devices stop working. Press the reset button to restore power. Confirm the indicator light returns and devices work again.
If the outlet doesn’t respond correctly during this test, you’ve caught a problem before it turns into a complete failure. That’s exactly what monthly testing is for.
Watch for signs that a GFCI is wearing out. The test button might become stiff or sticky instead of pressing smoothly. The reset button doesn’t click firmly like it used to. The outlet starts tripping frequently without any obvious cause. The indicator light flickers or dims. Or the outlet is simply old, 10 years or more means it’s lived a full life and replacement makes sense even if it still seems to work.
A few other maintenance practices help. Keep outlets clean and dry, wiping away dust and moisture regularly. Avoid overloading circuits by plugging too many high draw devices into outlets on the same circuit. Replace outlet covers that are cracked or loose, since they protect the outlet from moisture and debris. Schedule an electrical inspection every 3 to 5 years if your home is older.
Self testing GFCIs available in newer models take some of the work off your plate. They automatically check their internal circuitry and won’t reset if they detect an internal failure. You’ll still want to press the test button monthly, but these outlets add an extra layer of monitoring that older models don’t have.
Cost and Time Estimates for GFCI Outlet Repairs
(((alt-img8)))
Several factors affect what you’ll spend and how long repairs take: the outlet type and amperage rating, whether it’s in an easy spot or buried behind cabinets, DIY versus professional service, and whether you discover additional problems once you start the work.
| Repair Type | DIY Cost | DIY Time | Professional Cost | Professional Time |
|---|---|---|---|---|
| Basic GFCI outlet replacement (indoor standard location) | $12-$25 | 30-60 minutes | $150-$250 | 30-45 minutes |
| Weather-resistant outdoor GFCI replacement | $25-$45 | 45-90 minutes | $180-$300 | 45-60 minutes |
| Replacing multiple downstream outlets on same circuit | $40-$100 | 2-3 hours | $300-$500 | 1-2 hours |
| Circuit breaker replacement | $15-$40 | 30-60 minutes | $150-$300 | 30-45 minutes |
| Troubleshooting and rewiring | $30-$80 | 2-4 hours | $250-$500 | 1-3 hours |
| Full bathroom/kitchen GFCI circuit installation | $60-$150 | 3-5 hours | $400-$800 | 2-4 hours |
DIY material costs break down like this. A standard 15 amp GFCI outlet costs $12 to $25 at most hardware stores. A 20 amp version runs $18 to $35. Weather resistant GFCIs for outdoor use cost $25 to $45. Tamper resistant models with child safety shutters range from $20 to $40. If you don’t already have the basic tools, expect to spend $30 to $80 for a voltage tester, screwdrivers, and wire strippers.
Professional service costs more upfront, but you’re paying for guaranteed code compliance, a warranty on the work performed, rapid diagnosis of complex issues you might struggle with for hours, and liability protection if something goes wrong. Those benefits matter more when the outlet is in a tricky location, when your home has older wiring, or when you just want to know it was done right.
Final Words
A GFCI outlet not working with no light usually points to internal failure, wiring problems, or a tripped upstream source. Most homeowners can safely check the breaker, press the reset button, and test nearby outlets.
If those steps don’t restore power, you’re likely looking at a failed outlet or loose connection that needs replacement.
For straightforward swaps in accessible locations, DIY replacement works fine if you follow the LINE and LOAD terminal diagram carefully. But if you see burn marks, hear buzzing, or the reset button won’t stay in, stop and call a licensed electrician.
Either way, you’ll have a properly functioning outlet that protects against shock and keeps your home safe.
FAQ
Why won’t my GFCI reset with no light showing?
A GFCI that won’t reset with no light showing typically means the outlet has lost incoming power from the circuit breaker or an upstream GFCI, or the outlet itself has failed internally and needs replacement.
Should a GFCI light always be on when working properly?
A GFCI light should always be on when the outlet is working properly and receiving power. If the indicator light is off, it means the outlet has no power or has failed.
Why is my GFCI outlet not working but the breaker is not tripped?
A GFCI outlet may not work even when the breaker looks fine because an upstream GFCI has tripped, the outlet itself has failed, or loose wire connections are preventing power from reaching the outlet.
How do you fix a dead GFCI outlet with no power?
You fix a dead GFCI outlet by first checking the circuit breaker, then resetting any upstream GFCI outlets, testing for incoming voltage, and replacing the outlet if it has failed internally or shows wiring damage.
What does it mean if the GFCI reset button pops back out?
If the GFCI reset button pops back out immediately, it means the outlet is detecting a ground fault or has failed internally. Stop using the outlet and call a licensed electrician right away.
Can one GFCI outlet affect others in the house?
One GFCI outlet can affect others in the house because a single GFCI often protects multiple downstream outlets on the same circuit. If the upstream GFCI trips, all connected outlets lose power.
How long do GFCI outlets typically last before failing?
GFCI outlets typically last 10 to 15 years before failing. Outlets that trip frequently or are exposed to moisture may wear out faster and need earlier replacement.
What tools do I need to replace a GFCI outlet myself?
You need a screwdriver, voltage tester, wire strippers, needle-nose pliers, and a new GFCI outlet matching your circuit’s amperage rating to replace a GFCI outlet yourself.
Where are GFCI outlets required by electrical code?
GFCI outlets are required by electrical code in bathrooms, kitchens near sinks, outdoor areas, garages, unfinished basements, laundry rooms, and within six feet of any water source.
How much does professional GFCI outlet replacement cost?
Professional GFCI outlet replacement typically costs $150 to $250 for a standard indoor location, with higher costs for outdoor installations or troubleshooting complex circuit issues.
How often should I test my GFCI outlet?
You should test your GFCI outlet monthly by pressing the Test button to verify it trips immediately, then pressing Reset to restore power and confirm proper operation.
What is the difference between LINE and LOAD terminals on a GFCI?
LINE terminals receive incoming power from the breaker and must be connected for the GFCI to work, while LOAD terminals are optional and send protected power to additional downstream outlets.