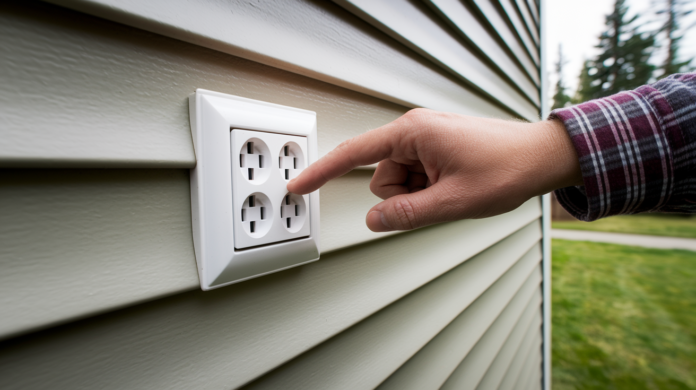

Ever plug in holiday lights only to find your outdoor outlet completely dead? You’re not alone. Most outdoor outlet failures come down to three simple causes: a tripped GFCI outlet hiding somewhere inside your house, a flipped circuit breaker, or moisture that triggered a safety shutoff. The good news is you can solve about 70 percent of these problems yourself in under 10 minutes with no tools. This guide walks you through the quick diagnostic steps that restore power, plus the safety checks that keep you protected while you troubleshoot.
Quick Diagnostic Steps to Restore Power to Your Outdoor Outlet

Most outdoor outlet failures have straightforward fixes. Before you start digging into complex electrical work, run through this sequence. It solves about 70 to 80 percent of outdoor outlet problems without tools or specialized knowledge.
Here’s what to do, in order:
Step 1. Test if other outdoor outlets work. Plug a small lamp or phone charger into nearby exterior outlets. If multiple outlets are dead, the problem’s upstream, likely a tripped GFCI outlet or circuit breaker. If only one outlet’s dead, the problem’s probably isolated to that specific receptacle.
Step 2. Locate GFCI outlets inside your home. Check the garage first (that’s the most common location for GFCI outlets protecting outdoor circuits), then bathrooms, kitchen, basement, and utility areas. Look for outlets with test and reset buttons in the center.
Step 3. Press the reset button on any GFCI outlet you find. Push firmly until you hear or feel a click. One tripped GFCI can shut off power to multiple outlets, including all your exterior receptacles.
Step 4. Test your outdoor outlet again with a small lamp or voltage tester. If power’s restored, you’ve solved the problem.
Step 5. If no GFCI was found or the reset didn’t work, locate your electrical panel. It’s usually in the garage, basement, or utility room.
Step 6. Look for a tripped circuit breaker. Tripped breakers sit in a middle position between on and off, or they flip all the way to off. Flip the breaker fully to the off position first, then firmly switch it back to on.
Step 7. Test the outdoor outlet. If power’s restored, you’re done. If not, mark the dead outlet with a piece of tape and move on to detailed troubleshooting.
This sequence handles the most common causes fast. GFCI outlets trip when they detect moisture or ground faults. Circuit breakers trip when circuits get overloaded or when there’s a short. Both reset quickly once you locate them.
If you’ve completed all seven steps and the outlet still has no power, the issue’s likely physical damage, loose wiring, or a problem inside the outlet itself. That’s when you’ll need to open things up for a closer look.
Essential Safety Precautions Before Troubleshooting Your Outdoor Outlet

Outdoor electrical work carries real risk. Moisture, weather exposure, and corroded connections make exterior outlets more dangerous to work on than indoor receptacles.
Follow this safety sequence before you touch anything:
1. Turn off power at the electrical panel. Locate the circuit breaker that controls your outdoor outlets and switch it to the off position.
2. Confirm the power’s actually off. Use a non-contact voltage tester or plug a small lamp into the outlet. If the tester lights up or the lamp turns on, power’s still flowing.
3. Wear rubber soled shoes. If you’re standing on wet ground or a damp patio, rubber soles provide an extra layer of protection against electrical shock.
4. Never work in wet conditions. Wait for rain to stop and let the outlet area dry out before opening anything.
5. Check for visible warning signs before you start. Look for burn marks around the outlet, discolored plastic, a warm outlet cover, moisture pooling near the receptacle, or a faint buzzing sound.
Stop immediately and call a licensed electrician if you notice any of these danger signals: a burning smell near the outlet, an outlet that feels warm to the touch even when nothing’s plugged in, visible scorch marks or melted plastic, sparking when you plug something in, or a buzzing or crackling sound. These indicate serious wiring problems, loose connections that are arcing, or damaged components that pose fire risk.
If you’re uncertain about any step, don’t guess. Outdoor outlets connect to the same 120 volt power supply as indoor receptacles. That’s enough voltage to cause injury. When in doubt, leave the troubleshooting to a professional electrician who works with these systems daily.
Testing and Resetting GFCI Protection and Outlet Function
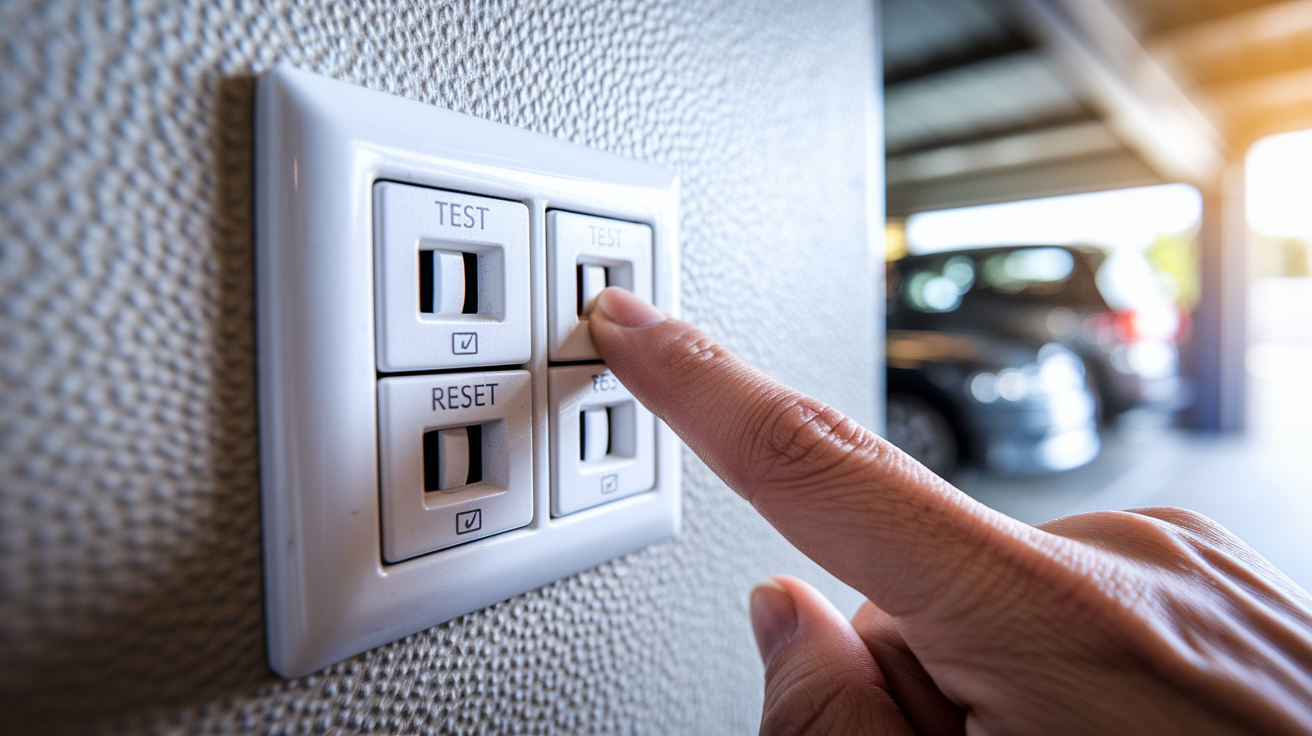
GFCI outlets (ground fault circuit interrupters) are safety devices that shut off power instantly when they detect moisture, ground faults, or electrical imbalances. They’re required by electrical code in areas where water and electricity might meet, which is why they protect most outdoor circuits.
Here’s what makes GFCI protection tricky for troubleshooting. One GFCI outlet can control multiple downstream outlets in a series connection. That means a GFCI located inside your garage might be the protective device for every outdoor receptacle on that side of your house. When that single GFCI trips, all the outlets it protects go dead at once.
The most common locations for GFCI outlets controlling outdoor receptacles are garages (by far the most frequent spot), basements, kitchens, bathrooms, and utility rooms. They’re usually installed within 10 to 20 feet of the electrical panel or near the area they’re protecting.
Locating and Resetting Your GFCI Outlet
Follow this sequence to find and reset GFCI protection:
1. Start in the garage. Check outlets near the garage door, on walls adjacent to outdoor outlet locations, and near the electrical panel.
2. Identify the GFCI by looking for an outlet with two small buttons labeled “test” and “reset” in the center between the two plug receptacles.
3. Press the test button. If the GFCI’s working correctly, you’ll hear a click and the reset button will pop out slightly. This confirms the device is functional.
4. Press the reset button firmly until it clicks back into place. You should feel resistance and hear a solid click when it seats properly.
5. Test your outdoor outlet with a small lamp, phone charger, or voltage tester. If power’s restored, the problem’s solved.
6. If the GFCI trips again immediately after you reset it, there’s likely moisture inside the outdoor outlet or a ground fault in the wiring. Unplug anything connected to the outdoor outlets, let them dry out if they’re damp, and try resetting one more time.
If the GFCI keeps tripping repeatedly, it’s telling you there’s an active problem. Moisture exposure, damaged wiring, or a short circuit somewhere downstream is causing the protective device to do its job. You’ll need to track down the source before the GFCI will stay reset.
Systematic Outlet Testing Methods
If GFCI reset doesn’t restore power, work through these diagnostic tests:
1. Confirm the outlet’s actually dead. Plug in a small appliance like a lamp or radio. No power means you’ve confirmed the problem.
2. Use a non-contact voltage tester on the outlet. Hold it near the receptacle slots. If it doesn’t light up or beep, no electricity’s reaching the outlet.
3. Test other outdoor outlets in the area. Plug your test lamp into each exterior receptacle. If multiple outlets are dead, the problem’s upstream (GFCI, circuit breaker, or main supply line). If only one’s dead, the problem’s isolated to that outlet.
4. Use a plug in outlet tester if you have one. These small devices have three lights that indicate proper wiring, reversed polarity, open ground, and other wiring issues. They’re helpful but not required for basic troubleshooting.
5. Mark dead outlets with painter’s tape or masking tape during troubleshooting. When you’re checking multiple outlets, it’s easy to lose track of which ones are working and which aren’t.
Here’s how to interpret your testing results. If all outdoor outlets are dead but indoor outlets work fine, you’ve narrowed the problem to the outdoor circuit. That points to a tripped GFCI you haven’t found yet, a tripped circuit breaker, or a break in the outdoor wiring line.
If only one outdoor outlet’s dead and others nearby work correctly, the problem’s in that specific outlet. Likely causes are a loose wire connection, corrosion inside the outlet, moisture damage to the receptacle, or a worn out outlet that needs replacement.
When a GFCI trips repeatedly even after you’ve dried everything out and disconnected all devices, it’s detecting an actual ground fault or short circuit. That’s a protective response, not a malfunction. At that point, you’ll need to inspect the wiring and outlet internals to find what’s causing the ground fault condition.
Checking Your Circuit Breaker for Tripped Switches

Circuit breakers protect your home’s electrical circuits from overload and short circuits. When too much current flows through a circuit or a short occurs, the breaker automatically trips to prevent wire overheating and fire risk.
Tripped breakers have a distinctive appearance. Instead of sitting firmly in the “on” position, they move to a middle position between on and off. Some breakers flip all the way to off when they trip. Either way, they’re easy to spot once you know what to look for.
Locate your electrical panel. It’s typically mounted on a wall in the garage, basement, utility room, or exterior wall. Open the metal door and look for a breaker that’s not aligned with the others.
Follow this reset sequence for proper circuit breaker reset:
1. Identify the tripped breaker. It’ll be in a middle position or fully in the off position while other breakers are firmly on.
2. Switch the tripped breaker fully to the off position first. Push it firmly until it stops. Don’t skip this step.
3. Switch the breaker firmly back to the on position. You should feel it click into place with solid resistance.
4. Test your outdoor outlet with a small lamp or voltage tester. If power’s restored, the reset worked.
If your circuit breaker trips again immediately or trips repeatedly after reset, that’s a diagnostic clue about deeper problems. A breaker that trips once might have responded to a brief overload, like running too many devices at the same time. A breaker that trips repeatedly is telling you there’s an ongoing problem.
Repeatedly tripping breakers indicate an overloaded circuit (too many devices pulling power at once), faulty wiring somewhere on the circuit, a short circuit in an outlet or device, or a worn out breaker that’s no longer functioning correctly. These situations require evaluation by a licensed electrician.
Don’t ignore a breaker that trips easily. Circuit breakers are rated for specific amperage (usually 15 or 20 amps for residential outdoor outlets). When a breaker trips repeatedly, it’s protecting your home from overheating wires, which can lead to electrical fires inside your walls. That’s when you stop troubleshooting and bring in a professional to diagnose the underlying issue.
Physical Inspection: Moisture, Corrosion, and Wire Connection Problems
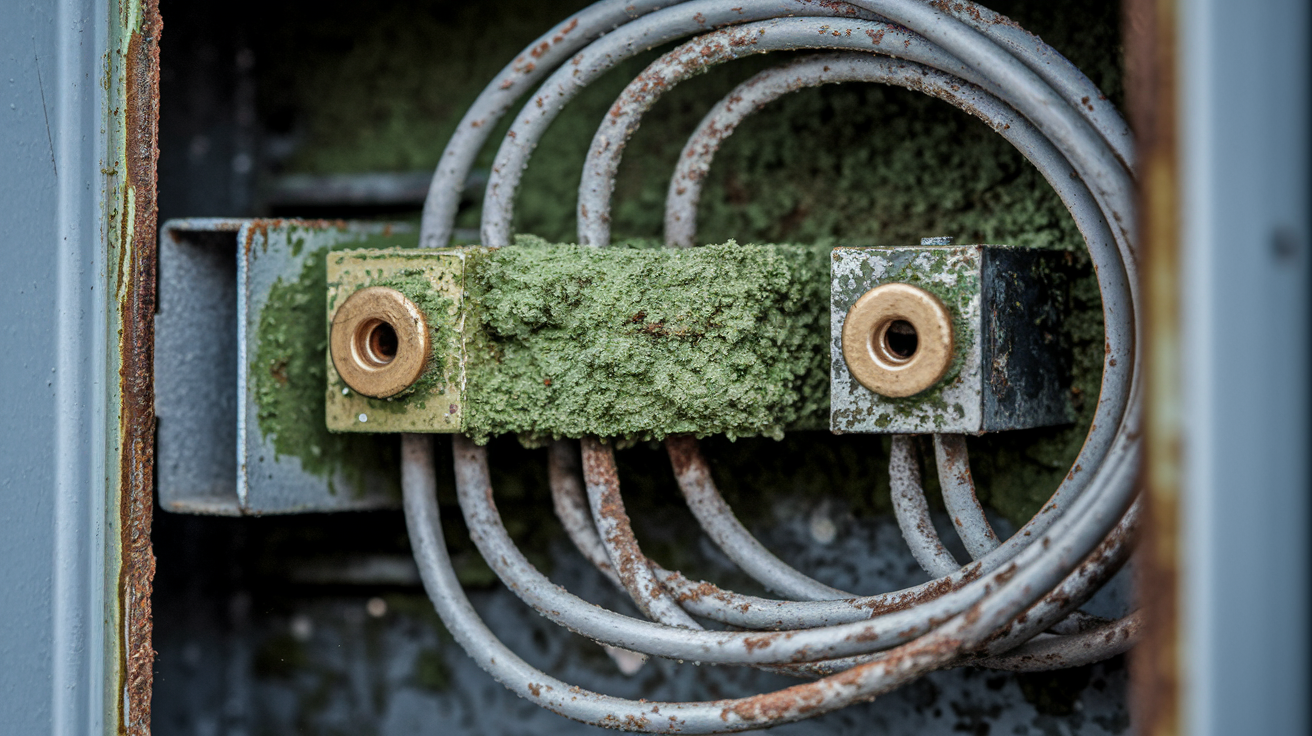
Physical inspection requires opening the outlet to examine internal conditions. You’ll be looking at moisture damage, corrosion buildup, and wire connections all at the same time, since these problems often occur together and become visible once you remove the outlet from its electrical box.
Start with the weatherproof cover and gasket. These components are your first line of defense against rain, snow, and moisture. Inspect the cover for cracks, damage, or missing pieces before you open anything. Check that the foam gasket between the cover and the outlet is intact and creates a complete seal when closed.
Opening and Inspecting the Outlet
Confirm power’s off at the circuit breaker and verify with a voltage tester before you touch any screws.
1. Remove the weatherproof cover. Unscrew or unlatch it depending on the cover type.
2. Unscrew the outlet from the electrical box. There are usually two screws, one at the top and one at the bottom, holding the receptacle to the box.
3. Carefully pull the outlet forward about 2 to 3 inches. You’ll see the wire connections on the back or sides. Don’t pull hard or yank on the wires.
4. Examine the connections and interior of the electrical box. This is where you’ll spot all the problems at once.
What to Look For During Inspection
Check for these conditions simultaneously during your inspection:
Visible moisture accumulation inside the electrical box or on the back of the outlet. Green or white corrosion (oxidation) on terminal screws or wire connections. Rusty or corroded terminal screws where wires connect. Water staining or mineral deposits inside the electrical box. Corroded or damaged wire insulation near connection points.
Loose terminal screws that don’t hold wires firmly. Wires that have disconnected or pulled away from terminals. Burn marks on wire insulation, terminal screws, or the back of the outlet.
Proper connection of hot wire (black) to brass colored terminal. Proper connection of neutral wire (white) to silver colored terminal. Proper connection of ground wire (bare copper or green) to green screw.
Minor fixes you can handle safely: tightening loose terminal screws with a screwdriver, cleaning light surface corrosion on wire ends with a wire brush or fine sandpaper, trimming back slightly corroded wire ends (about half an inch) to expose fresh copper, and re-seating wires that have loosened but aren’t damaged.
For weatherproof cover problems, replace any cover that’s cracked, warped, or missing pieces. Purchase outdoor rated weatherproof covers designed for your outlet type. Replace the foam gasket if it’s compressed, torn, or missing sections. When you reinstall everything, make sure the gasket sits flat and creates a continuous seal all the way around.
Stop and call a licensed electrician immediately if you find: any burn marks on wires or terminals (indicates arcing or overheating), extensive corrosion that’s eaten into wire strands, damaged wire insulation exposing bare copper, disconnected wires you’re not confident reconnecting correctly, signs of previous amateur repairs (electrical tape holding connections, wires twisted together without proper connectors), or water actively dripping inside the electrical box.
Loose connections and faulty wiring cause arcing, where electricity jumps across gaps. Arcing generates intense heat that can ignite surrounding materials. If you see burn marks or melted plastic, that’s evidence of dangerous arcing that poses fire risk. That’s a job for a professional electrician who can trace the problem and make code compliant repairs.
Replacing a Damaged Outdoor Outlet: DIY Guide

Outlet replacement becomes necessary when you find extensive corrosion, burn marks, cracked plastic, worn out receptacles that don’t grip plugs firmly, or repeated failures even after cleaning and tightening connections.
You’ll need these tools and materials: new outdoor rated outlet (GFCI outlet if required for your location), weatherproof cover with intact gasket, voltage tester, screwdriver set (flathead and Phillips), wire strippers, needle nose pliers, and your phone or camera for taking photos.
Follow this replacement sequence:
1. Turn off power at the circuit breaker that controls the outdoor outlet circuit.
2. Confirm power’s off using a voltage tester on the existing outlet. Test both receptacle slots to be certain.
3. Remove the old weatherproof cover by unscrewing or unlatching it.
4. Unscrew the outlet receptacle from the electrical box and carefully pull it forward to expose wire connections.
5. Take photos of the wire connections before you disconnect anything. You’ll use these photos to match the connections on your new outlet. Pay attention to which wire connects to which terminal.
6. Disconnect the wires. Loosen terminal screws and remove wires, or press release tabs if the outlet uses back wire connections.
7. Connect wires to your new outdoor rated outlet. Match hot wire (black) to brass terminal, neutral wire (white) to silver terminal, and ground wire (bare copper or green) to green ground screw. Wrap wires clockwise around terminal screws so they tighten down securely when you turn the screw.
8. Tighten all terminal screws firmly. Give each screw a final check to ensure wires won’t pull loose.
9. Carefully push the outlet back into the electrical box and secure it with mounting screws. Make sure it sits flush and level.
10. Install a new weatherproof cover with proper gasket seal. Ensure the gasket creates a complete seal around the perimeter.
11. Restore power at the circuit breaker.
12. Test the new installation with a small appliance or voltage tester to confirm proper function.
Choose the right replacement outlet for your situation. GFCI outlets are required by electrical code anywhere moisture’s common, including all outdoor locations in most jurisdictions. Look for outdoor rated or weather resistant markings on the outlet package. Check the amperage rating (15 or 20 amps) and match it to your circuit breaker rating. Tamper resistant outlets include internal shutters that prevent objects from being inserted into a single slot, which adds safety if children are around.
Weatherproof covers come in different types. “In use” covers allow you to keep devices plugged in while the cover’s closed. Standard “while not in use” covers only protect the outlet when nothing’s plugged in. Choose covers with built in gaskets and verify they’re rated for outdoor use. Higher IP ratings (like IP66) indicate better protection against moisture intrusion.
After installation, test both receptacles in the outlet. Plug in a lamp or phone charger to each slot and verify power flows correctly. If you installed a GFCI outlet, press the test button to confirm it trips, then reset it and verify power returns.
Understanding When Professional Electrician Help Is Required

Some outdoor outlet problems fall outside the scope of safe DIY troubleshooting. Knowing when to stop and call for professional help prevents electrical shock, fire risk, and code violations that could affect your home’s safety and resale value.
Call a licensed electrician when you encounter:
Burning smell near the outlet or electrical panel, or any discolored outlet covers or receptacle faces. Circuit breakers or GFCI outlets that trip repeatedly even after you’ve addressed obvious causes. Visible wire damage, frayed insulation, or exposed bare copper anywhere in the system.
Aluminum wiring (silver colored instead of copper) connected to the outlet, which requires special handling. Needed upgrades to your electrical panel capacity or circuit additions. Damaged electrical conduit, junction boxes with missing covers, or outdoor wiring that’s exposed to the elements.
Lack of confidence in your ability to safely complete the repair, especially when working with live circuits. Permit requirements for significant electrical work in your jurisdiction.
Electrical code compliance matters for safety and legal reasons. Licensed electricians know current National Electrical Code (NEC) requirements and local building codes. They pull permits when required, install outlets and wiring to code specifications, and ensure GFCI protection’s in place where mandated.
Professional repair costs vary based on problem complexity and your location. Simple outlet replacement typically runs $100 to $200 including labor and materials. GFCI outlet installation costs $150 to $250. Troubleshooting and repairing wiring issues ranges from $200 to $500 depending on how much detective work’s needed to find the problem. These costs are reasonable when you consider the expertise, proper tools, code knowledge, and liability insurance professionals bring to electrical work.
Complex wiring issues like intermittent power loss, multiple dead outlets with no obvious cause, or problems that persist after you’ve tried standard troubleshooting often require professional diagnosis. Electricians have specialized testing equipment like circuit tracers, meggers for insulation testing, and thermal imaging cameras that detect overheating connections inside walls. That diagnostic capability gets to the root of problems that visual inspection can’t find.
Preventive Maintenance to Keep Outdoor Outlets Working Year Round
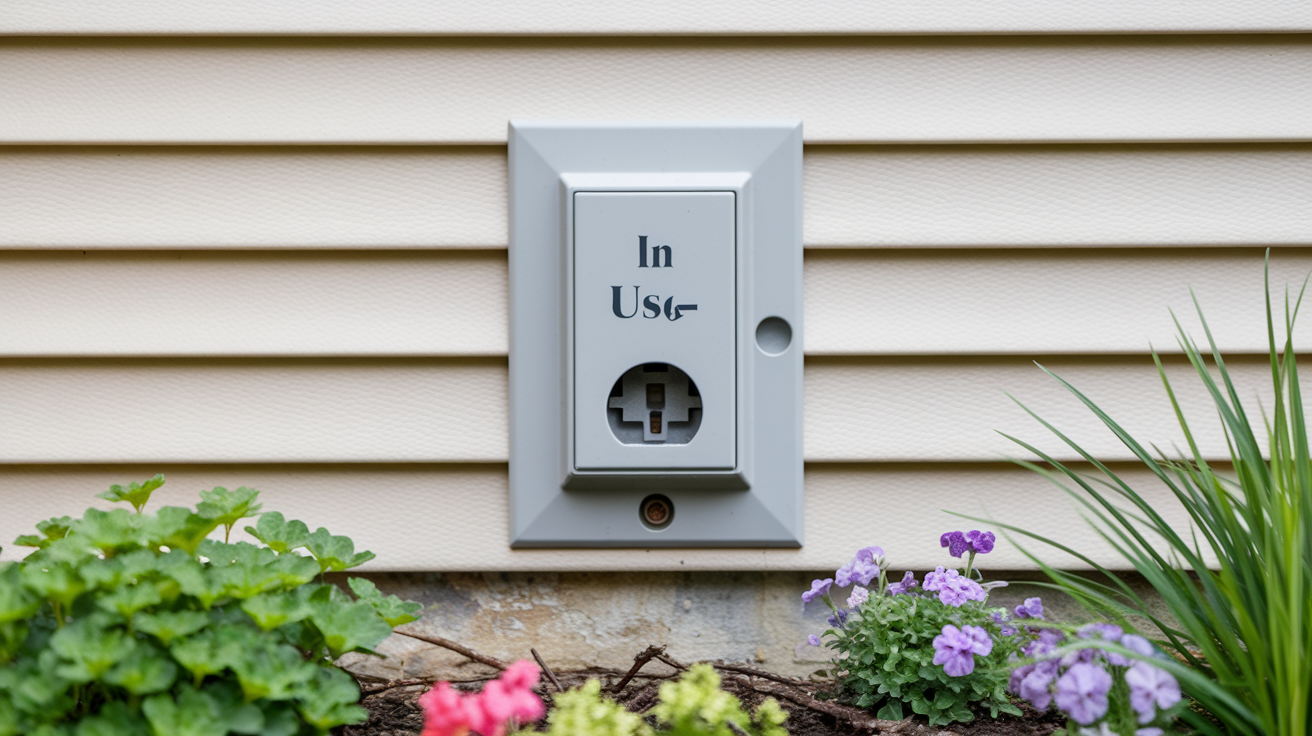
Prevention beats emergency repairs. Outdoor outlets face constant weather exposure, temperature swings, moisture infiltration, and UV degradation. A basic seasonal maintenance routine catches small problems before they become complete failures.
Establish a regular inspection schedule. Check outdoor outlets and weatherproof covers every three to six months. After major storms, do a quick visual inspection for obvious damage.
Your preventive maintenance checklist:
Test GFCI outlets monthly by pressing the test button, verifying the outlet trips, then pressing reset to restore power. Inspect weatherproof covers and gaskets before winter and after severe weather, checking for cracks, warping, or damage. Check for moisture accumulation inside outlet boxes during humid summer months or after heavy rain.
Keep weatherproof covers closed whenever outlets aren’t actively in use. Verify weatherproof cover gaskets remain properly sealed with no gaps or compressed sections. Trim back vegetation, vines, and plants that grow against or over outdoor outlets. Schedule annual professional electrical inspections as part of overall home maintenance.
| Season | Maintenance Task | Why It Matters |
|---|---|---|
| Spring | Test all GFCI outlets, inspect weatherproof covers for winter damage, clear debris from outlet areas | Winter ice and snow can crack covers and gaskets, spring moisture tests GFCI function |
| Summer | Check for moisture accumulation in humid conditions, verify covers seal properly, test outlets under load | Humid air condenses inside electrical boxes, high summer usage reveals weak connections |
| Fall | Inspect gaskets and seals before wet weather, tighten any loose covers or mounting screws, test GFCI function | Prepares outlets for winter moisture and ensures protection’s in place before storms |
| Winter | Check covers after ice storms, keep outlets clear of snow accumulation, verify weatherproof seals remain intact | Ice expansion can crack covers and boxes, moisture from melting snow tests all seals |
Outdoor outlets in humid climates require extra attention. The Gulf Coast, Pacific Northwest, and regions with high rainfall experience more weather related wear than dry climates. Moisture and temperature fluctuations accelerate corrosion and gasket degradation.
Year round protection starts with proper installation. Outlets should be installed in electrical boxes rated for outdoor use, with appropriate weatherproof covers and intact gaskets. Keeping those components maintained and replacing them when they show wear prevents most moisture related failures. Small preventive actions like keeping covers closed and checking gaskets twice a year avoid the inconvenience and cost of complete outlet failure when you need outdoor power most.
Final Words
Most outdoor outlet problems come down to tripped GFCI protection, a flipped breaker, or moisture getting where it shouldn’t.
If you’ve worked through the diagnostic steps and your outdoor outlet not working issue is solved, test it with a small load and keep an eye on it for a few days.
Regular checks on your weatherproof covers and a quick GFCI test every month or two will help you catch small problems before they turn into dead outlets.
And if something still feels off, there’s no shame in calling a licensed electrician to confirm everything’s safe and solid.
FAQ
Why did my outside electrical outlet stop working?
An outside electrical outlet stops working most commonly because of a tripped GFCI outlet, a tripped circuit breaker, or moisture damage that corroded the connections. Other causes include loose wire connections, a damaged weatherproof cover allowing water inside, or the outlet itself wearing out from weather exposure. Check indoor GFCI outlets in the garage, bathroom, or kitchen first, then inspect your electrical panel for tripped breakers before examining the outlet itself.
How do you reset an outdoor outlet?
You reset an outdoor outlet by locating the GFCI outlet that controls it, which is usually inside your garage, bathroom, kitchen, or basement. Press the reset button firmly until you hear or feel a click. If the outdoor outlet is a GFCI itself, press its reset button the same way. After resetting, test the outlet with a small lamp or phone charger to confirm power is restored.
Do outdoor GFCI outlets go bad?
Outdoor GFCI outlets do go bad over time, especially when exposed to moisture, temperature swings, and repeated weather cycles. If your GFCI trips immediately after you press reset, or if the reset button won’t stay in, the outlet has likely failed and needs replacement. Outdoor outlets in humid climates wear out faster due to corrosion and moisture buildup inside the electrical box.
Why is my outlet not working but the breaker is not tripped?
An outlet not working with an untripped breaker usually means a GFCI outlet upstream has tripped, cutting power to your outlet downstream. One tripped GFCI can shut off multiple outlets, including exterior ones. Check GFCI outlets in your garage, bathrooms, and kitchen for tripped reset buttons. If no GFCI is tripped, the problem is likely a loose wire connection, corrosion, or a failed outlet.
What are the first steps to diagnose a dead outdoor outlet?
The first steps to diagnose a dead outdoor outlet are to check if other outdoor outlets work, locate any GFCI outlets inside your home and check for tripped reset buttons, and inspect your electrical panel for tripped circuit breakers. Press any tripped GFCI reset buttons firmly and flip any tripped breakers fully off then back on. This systematic approach solves most outdoor outlet problems quickly.
When should I stop troubleshooting and call a licensed electrician?
You should stop troubleshooting and call a licensed electrician if you notice burning smells, discolored or warm outlets, visible wire damage, repeatedly tripping breakers or GFCI outlets, or burn marks on wires. Also call a professional if you find loose wiring, lack confidence in making repairs, or if the outlet remains dead after trying all basic troubleshooting steps. These conditions indicate safety hazards or complex wiring issues.
How do I check if moisture is causing my outdoor outlet to fail?
You check for moisture damage by first turning off power at the breaker, then removing the weatherproof cover and unscrewing the outlet from the electrical box. Look inside for visible water, green or white corrosion on terminals, rusty screws, water staining, or damaged wire insulation. Moisture can corrode wires and cause short circuits, especially if the weatherproof cover or gasket is cracked or improperly sealed.
What type of replacement outlet should I use for outdoor locations?
You should use an outdoor rated GFCI outlet for outdoor locations, especially anywhere moisture is common. Choose outlets marked weather resistant with proper amperage rating (usually 15 or 20 amps) and tamper resistant features. Pair the outlet with a quality weatherproof cover that has an intact gasket to seal against moisture. Check that the replacement meets current electrical code and has appropriate IP ratings for outdoor use.
How often should I test my outdoor GFCI outlets?
You should test your outdoor GFCI outlets monthly by pressing the test button, which should immediately cut power and pop out the reset button. Press reset to restore power after testing. Regular testing confirms the GFCI protection is working properly. Also inspect weatherproof covers seasonally, especially before winter and after major storms, to catch weather-related problems before complete failure occurs.
Can I fix loose wire connections in my outdoor outlet myself?
You can fix loose wire connections yourself if you’re comfortable working with electrical components and the damage is minor. First turn off power at the circuit breaker and confirm it’s off with a voltage tester. Tighten any loose terminal screws carefully. However, if you find extensive corrosion, damaged wire insulation, burn marks, or disconnected wires, call a licensed electrician. Loose wiring poses fire risk and requires professional intervention.