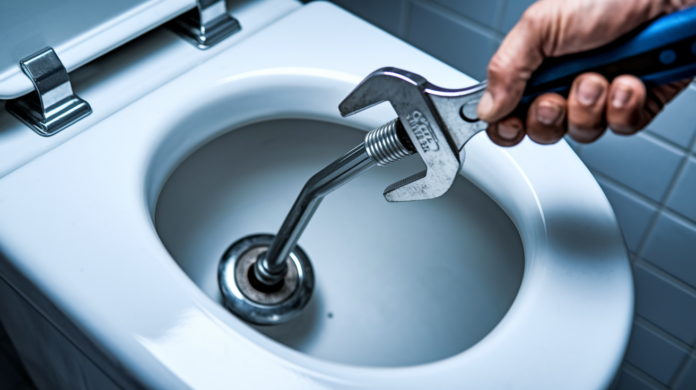

Have you been jiggling that toilet handle for weeks hoping it’ll magically fix itself? A loose handle is one of those minor annoyances that’s easy to ignore until it finally stops working altogether. The good news is you can tighten it in about five minutes with one basic tool you probably already own. We’ll walk you through the simple steps to get that handle feeling solid again, plus show you how to avoid the most common mistake that turns a quick fix into a bigger problem.
Tightening Your Toilet Handle: The Quick Fix Method
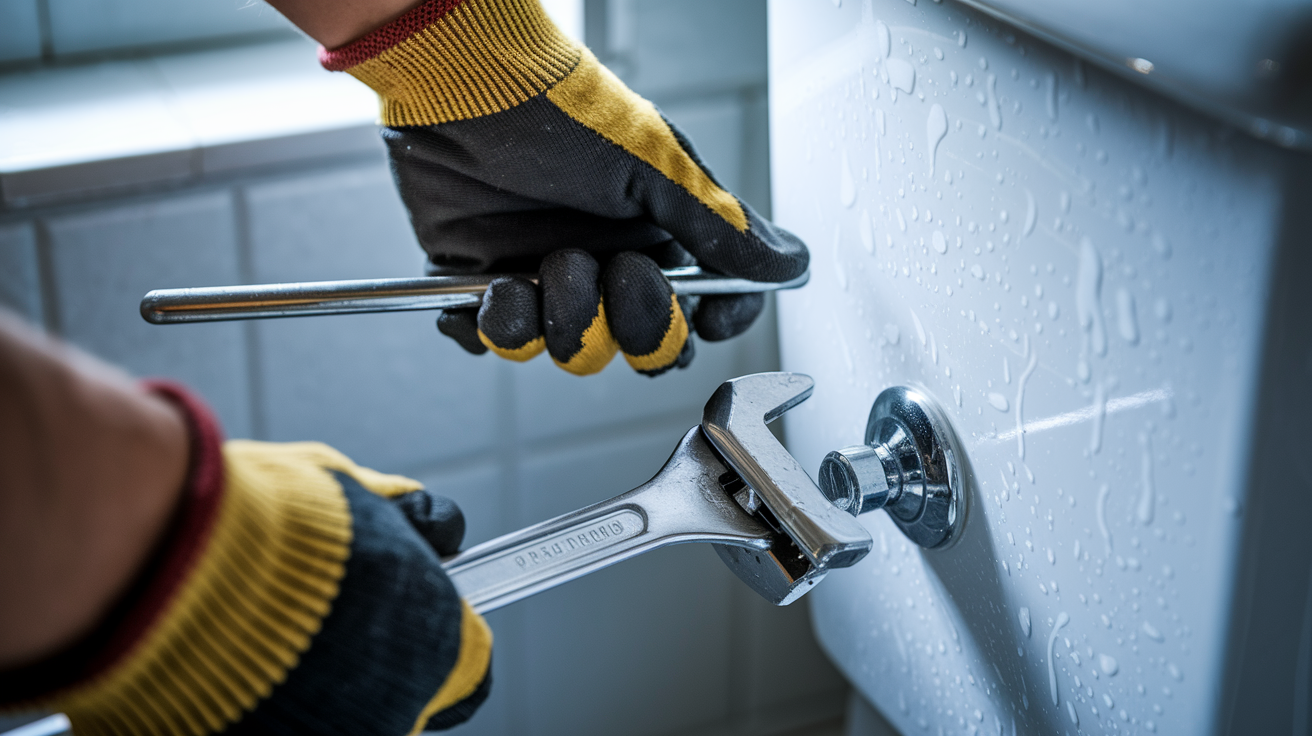
A loose toilet handle develops over time. That mounting nut inside the tank gradually works itself free from repeated use. Most loose handle problems take about five minutes to fix and you probably already own the one simple tool you’ll need.
Here’s the complete tightening process:
-
Close the toilet seat cover to create a work surface. This prevents wrenches or small parts from dropping into the bowl.
-
Remove the tank lid carefully using both hands. Set it on a towel or soft surface. Porcelain cracks easily if bumped or dropped.
-
Shut off the water supply by turning the valve behind the toilet clockwise until it stops. The valve sits near the floor where the supply line connects to the tank.
-
Flush the toilet to drain the tank. This gives you better visibility and easier access to the handle nut.
-
Locate the mounting nut on the underside of the handle inside the tank. It’s usually a plastic or metal nut positioned directly behind where the handle attaches.
-
Turn the nut clockwise using an adjustable wrench or pliers until it feels snug. Here’s what trips up most people: toilet handle threads run in reverse. Clockwise tightens, counterclockwise loosens.
-
Stop when the nut feels snug. Don’t force it. Plastic threads strip easily, and too much pressure can crack the porcelain tank where the handle mounts.
-
Turn the water supply back on by rotating the valve counterclockwise until it’s fully open.
Let the tank refill completely, then test the handle with several flushes. The handle should feel solid without wobbling or excessive play. If it still feels loose after the first tightening attempt, drain the tank again and give the nut another quarter turn. Some handles need two rounds of adjustment before they’re properly snug.
If the handle remains loose even after tightening the nut firmly, the problem might be a stripped thread, disconnected chain, or worn handle components. In that case, chain adjustment or full handle replacement becomes necessary.
Essential Tools and Materials for Toilet Handle Repair
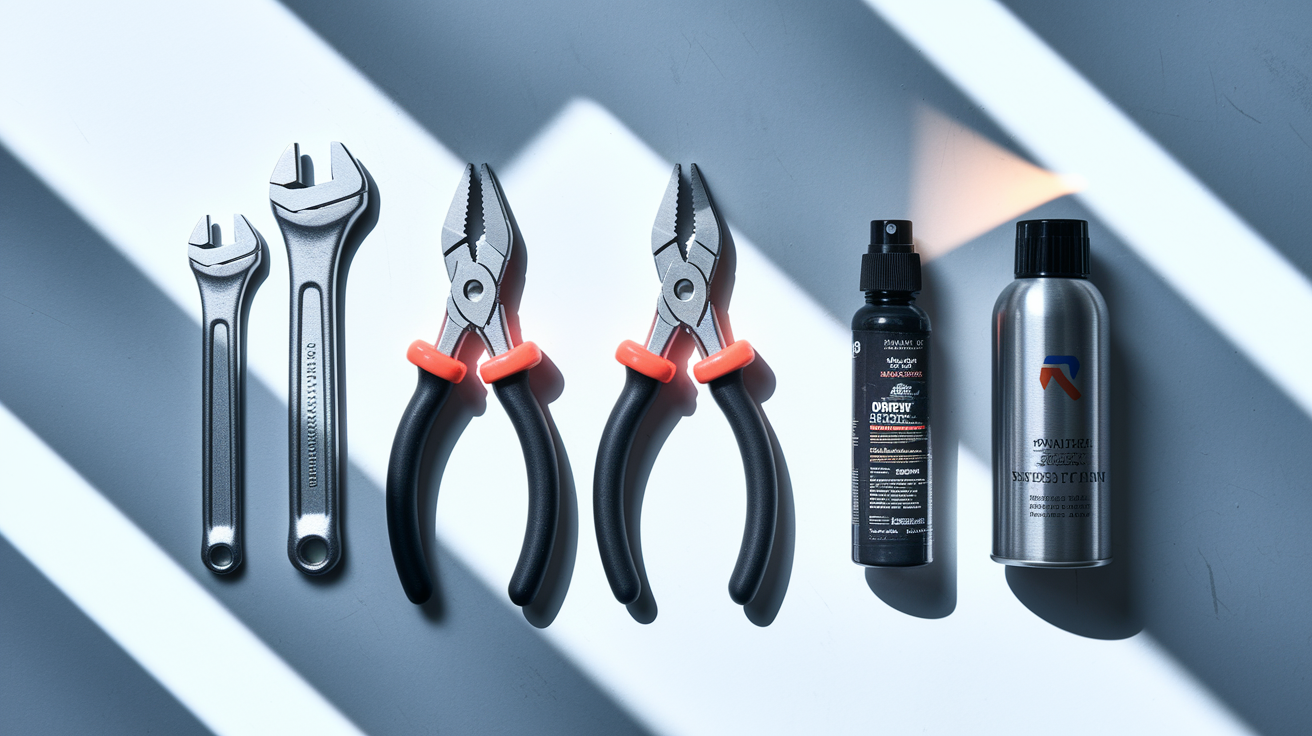
Most toilet handle repairs need only basic tools you probably have in your toolbox already. The typical tightening job requires one tool and takes less time than finding your car keys.
Here’s what you’ll need:
Adjustable wrench. The primary tool for tightening handle nuts. An 8 inch or 10 inch wrench fits most toilet handle nuts comfortably.
Pliers. Channel lock or slip joint pliers work as a backup if your wrench doesn’t fit in the tight space inside the tank.
Screwdriver. Some handle designs use screws instead of nuts. A standard flathead or Phillips head covers most models.
Basin wrench. This specialized tool helps with nuts positioned tight against the back of the tank where standard wrenches won’t fit. You probably won’t need this for basic tightening.
Lubricant. Spray lubricant or pipe grease helps if the handle mechanism sticks or binds when you test it.
Flashlight. A small flashlight or headlamp makes it easier to see inside the tank, especially if your bathroom lighting is dim.
Bucket or towels. Keep something nearby to catch drips when you disconnect the water supply or work inside the tank.
If you need to purchase replacement parts because tightening doesn’t solve the problem, take photos of both the outside handle and the inside mounting area before heading to the hardware store. Show these pictures to the staff if you’re unsure which replacement handle matches your toilet. Note the toilet brand if visible, which side of the tank the handle sits on, and whether it’s a front mount or side mount style.
Understanding Your Toilet Handle Assembly and Components

The toilet handle operates as a simple lever system. When you push the handle down, a metal or plastic arm inside the tank lifts up. This arm connects to a chain, and the chain pulls open a rubber flapper valve at the bottom of the tank. Water rushes from the tank into the bowl to create the flush.
The mounting nut holds the entire handle assembly in place through a hole in the tank wall. The handle arm, also called the trip lever, extends from the handle shaft into the tank interior where it connects to the lift chain. The chain runs down to the flapper valve at the tank bottom. This connection between handle arm and flapper creates the mechanical link that makes flushing possible. Most handle problems trace back to issues at one of these three connection points: the mounting nut, the chain attachment, or the flapper connection.
Proper chain slack is critical for the whole system to work correctly. The chain should have about half an inch of looseness when the flapper sits closed. This small amount of slack allows the flapper to seal completely against its seat at the tank bottom. It prevents water from leaking into the bowl between flushes. But the chain can’t have so much slack that it tangles or prevents the handle from lifting the flapper fully when you push down. Think of it like a bicycle chain. Too tight and things bind up, too loose and it slips off.
Adjusting Chain Length for Optimal Performance
Check the chain slack by looking inside the tank when the flapper is closed and the tank is full. Lift the chain slightly with your finger. You should see about half an inch of looseness before the chain pulls tight.
If the chain is too tight, the flapper can’t seal properly. You’ll hear water running constantly as the tank tries to refill while water leaks past the partially open flapper. The tank never fills completely and you waste water. If the chain has too much slack, it creates two different problems. The extra chain might tangle or get caught under the flapper, preventing it from sealing. Or the handle might move through its full range of motion without pulling the flapper open enough to create a strong flush.
Adjust the chain by moving the clip to a different link. Most chains connect to the handle arm with a simple S hook or clip that you can squeeze open with your fingers. Slide it to a link that creates proper slack. Some flapper valves have multiple attachment holes. If the chain is too long even at its shortest connection point on the handle arm, move the chain to a different hole on the flapper itself.
The mounting nut typically loosens first because it experiences constant vibration and stress every time someone uses the handle. The threads gradually work themselves loose over weeks or months of use. Less common failure points include the chain clip wearing out or the handle arm cracking near the mounting point where stress concentrates.
Diagnosing Common Toilet Handle Problems Before Repair

Proper diagnosis saves time. It prevents you from tightening parts that aren’t actually loose or replacing components that still work fine. Most handle problems fall into three categories based on how the handle feels and what happens when you try to flush.
Loose or Wobbly Handle Movement
When the handle feels loose or wobbles side to side as you push it, the mounting nut has backed off from its snug position. The handle still flushes the toilet, but it feels sloppy and imprecise. You might need to jiggle it to get the flush to activate. Sometimes you’ll hear a rattling sound when you move the handle because the shaft is shifting around in the mounting hole. This is the clearest sign that tightening the nut will solve the problem. The repair takes five minutes and doesn’t require any replacement parts.
Handle Moves But Won’t Flush
If the handle moves through its full range of motion but nothing happens, or the toilet flushes weakly, the chain has either disconnected or needs adjustment. Remove the tank lid and push the handle while watching the inside mechanism. The handle arm should lift smoothly upward. If the arm moves but the chain doesn’t lift the flapper, the chain has slipped off its connection point. If the chain is still attached but barely moves when you operate the handle, there’s too much slack in the chain. You’ll see the handle arm rise while the chain just shifts around without pulling the flapper open. Both problems fix with chain reconnection or adjustment rather than nut tightening.
Handle Sticks or Won’t Return
A handle that sticks in the down position or requires force to move indicates binding in the mechanism rather than looseness. The shaft might be rubbing against the tank wall if the handle shifted position. Mineral deposits sometimes build up on the shaft where it passes through the mounting hole, creating friction that prevents smooth movement. Corrosion on metal handle components can cause similar binding. Apply spray lubricant to the shaft on both sides of the tank wall and work the handle up and down several times. If lubrication doesn’t help, the handle mechanism itself is probably damaged or corroded.
Tightening the mounting nut fixes loose, wobbly handle problems. Chain adjustment fixes flushing problems where the handle moves but nothing happens. But if the handle arm is cracked, the threads are stripped, or the metal is corroded, replacement becomes necessary because no amount of tightening or adjustment will restore proper function.
Preventing Damage: Avoiding Over Tightening and Stripped Threads

Most toilet handle mounting nuts are plastic rather than metal. Plastic threads grip well when properly tightened but strip easily when forced. The mounting nut threads onto a plastic or brass shaft that extends through the porcelain tank wall. Over tightening crushes the plastic threads, damages the shaft, or cracks the porcelain around the mounting hole.
You can’t rely on how tight the nut feels with a wrench because wrenches multiply your hand strength several times over. What feels like moderate pressure with a 10 inch wrench actually applies significant force to small plastic threads. Instead, tighten the nut by hand first until it stops turning easily. Then use your wrench for just a quarter turn or half turn more until the nut feels snug. The handle shouldn’t wobble, but the nut shouldn’t require serious force to turn that final bit. If you’re straining to turn the wrench, you’ve gone too far.
Test the tightness by grasping the outside handle and trying to wiggle it side to side. Some slight movement is normal and doesn’t indicate the nut needs more tightening. The handle should feel solid during normal use without excessive play. Push the handle through a full flush cycle. If it operates smoothly without wobbling or shifting position, the nut is tight enough.
If you’ve already stripped the threads by over tightening or if previous repairs damaged them, you can create a temporary fix by wrapping the shaft threads with plumber’s tape or electrician’s tape. Remove the nut completely, wrap the exposed shaft threads with three or four layers of tape, then thread the nut back on. The tape fills the gaps created by damaged threads and gives the nut something to grip. This fix might last a few months, but it’s temporary. Plan to replace the handle completely because stripped threads only get worse with continued use.
Dealing With Corrosion and Mineral Deposits on Handle Hardware
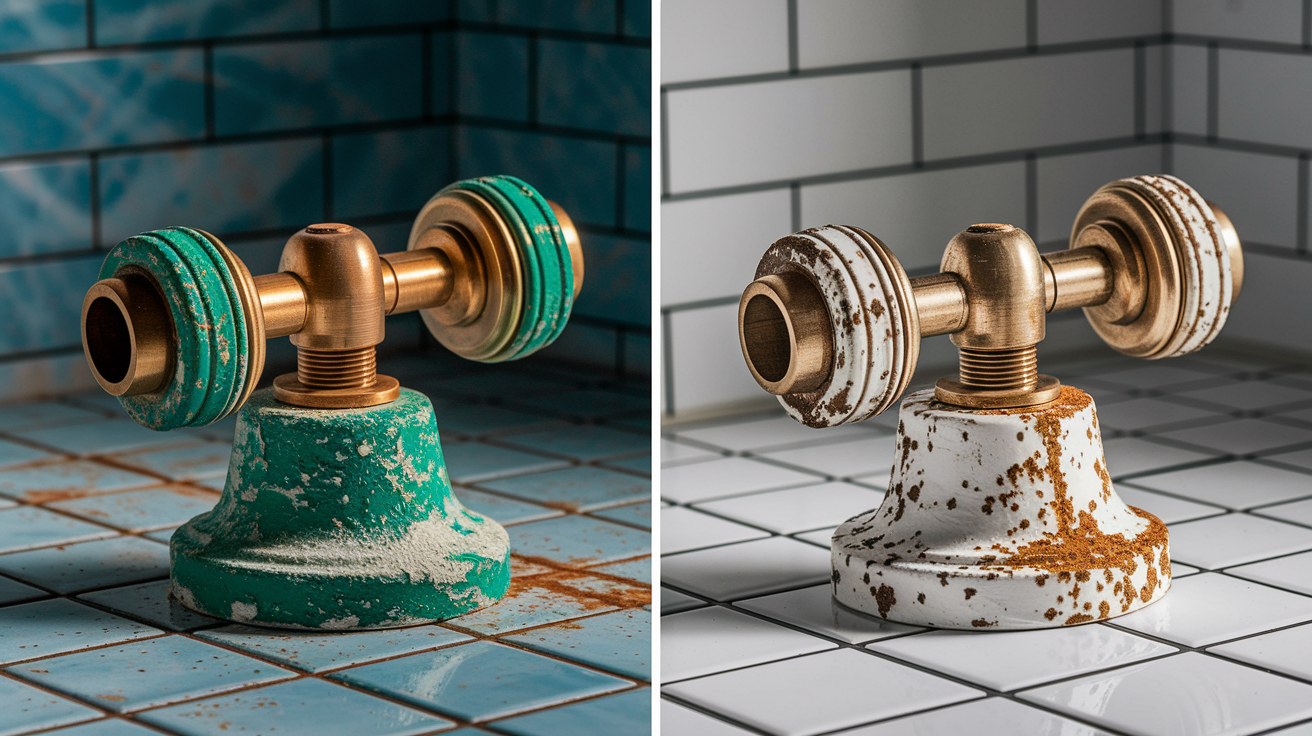
Hard water and tank moisture create an environment where mineral deposits and corrosion develop over months and years. White or greenish buildup accumulates on the handle shaft, mounting nut, and chain connections. Metal handles corrode at stress points where the metal bends or where dissimilar metals touch.
Minor mineral deposits clean off with white vinegar. Pour enough vinegar into the empty tank to submerge the corroded parts, or soak a rag in vinegar and wrap it around the affected area for 20 to 30 minutes. The acid in vinegar dissolves calcium and lime deposits. Scrub the loosened deposits with an old toothbrush or a piece of fine sandpaper. Rinse thoroughly and dry the components before reassembly.
Stuck mounting nuts that won’t turn even with a wrench require penetrating oil. Spray the threads where the nut meets the shaft and let the oil soak in for 15 to 20 minutes. The oil seeps into the threads and loosens rust or mineral deposits that lock the nut in place. Try turning the nut again with steady pressure rather than sudden force. If it still won’t budge, apply more oil and wait another 15 minutes. Use pliers to grip the handle shaft from outside the tank to keep it from spinning while you turn the nut inside. Sometimes you need to work the nut back and forth, loosening it slightly in one direction then the other, to break the corrosion’s grip.
Here are effective products and methods for different corrosion situations:
White vinegar soak dissolves mineral deposits and light corrosion without damaging plastic or porcelain components.
Penetrating oil (WD 40 or similar) breaks the bond between corroded threads on metal nuts.
Wire brush removes surface rust and scale from chrome or brass handles before they pit deeper.
Baking soda paste scrubs away stubborn deposits when vinegar alone isn’t enough.
Heavy corrosion that pits the metal or creates rough, flaky surfaces means replacement is the better choice. Severely corroded handles break during removal attempts. Even if you get them out, pitted threads won’t hold a nut securely. Chrome finish that’s flaking off or brass that’s turned green and brittle indicates the metal has weakened to the point where tightening might snap the handle shaft.
When to Replace Instead of Tighten Your Toilet Handle

Toilet handles last 10 to 20 years under normal use, but certain conditions cut that lifespan short. Once the handle reaches a point where metal has corroded through or plastic has cracked, tightening becomes futile. You’re just securing a broken part that will fail again shortly.
Look for these specific conditions that require replacement:
Visible cracks in the handle arm or lever that appear as hairline splits or breaks anywhere in the mechanism. Even small cracks cause the handle to flex incorrectly during use, preventing it from lifting the chain properly or causing the handle to break completely during a flush.
Stripped or damaged threads where the mounting nut spins freely without tightening. If tape wrapping doesn’t hold or if previous repair attempts damaged the threads, replacement is the only permanent solution.
Severe corrosion or rust that creates pitting, rough surfaces, or flaking metal. Corroded threads won’t hold tightness, and corroded metal breaks easily under stress.
Broken mounting ears or attachment points where the handle structure has cracked or broken at critical stress points. These can’t be repaired effectively.
Handle material degradation where plastic has become brittle and chalky or metal has thinned from corrosion. Old handles sometimes crack just from normal tightening pressure.
Repeated loosening where you’ve tightened the mounting nut two or three times over a few months and it keeps working free. This indicates worn threads or a handle shaft that’s no longer sized correctly for the mounting hole.
Universal toilet handles work with most standard toilets regardless of brand. These generic handles cost between $8 and $15 at hardware stores and home centers. They come with adjustable length shafts that you trim to fit your specific tank wall thickness. The mounting nut and basic mechanism are standardized, so universal handles connect to standard chains and flappers without compatibility issues. If you know your toilet brand and model number, you can get an exact replacement handle from a plumbing supply store or directly from the manufacturer. Brand specific handles cost more but match the original finish and style exactly.
Before purchasing either type, check which side of the tank your handle is on and measure the distance from the outside of the tank to the inside wall. Universal handles adjust for different wall thicknesses, but extremely thick or thin tank walls might require a specific handle model. Take photos of your current handle from both inside and outside the tank to verify you’re getting the correct mounting style and handle position.
Different Types of Toilet Handle Mounting Systems
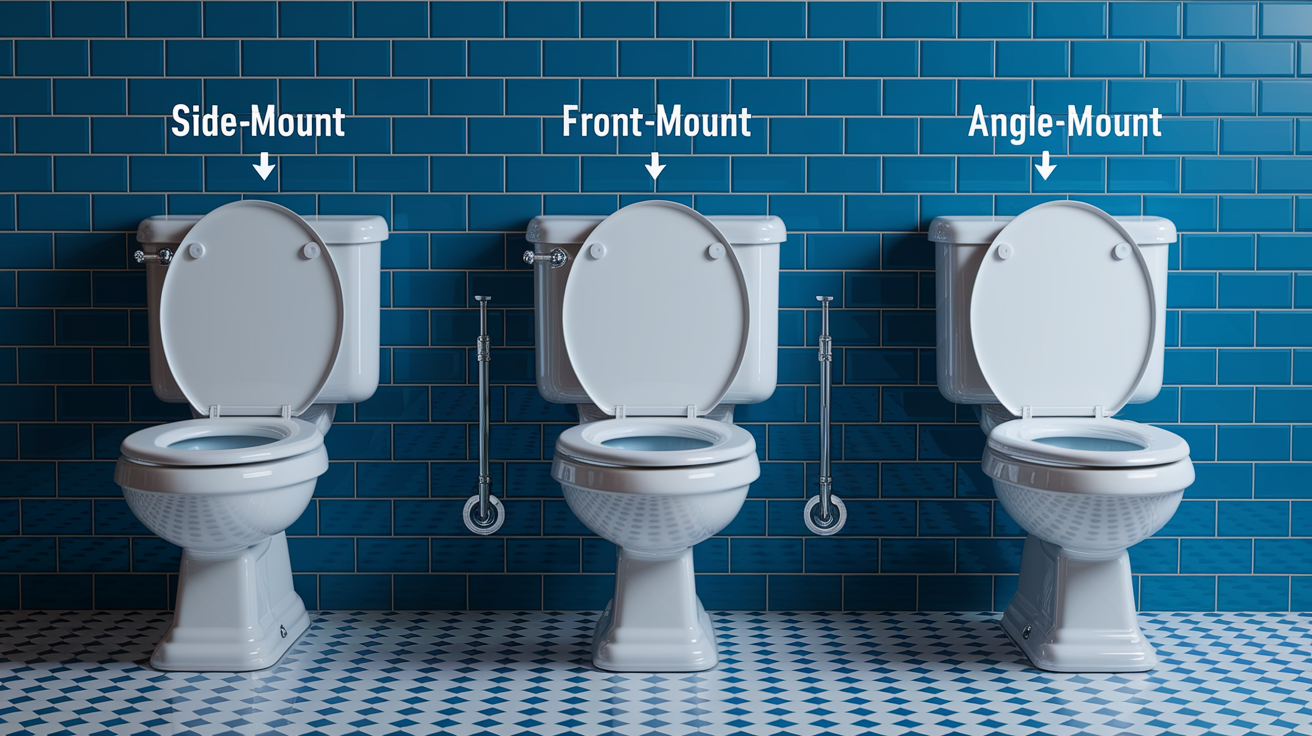
Handle position and mounting style affect how you access the mounting nut and what type of replacement handle you need to purchase. All handles mount through a hole in the tank wall, but the angle and location of that hole vary.
Side mount handles attach through a hole on either the left or right side of the tank about two thirds of the way up from the tank base. The handle shaft runs horizontally or at a slight angle through the tank wall. This is the most common configuration. The mounting nut sits inside the tank in clear view when you remove the lid. You can reach it easily with a standard adjustable wrench. Most universal replacement handles fit side mount positions.
Front mount handles attach through a hole in the front face of the tank, usually near the top right or top left corner. The shaft angles downward and back into the tank interior. These handles often appear on older toilets or on models with decorative tank shapes that don’t accommodate side handles well. The mounting nut can be harder to reach because it sits close to the front wall of the tank. A basin wrench sometimes helps with front mount nuts positioned tight against the tank wall.
Angle mount handles are a variation where the mounting hole sits on the tank corner rather than squarely on the front or side. The shaft enters at an angle between horizontal and vertical. Access to the mounting nut varies depending on the specific angle and how close the nut sits to adjacent tank walls. Some angle mounts give you plenty of room to work, while others require working from above at an awkward angle.
| Handle Position | Nut Location | Access Method |
|---|---|---|
| Side Mount | Inside tank wall, horizontal access | Standard wrench from directly above or angle |
| Front Mount | Inside front wall, angled access | Wrench or basin wrench at angle toward front |
| Angle Mount | Inside corner, limited access | Small wrench or pliers from above |
Complete Toilet Handle Replacement Process
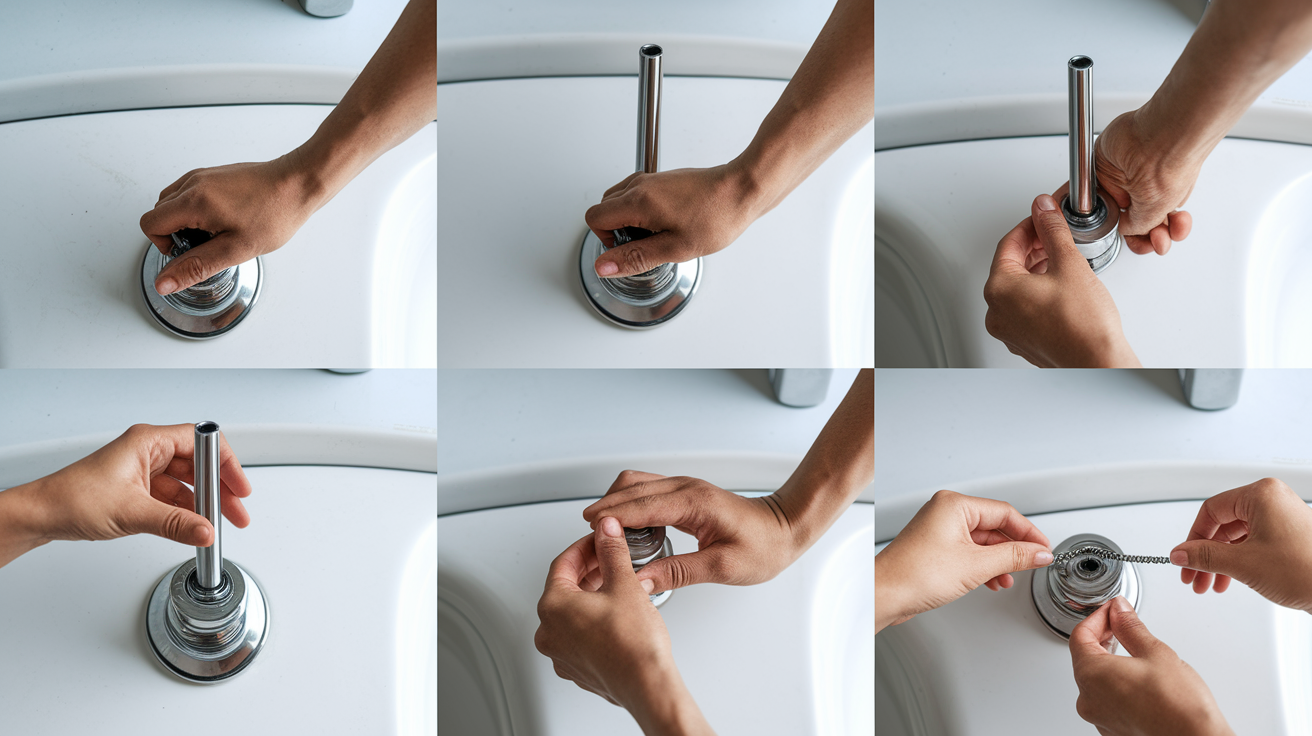
Use these instructions when tightening hasn’t solved the problem or when you’ve identified one of the replacement conditions listed earlier. The process takes 10 to 15 minutes from start to finish for a straightforward replacement on a standard side mount handle.
-
Disconnect the lift chain from the old handle arm inside the tank. Most chains connect with a simple clip or S hook that you can unhook with your fingers. If the connection is tight, use needle nose pliers to spread the hook open slightly. Let the chain drop down to hang from the flapper.
-
Remove the mounting nut by turning it counterclockwise with your wrench. Remember that toilet handle threads run backwards. Counterclockwise loosens, clockwise tightens. Hold the handle from outside the tank to keep the shaft from spinning as you loosen the nut.
-
Remove the old handle assembly by pulling it straight out through the mounting hole from outside the tank. The shaft and attached handle arm slide out together once the nut is off. If the handle is stuck from corrosion or mineral buildup, grip the handle body with pliers and work it back and forth while pulling to break it free.
-
Prepare the new handle by removing all packaging and checking that you have the mounting nut, any washers or gaskets, and installation instructions. Some handles come with the mounting nut already threaded onto the shaft, while others package it separately.
-
Insert the new handle through the tank mounting hole from outside. Universal handles require you to check the shaft length first and trim it if necessary using a hacksaw or pipe cutter. The shaft should extend about 2 inches into the tank interior past the inside tank wall. Push the handle through until the mounting flange sits flush against the outside tank wall.
-
Hand tighten the mounting nut from inside the tank by threading it clockwise onto the shaft threads. Tighten by hand until the nut stops turning easily. This ensures proper alignment before you apply wrench pressure.
-
Finish tightening with a wrench by giving the nut a quarter to half turn past hand tight. The handle should feel solid without wobble but shouldn’t require excessive force to secure.
-
Reconnect the chain to the new handle arm using the clip or hook connection. Adjust the connection point to leave about half an inch of slack in the chain when the flapper is closed and the handle is at rest.
-
Test the new handle by turning the water supply back on, letting the tank fill completely, then flushing several times. Watch inside the tank during the first few flushes to verify the handle arm lifts smoothly, the chain pulls the flapper fully open, and the flapper drops back down to seal after each flush.
Most handle kits include manufacturer specific installation instructions that might differ slightly from these generic steps. Read through the included instructions before you start to catch any model specific requirements. Some handles use set screws instead of mounting nuts, or they include rubber gaskets that must be positioned in a specific order. Follow the manufacturer’s guidance when it conflicts with generic instructions.
Time Requirements and Cost Estimates for Handle Repairs

Knowing how much time and money to expect helps you decide whether to tackle the repair yourself or hire someone else to handle it. Most toilet handle work falls into the “quick weekend fix” category that takes less time than driving to get replacement parts.
| Repair Type | Time Required | Typical Cost | Difficulty |
|---|---|---|---|
| Tightening loose mounting nut | 5 to 10 minutes | $0 (no parts needed) | Very Easy |
| Tightening plus chain adjustment | 10 to 15 minutes | $0 (no parts needed) | Easy |
| Full handle replacement | 15 to 25 minutes | $8 to $25 for universal or brand specific handle | Easy to Moderate |
Several factors can increase the time requirement beyond these estimates. Heavy corrosion or mineral deposits that lock the mounting nut in place might add 15 to 30 minutes for cleaning and penetrating oil application. Handles mounted in tight spots or unusual angles take longer because you’re working at awkward positions with limited wrench access. If the first tightening attempt doesn’t fully solve the looseness, you’ll need to repeat the process after testing, which adds another 5 to 10 minutes. Plan for extra time on your first handle repair while you’re learning the process and familiarizing yourself with how the mechanism works.
If the handle problem is complicated by other toilet issues like a constantly running tank, weak flush, or leaking base, the time and complexity increase substantially. At that point, you’re troubleshooting multiple systems rather than completing a single straightforward fix. When the time investment approaches an hour or more and you’re replacing multiple components, consider whether professional repair makes more sense than extended DIY troubleshooting.
Common Mistakes to Avoid During Toilet Handle Repair
Learning from typical errors saves you from creating bigger problems than the loose handle you started with. Most mistakes happen from rushing or from not understanding how toilet handle mechanisms work differently from other household hardware.
Watch out for these frequent problems:
Forgetting to close the toilet lid before starting creates a direct path for your wrench, mounting nut, or small hardware pieces to drop into the bowl. Fishing tools out of toilet water or calling a plumber to retrieve something that made it past the trap turns a 5 minute fix into an embarrassing ordeal.
Mishandling the porcelain tank lid causes expensive damage. Tank lids crack or chip easily when bumped against hard surfaces. Always use both hands to lift the lid straight up, and set it on a towel or bath mat away from the work area where you won’t accidentally kick it or knock it over.
Turning the nut the wrong direction because you forgot that toilet handle threads run backwards. Counterclockwise loosens, clockwise tightens. This is opposite from normal threads. If the nut feels like it’s getting looser instead of tighter, you’re turning the wrong direction.
Over tightening and stripping threads from using too much wrench force on plastic components. Remember that what feels like moderate pressure on a 10 inch wrench translates to significant force on small plastic threads. Stop when the nut feels snug, not when your wrench won’t turn any further.
Failing to drain the tank before starting leaves you working in several inches of water. You can see better and work more easily in an empty tank. Water splashing on your arm gets uncomfortable quickly, and you’re more likely to drop tools into the tank when you’re trying to keep your hands above water level.
Incorrect chain length adjustment that leaves too much or too little slack causes the toilet to run constantly or flush weakly. Check the chain with the flapper closed and the handle at rest. You should see about half an inch of looseness before the chain pulls tight.
Not testing before putting everything back together means you might need to disassemble everything again if the repair didn’t work. Test the handle operation while the tank lid is still off and the tank is empty. This lets you see what’s happening and make adjustments before filling the tank and replacing the lid.
Working without proper lighting inside the tank makes it hard to see the mounting nut, verify the chain connection, or notice damage to components. A small flashlight or headlamp transforms the repair from frustrating squinting to clear visibility.
The most critical safety consideration is handling the porcelain tank lid and tank carefully. Porcelain shatters into sharp edges when it breaks. If you crack the tank during repair, the tank must be replaced, typically costing $100 to $300 for parts alone. Use moderate pressure on all connections and always support the tank lid with both hands during removal and replacement.
Preventive Maintenance for Toilet Handle Longevity
Regular attention to toilet handle condition prevents most loosening problems and extends the life of handle components. Spending two minutes every few months on inspection saves you from dealing with a completely failed handle or stripped threads that require emergency replacement.
Check the handle firmness monthly as part of routine bathroom cleaning. Grasp the handle and try to move it side to side. If you notice any new wobble or looseness, tighten the mounting nut right then before the looseness gets worse. This quick monthly check catches loosening early when a quarter turn of the nut fixes it, rather than waiting until the handle is wobbling badly and the threads are beginning to wear.
Quarterly, remove the tank lid and inspect the internal components. Look at the mounting nut to verify it’s still snug against the inside tank wall. Check the handle arm where it connects to the chain for any signs of cracking, especially at the bend points where the arm changes direction. Verify the chain connection is secure and the chain itself isn’t showing rust or stretched links. Check the water level inside the tank. If it’s too high, water constantly spills into the overflow tube, which accelerates mineral deposit buildup on all metal and plastic parts.
Perform these maintenance tasks according to this schedule:
Monthly handle firmness check by grasping and testing for wobble or excess play.
Quarterly mounting nut inspection by removing tank lid and verifying the nut hasn’t backed off.
Semi annual chain inspection to check for rust, stretched links, or weakening at connection points.
Annual handle mechanism lubrication with silicone spray on the handle shaft where it passes through the mounting hole.
Regular mineral deposit cleaning by wiping down visible surfaces with vinegar dampened cloth during tank cleaning.
Periodic replacement of worn components like chains showing rust or handles with surface cracks before they fail completely.
Preventive maintenance transforms toilet handle care from reactive emergencies to planned, simple tasks that take minimal time. If you catch loosening early through monthly checks, you’ll probably never experience a handle that suddenly stops working or breaks during use. The few minutes spent on quarterly inspections prevent the annoyance of dealing with a toilet that won’t flush properly when you’re rushing to get ready in the morning or when guests are visiting.
Professional Help: When to Call a Plumber for Handle Issues
Most toilet handle work sits comfortably in DIY territory with minimal tools, straightforward steps, and low risk if something goes wrong. But certain situations push beyond simple home repair into territory where professional expertise makes more sense.
Call a plumber rather than attempting DIY repair when you encounter these situations:
Cracked or damaged toilet tank where the porcelain around the handle mounting hole has cracked or where you notice any cracks in the tank walls or base. A cracked tank will eventually fail completely, flooding your bathroom. The repair requires tank replacement, not just handle work.
Complex dual flush mechanisms with electronic components or push button systems that don’t use standard handle assemblies. These require specialized knowledge of the specific flush system and often use proprietary parts.
Handle issues combined with other toilet problems like constant running, weak flush, or leaking around the tank base. Multiple simultaneous problems suggest underlying issues that need professional diagnosis rather than patchwork fixes.
Repeated failures after DIY attempts where you’ve tightened or replaced the handle and it keeps failing. This indicates a problem you’re not identifying, like improper chain adjustment, mismatched parts, or mounting hole damage.
Accessibility challenges where the toilet is installed in a tight space with limited room to work or where you can’t physically access the mounting nut because of unusual tank configuration.
Lack of confidence or proper tools when you’re not comfortable working with plumbing components or when you don’t own an adjustable wrench and don’t want to purchase tools for a one time repair.
Professional plumbers diagnose and repair toilet handle problems in 15 to 30 minutes because they’ve seen every variation of handle mounting and failure mode. They carry specialized tools like basin wrenches and handle pullers that make difficult jobs easier. They also identify related problems during the repair, like a flapper that’s starting to deteriorate or a fill valve that’s wearing out. This comprehensive check prevents future problems rather than just fixing the immediate issue.
Cost considerations factor into the DIY versus professional decision. A service call for simple handle tightening typically costs $75 to $150 depending on your location and the plumber’s minimum service charge. Handle replacement by a plumber costs $100 to $175 including parts and labor. If you’re already planning to call a plumber for other bathroom work, adding handle repair to the visit makes economic sense. But for a standalone loose handle that’s otherwise functioning correctly, DIY tightening saves you the entire service call cost and gives you the satisfaction of fixing it yourself.
Final Words
A loose toilet handle usually needs nothing more than a quick turn of the mounting nut to get things working smoothly again.
Most fixes take five minutes with a wrench you already own.
If tightening doesn’t solve it, you’ve still learned enough to spot whether you need a new chain, a replacement handle, or just a small adjustment.
Either way, you’re not living with that wobbly handle anymore. And honestly, that’s a nice thing to check off the list.
FAQ
How do you tighten a loose toilet handle?
You tighten a loose toilet handle by locating the mounting nut inside the tank on the underside of the handle and turning it clockwise with an adjustable wrench or pliers until snug but not overly tight.
Why is there no tension on my toilet handle?
No tension on your toilet handle indicates a loose or broken lift chain between the handle arm and the flapper valve, or the chain has become disconnected and needs to be reattached with proper slack.
How do you tighten the handle on a Kohler toilet?
You tighten the handle on a Kohler toilet the same way as other brands by turning the mounting nut clockwise inside the tank, though Kohler uses reverse threading that requires counterclockwise turning to loosen.
How do you fix a toilet that you have to jiggle the handle?
You fix a toilet that requires jiggling by tightening the mounting nut inside the tank and adjusting the lift chain to have slight slack, which allows the flapper to close completely after flushing.
What causes a toilet handle to become loose over time?
A toilet handle becomes loose over time due to normal vibration from repeated flushing, which gradually loosens the mounting nut, or from worn plastic components that no longer hold their original tension.
Can you over-tighten a toilet handle nut?
You can over-tighten a toilet handle nut, which may strip the plastic threads, crack the porcelain tank, or damage the handle mechanism, so tighten only until snug and avoid forcing it.
How much slack should the toilet handle chain have?
The toilet handle chain should have about half an inch of slack when the flapper is closed, allowing complete sealing while still lifting properly when you press the handle down.
When should you replace a toilet handle instead of tightening it?
You should replace a toilet handle instead of tightening it when you see visible cracks in the handle arm, stripped threads that won’t hold, severe corrosion, or if tightening has failed multiple times.