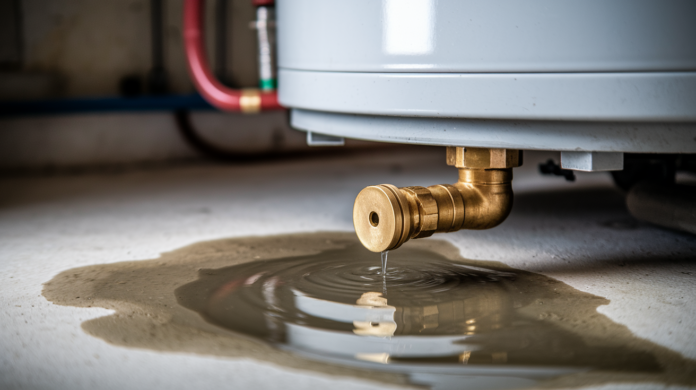

You just found a puddle under your water heater. That’s not condensation and it’s not going away on its own. A water heater leaking from the bottom can mean a quick valve fix you handle in twenty minutes, or it can mean the tank’s done and you’re shopping for a replacement by tomorrow. The difference comes down to where the water’s coming from and what’s causing it. We’ll walk you through how to find the source, what you can fix yourself, and when it’s time to call in help or start planning for a new unit.
Diagnosing Your Bottom Leak: Causes and Inspection Steps

Getting the diagnosis right tells you whether you’re dealing with a quick valve adjustment or a full replacement. And that saves you time and money. Figuring out exactly where your water heater is leaking helps you understand how serious things are and whether you can tackle it yourself or need to bring in help.
Checking the Drain Valve
The drain valve sits near the bottom of the tank, usually on the lower front panel. Look for water dripping from the valve handle or where the valve screws into the tank. These valves leak because they weren’t closed properly, the seals are shot, or minerals have built up on the valve parts.
For quick troubleshooting, try tightening the valve handle clockwise. Firm pressure, but don’t force it. Dry everything completely with towels, wait half an hour, and check again. If the valve was just loose, tightening it often stops the leak.
If water’s still dripping after you’ve tightened it, the internal gasket or seal has failed. This happens over time as minerals from your water harden around the valve components.
Inspecting the Temperature Pressure Relief Valve Discharge
The T&P valve discharge tube runs from the side or top of your tank down toward the floor. Check the tube opening at floor level for water. T&P valve discharge means excessive pressure or temperature inside the tank. Could be a malfunctioning thermostat, sediment insulating the tank bottom and causing overheating, or the valve mechanism itself is faulty.
If you see continuous water flowing from this discharge tube instead of occasional drips, that’s a serious pressure problem needing immediate professional attention. The valve’s designed to release water when conditions become unsafe, so persistent discharge means something keeps triggering it.
Temperature and pressure relief valve discharge. “The discharge tube released a steady stream of water all morning, pooling under the furnace area and spreading toward the back wall.”
Examining the Storage Tank Body for Internal Damage
Look for rust spots, corrosion, or water seeping directly from the tank body, welding seams, or bottom panel. Check where the tank meets the bottom plate and along any visible seam lines on the lower half.
Internal tank damage happens when sediment settles at the bottom. Calcium and magnesium minerals from your water accumulate over months and years, hardening into a crusty layer. This traps excessive heat against the metal floor, causing it to overheat and weaken. Eventually the overheated metal develops corrosion holes or cracks.
Hard water areas see faster sediment buildup and tank failure. If your water leaves white deposits on faucets and fixtures, your heater likely has significant sediment working against it from inside.
Visible exterior rust or water seeping from the tank shell means internal corrosion has reached structural failure. Once rust appears on the outside, the interior damage is already severe.
Understanding the visual differences between leak types helps narrow your diagnosis. Valve leaks show water dripping from specific connection points, creating a wet spot directly beneath. T&P discharge creates puddles near the discharge tube opening on the floor. Tank body leaks often appear as moisture spreading across the bottom panel or rust-stained water seeping from the shell.
Dry the entire area, place paper towels under suspected leak points, and check again after an hour to confirm the exact source before attempting repairs. Fresh water on the paper towels shows you exactly where the problem starts.
Emergency Steps When You Discover Bottom Leaking
Quick response prevents water damage to flooring and surrounding areas while reducing safety hazards from water and electricity mixing or gas line issues.
Follow these five steps right away:
-
Shut off the cold water supply valve at the top of the heater by turning it clockwise until it stops. This prevents more water from entering and leaking out.
-
Cut power to the unit by switching off the circuit breaker for electric heaters or turning the gas control dial to “off” or “pilot” for gas units. Never work around water with electricity active.
-
Assess leak severity and water pooling to figure out if you’re facing a slow drip or active flooding. Check how quickly water accumulates.
-
Drain the tank if the leak is extensive by attaching a garden hose to the drain valve and running it to a floor drain, sump pump, or outside area away from your foundation.
-
Contain water with towels or a drip pan placed under the leak source to protect flooring and prevent water from spreading.
Staying safe from hot water means wearing gloves and shoes if you’re cleaning up puddles or attaching a drain hose. Water inside the tank can reach 140 degrees or higher, hot enough to cause burns. If flooding becomes severe and you can’t safely access the shutoff points, evacuate the area and call for emergency help. Standing water near electrical panels or gas lines creates immediate danger.
Simple DIY Fixes for Minor Bottom Leaks

Drain valve leaks are the most common successful DIY fix. T&P valve issues and tank body leaks typically need professional intervention. You can handle valve tightening and replacement if you’re comfortable with basic tools and following procedures.
| Leak Source | Tools Needed | Repair Steps | Difficulty Level |
|---|---|---|---|
| Drain Valve (tightening) | Adjustable wrench, towels | Tighten valve handle clockwise, dry area, monitor for 30 minutes | Easy |
| Drain Valve (replacement) | Garden hose, pipe wrench, new valve, plumber’s tape, bucket | Drain tank, unscrew old valve, wrap new valve threads with tape, install new valve | Moderate |
| T&P Valve (replacement) | Pipe wrench, new valve, plumber’s tape, bucket | Partially drain tank, unscrew old valve, apply tape to threads, install new valve, test operation | Moderate to Difficult |
For drain valve tightening and replacement, start by shutting off water and power as described earlier. Attach a garden hose to the drain valve and run it to a safe drainage area. Open the valve completely and let the tank drain until empty. Takes 20 to 40 minutes depending on tank size.
Once drained, use a pipe wrench to unscrew the old valve counterclockwise. Expect some residual water to drip out. Clean the threaded opening on the tank with a rag. Wrap plumber’s tape around the threads of your new valve three to four times, going clockwise. Thread the new valve into the opening by hand first, then tighten with the wrench until snug. Don’t overtighten.
Tightening alone works when the valve was simply loose and not fully seated in the closed position. If water keeps leaking after you’ve tightened the handle completely, the internal gasket has deteriorated and you need full valve replacement. Don’t keep cranking on it. You can crack the valve body or damage the tank threads.
T&P valve replacement requires more caution because of pressure concerns. Even after shutting off water, some pressure may remain in the system. You only need to drain the tank down below the level of the T&P valve rather than emptying it completely.
When Bottom Tank Leaks Mean Replacement is Necessary
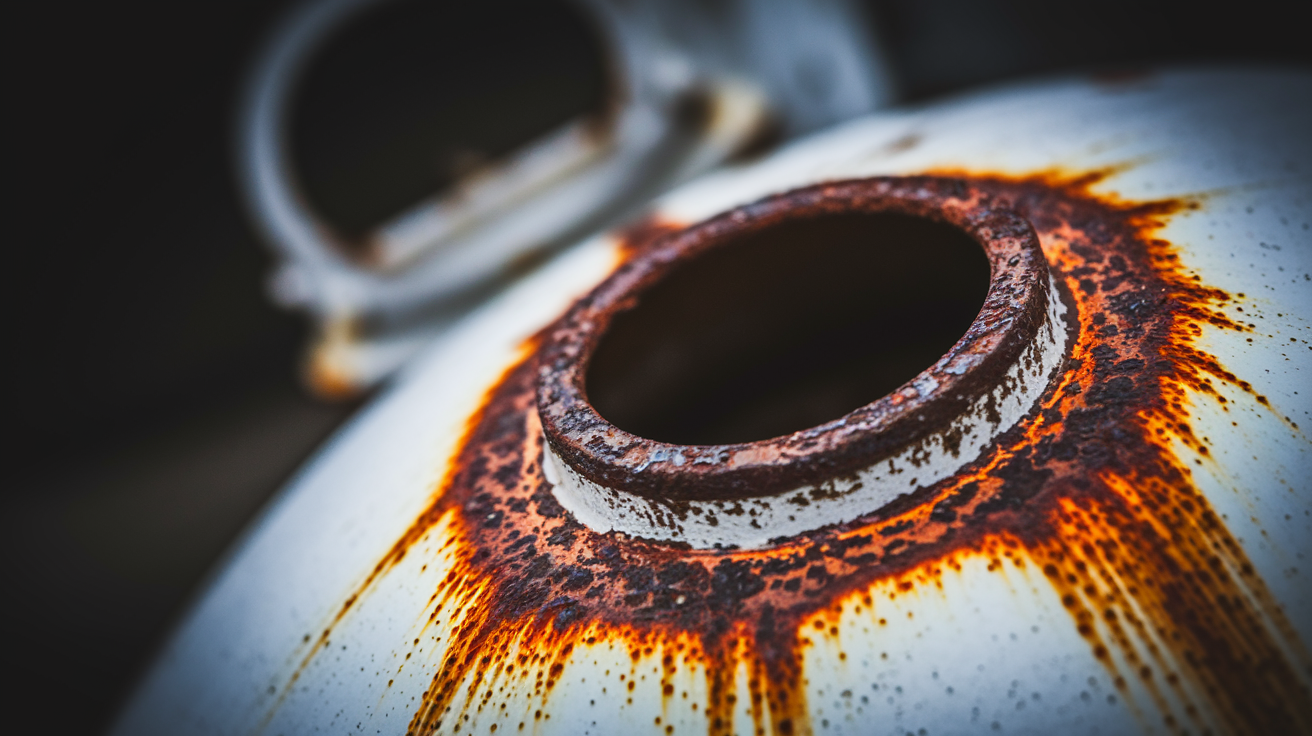
Internal tank damage signals irreversible failure that no repair can fix. Once the tank shell develops holes or cracks, the structural integrity is gone.
Six warning signs that mean you need replacement:
- Visible rust spots or corrosion on the exterior shell, especially near the bottom or on side panels where water has seeped through from inside
- Water seeping from the tank body rather than valves, appearing as moisture spreading from the shell or dripping from welding seams
- Heater age exceeding 10 to 12 years, approaching or past the typical lifespan even if it’s currently working
- Structural cracks or welding seam failures visible during close inspection of the tank body
- Persistent leaks after valve repairs, suggesting the problem comes from the tank rather than replaceable components
- Mineral deposits visible inside the tank during inspection, indicating severe sediment buildup has already damaged interior surfaces
Sediment buildup causes internal corrosion that weakens the tank from the inside out. Calcium and magnesium settle at the bottom, forming a barrier between the heating element and the water. The element works harder to heat through this insulation, overheating the metal floor. This cycle repeats for months or years until the metal develops weak spots. Corrosion forms at these weak spots as water continuously contacts compromised metal. Eventually tiny holes develop and grow into visible cracks or seepage points.
Attempting repairs on corroded tanks is unsafe and throwing money away compared to replacement. Patch jobs don’t work because you can’t seal holes from inside a pressurized water vessel. Even if you could temporarily seal one leak point, the surrounding metal is equally compromised and will fail elsewhere within days or weeks. The tank will keep leaking, causing water damage while you pay for multiple failed repair attempts. Replacement gives you a new tank with intact metal, fresh protective coatings, and a warranty covering future failures.
Cost Breakdown: Repairing vs Replacing a Leaking Water Heater

Costs vary by region, plumber rates, and water heater type. But understanding typical ranges helps you budget and recognize fair pricing.
| Service Type | Typical Cost Range | Timeline |
|---|---|---|
| Diagnostic service call | $80 to $150 | Same day or next day |
| Drain valve replacement | $150 to $300 | 1 to 2 hours |
| T&P valve replacement | $150 to $350 | 1 to 2 hours |
| Gasket replacement | $100 to $200 | 1 hour |
| Partial repairs with parts | $200 to $500 | 2 to 3 hours |
| 40-gallon tank replacement | $900 to $1,800 | 3 to 5 hours |
| 50-gallon tank replacement | $1,000 to $2,000 | 3 to 5 hours |
| Tankless system replacement | $2,500 to $4,500 | 6 to 8 hours |
Factors affecting replacement costs include gallon capacity (larger tanks cost more), energy efficiency ratings (high-efficiency models carry premium prices), warranty coverage (extended warranties add cost but provide protection), and installation complexity. Difficult access areas, code upgrades, or venting modifications increase labor time. Labor often exceeds parts cost for professional repairs, particularly for straightforward valve replacements where the part costs $15 to $40 but the service call and labor bring the total to $150 or more.
When repair costs approach replacement costs, replacement becomes the smarter investment. If your heater is 8 years old and needs a $400 repair, spending $1,200 for a new unit with a 6-year warranty makes more sense than repairing an aging tank that may fail again soon. Warranty coverage can substantially reduce replacement expenses if your current unit is still covered for tank failures. Energy-efficient models cost more upfront, sometimes $200 to $500 additional, but reduce long-term operating costs through better insulation and more efficient heating elements.
Maintenance Steps to Prevent Future Bottom Leaks

Regular maintenance extends water heater lifespan from the typical 8 to 12 years to 15 years or more while preventing most emergency leak situations.
Follow this maintenance schedule:
- Flush the tank twice yearly (every 6 months) to remove sediment before it hardens and causes damage
- Test the T&P valve annually by lifting the lever briefly to confirm water releases and the valve reseats properly
- Inspect the anode rod every 2 to 3 years, checking for deterioration that indicates replacement is needed
- Check drain valve and connections for moisture every 6 months during your regular flushing routine
- Monitor for rust spots or corrosion during visual inspections, catching early warning signs before leaks develop
- Install water alarms near the base for early detection of small leaks before they cause significant damage
- Schedule professional inspections annually to catch internal corrosion or faulty valves not visible during routine checks
For homeowner-performed tank flushing, connect a garden hose to the drain valve at the bottom of the tank. Run the hose to a floor drain, utility sink, or outside area. Turn off the cold water supply to the heater, then open the drain valve. Let water run out until it flows clear instead of cloudy or rust-colored. This usually takes 10 to 15 minutes. Close the drain valve, turn the water supply back on, and let the tank refill before restoring power.
Flushing removes sediment before it hardens into the damaging crusty layer that traps heat and corrodes metal. Catching sediment while it’s still loose and flowing saves your tank from the overheating cycle that causes bottom leaks.
The anode rod protects your tank by attracting corrosive water elements to itself instead of the tank walls. This sacrificial rod slowly deteriorates over years. When it’s mostly consumed, corrosion begins attacking the tank. Inspecting the rod requires locating the hex head on top of the heater, shutting off water and partially draining the tank, then using a socket wrench to remove the rod for visual inspection. If less than 1/2 inch of core wire remains or the rod is heavily coated with calcium, replacement is needed. Many homeowners hire professionals for this task because it requires more disassembly and the rod can be difficult to remove if it hasn’t been checked in years.
Preventive measures cost far less than emergency repairs. A $20 replacement drain valve and 30 minutes of your time beats a $1,500 tank replacement. For more guidance on maintaining your home’s systems, see Understanding Your Home’s Plumbing System.
When to Call a Professional Plumber for Bottom Leaks
While drain valve tightening is DIY-friendly, many situations demand licensed plumber intervention for safety and code compliance.
Six scenarios requiring professional help:
- Visible corrosion or rust on tank body, indicating internal failure beyond repair capability
- Persistent leaking after valve tightening or replacement, suggesting the problem comes from the tank or requires diagnosis of pressure regulation issues
- T&P valve repeatedly discharging, indicating pressure or thermostat problems that could lead to tank rupture if not properly diagnosed
- Any leak involving gas line connections, which should never be DIY due to explosion risk
- Significant water damage requiring structural assessment, including soaked drywall, damaged flooring, or signs of mold growth
- Heaters still under warranty, where DIY repairs can void coverage and leave you paying for premature failure
Professional diagnostic skills prevent unnecessary replacement expenses. A licensed plumber can pressure-test the system, check thermostat calibration, inspect internal components, and accurately determine whether a $200 repair will solve the problem or if the tank needs replacement. Spending $100 on a diagnostic visit saves you from either attempting a repair that won’t work or replacing a unit that could have been fixed.
Licensed plumbers ensure repairs meet building codes and permit requirements. Code compliance matters for safety and affects home resale value. Improperly installed water heaters can be flagged during home inspections, requiring costly corrections before sale. Professionals also carry insurance covering any damage that occurs during installation or repair work.
Gas line work should never be DIY. Natural gas and propane are explosive. Improper connections cause leaks that create explosion and carbon monoxide poisoning risks. Professionals have specialized tools for accurate pressure testing and leak detection that confirm safe operation. Proper installation affects warranty coverage and insurance claims as well.
For professional assessment and repair of plumbing issues, contact Home Recovery Pro for Plumbing Repairs.
Protecting Your Home From Water Heater Leak Damage

Quick containment prevents flooring damage, mold growth, and structural issues that cost thousands more than the water heater repair itself.
Take these five immediate protection steps:
- Place a drip pan or waterproof container under the leak to catch dripping water and prevent floor contact
- Use towels or a wet vacuum to remove standing water from around the base before it spreads or soaks into subfloors
- Direct drain hose water away from the home foundation to prevent soil saturation and basement seepage
- Move nearby belongings to dry areas, including boxes, tools, cleaning supplies, or anything stored near the heater
- Document damage with photos for insurance purposes, capturing the leak source, water extent, and any damaged items or surfaces
Water damage progresses from surface moisture to subfloor saturation to mold growth within 24 to 48 hours. What starts as a small puddle on the concrete floor seeps into adjacent drywall, baseboards, and any wood framing that contacts the wet area. Mold spores present in most homes begin growing once materials stay damp for more than a day. Once mold establishes, you face remediation costs ranging from $500 for small areas to $3,000 or more for extensive growth requiring wall removal and HEPA cleaning.
Contact homeowner insurance and professional water extraction services when flooding exceeds a few gallons or when water has spread beyond the immediate heater area. Most homeowner policies cover sudden water damage from plumbing failures but not damage from long-term neglected leaks. Insurance adjusters need documentation showing you responded promptly to minimize damage. Water extraction services use industrial pumps and dehumidifiers to remove moisture before permanent damage occurs, typically charging $300 to $1,000 depending on water volume and affected area.
Early containment significantly reduces total damage costs. Catching a leak during the first hour and containing it to a 2-foot area costs almost nothing beyond cleanup time. Discovering the same leak after an overnight flood might mean replacing flooring, treating mold, and dealing with structural moisture that takes weeks to fully dry. Mold prevention requires keeping areas dry and well-ventilated, running fans on the affected area, and using dehumidifiers if the space feels damp days after cleanup.
Final Words
A water heater leaking from the bottom won’t fix itself. And the longer it drips, the more it costs you in water damage, energy waste, and stress.
Start with the diagnosis. Check the drain valve, the T&P discharge tube, and the tank body for rust or corrosion. If it’s a loose valve, you might fix it in ten minutes. If it’s sediment damage or a corroded tank, you’re looking at replacement.
Either way, you’ll know what you’re dealing with. And you can stop wondering if that puddle is getting worse.
Handle the small stuff early. Keep the tank flushed. Watch for moisture. Call a pro when it’s beyond tightening a valve.
Your home works better when the fixes happen fast.
FAQ
What to do when a water heater is leaking from the bottom?
When a water heater is leaking from the bottom, shut off the cold water supply valve at the top of the tank and cut power at the circuit breaker (electric units) or gas valve (gas units). Then identify the leak source by checking the drain valve, temperature pressure relief valve discharge tube, and tank body for moisture.
How long will a hot water heater last once it starts leaking?
A hot water heater will last anywhere from a few days to several weeks once it starts leaking, depending on leak severity and source. Drain valve leaks can be repaired and won’t necessarily shorten lifespan, but internal tank leaks from corrosion indicate the unit has reached the end of its functional life and requires replacement soon.
Does a leaking water heater mean it needs to be replaced?
A leaking water heater does not always mean it needs replacement. Leaks from the drain valve or temperature pressure relief valve can often be fixed by tightening connections or replacing the faulty valve. However, leaks coming directly from the tank body indicate internal corrosion that cannot be repaired and require full unit replacement.
Can I take a shower if my water heater is leaking?
You should not take a shower if your water heater is leaking from the bottom until you’ve shut off the water supply and power to the unit. Using hot water while the tank is leaking can worsen the leak, increase water damage, and create safety hazards from electrical components or gas connections near pooling water.
What are the main causes of water heater bottom leaks?
The main causes of water heater bottom leaks include loose or damaged drain valves, malfunctioning temperature pressure relief valves releasing excess pressure, and internal tank corrosion from sediment buildup. Sediment (calcium and magnesium minerals) settles at the tank bottom, hardens, traps heat against the metal, and eventually creates corrosion holes or cracks in the tank shell.
How much does it cost to fix a water heater leaking from the bottom?
Fixing a water heater leaking from the bottom costs between $150 and $400 for drain valve or temperature pressure relief valve replacement, including parts and labor. Complete tank replacement ranges from $800 to $2,500 depending on tank capacity, type, and installation complexity. Minor valve tightening may only require a service call fee of $75 to $150.
How do you stop a water heater from leaking at the bottom temporarily?
You can stop a water heater from leaking at the bottom temporarily by tightening the drain valve handle clockwise if that’s the leak source. Place a drip pan or waterproof container under the leak to catch water, and attach a garden hose to the drain valve to direct water to a safe drainage area while waiting for permanent repairs.
Can sediment cause a water heater to leak from the bottom?
Sediment can cause a water heater to leak from the bottom by settling at the tank base, hardening over time, and trapping excessive heat against the metal floor. This constant overheating weakens the metal, leading to corrosion, cracks, and eventually holes in the tank bottom. Hard water areas experience faster sediment accumulation and accelerated tank failure.
How often should you flush a water heater to prevent bottom leaks?
You should flush a water heater once or twice a year to prevent bottom leaks caused by sediment buildup. Regular flushing removes calcium and magnesium mineral deposits before they harden at the tank bottom, trap heat, and cause corrosion. This simple maintenance extends tank lifespan and prevents most internal leak problems.
When should I call a plumber for a water heater leaking from the bottom?
You should call a plumber for a water heater leaking from the bottom if you see visible rust or corrosion on the tank body, if leaks persist after tightening or replacing valves, or if the temperature pressure relief valve continuously discharges water. Professional help is also required for any gas line connections, significant water damage, or warranty-covered units.