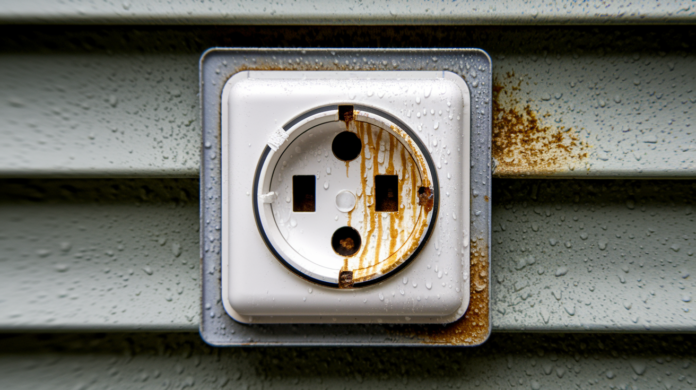

You just plugged in the pressure washer outside and nothing happened. No power, no hum, just silence. Before you assume the outlet’s dead for good, there’s a checklist of simple fixes that solve most outdoor outlet problems without calling anyone. Most failures trace back to a tripped GFCI somewhere in the house, a flipped breaker, or moisture that snuck into the wrong spot. We’ll walk you through the complete diagnostic sequence so you can pinpoint the real issue and get that outlet working again.
Quick Diagnostic Steps for a Dead Outdoor Electrical Outlet

Critical Safety Precautions
• Turn off power at circuit breaker before touching wires or opening outlet
• Never work in wet conditions or during rain
• Use voltage tester to confirm power is off
• Call licensed electrician if you smell burning, see visible damage, experience repeated tripping, or feel uncertain about electrical safety
Most outdoor outlet failures have simple solutions you can check safely. The key is understanding the complete diagnostic process so you tackle the right problem in the right order.
Complete Troubleshooting Sequence
-
Locate the GFCI outlet protecting the circuit. This might be at the dead outlet itself, at a nearby outdoor location, in your garage, basement, or even at the main electrical panel. One GFCI often protects multiple downstream outlets.
-
Check if the GFCI reset button has popped out. That small button sticking out tells you the protection system tripped.
-
Press the reset button firmly until it clicks into place. Then test the outlet.
-
If the GFCI won’t reset, walk to your main electrical panel and look for a tripped breaker. The handle will be in the middle position or pushed toward “off.”
-
Push the breaker handle fully to “off,” then firmly back to “on.” You should hear a definite click.
-
Return to the GFCI and try the reset button again.
-
Inspect the weatherproof cover. Check for cracks, make sure it closes completely, and look at the gasket seal around the edges.
-
Look for visible moisture inside the cover. Check for corrosion around the outlet or any signs of water getting inside.
-
Check for burn marks, a cracked outlet receptacle, or damaged socket openings.
-
Test other outlets on the same circuit. This tells you whether the problem is just this one outlet or affects the whole circuit.
-
If the outdoor outlet still has no power after these steps, check that wire connections are secure in the outlet box. Power must be off at the breaker before you open anything.
-
Verify there’s no loose wiring, corroded connections, or failed backstab connections where wires push into holes in the back of the outlet.
Now let’s talk about what you’re likely to find during this process.
GFCI trips happen from ground faults or moisture exposure. Circuit breaker trips usually mean overloaded circuits. Think about what you’ve been running out there. Power tools, holiday decorations, landscape lighting. All of that adds up fast.
Moisture damage comes from rain, snow piling up against the outlet, or sprinkler spray hitting it directly. Water causes wire corrosion over time, especially at connection points.
Loose wiring develops from thermal expansion and contraction. Outdoor outlets go through extreme temperature swings between summer and winter, and those cycles gradually loosen connections.
Here’s how to interpret what happens during your troubleshooting.
If the GFCI or breaker resets and everything works, but then trips again within minutes or hours, you’ve got an ongoing fault. That could be an overload, a short circuit somewhere in the wiring, or a ground fault from moisture or damaged insulation.
If the outlet shows physical damage like cracks, burn marks, or a receptacle that looks melted, replacement is your only option.
If you see evidence of water infiltration (moisture inside, corrosion, rust), you’ll need to improve the weatherproofing before the problem goes away for good.
If wire connections are loose or show green or white corrosion buildup, professional repair is required. Those connections need to be properly secured and may need replacement.
You should stop DIY troubleshooting and call a licensed electrician if you notice any of these warning signs:
Any burning smell. That indicates fire risk and needs immediate professional attention.
Visible internal damage or melted components inside the outlet box.
Repeated tripping after you’ve completed all the reset steps.
A warm outlet receptacle when you touch it (with power off).
Any sparking when you plug something in or flip the breaker.
Uncertainty about which wire is the hot wire versus the neutral wire or grounding wire. Getting this wrong creates serious safety hazards.
Aluminum wiring systems, which require special connection techniques.
Work that requires electrical code compliance and building permits. Most outlet replacement and any circuit modifications fall into this category.
Understanding GFCI Protection Systems in Detail

Here’s what’s actually happening inside that GFCI outlet.
Ground fault circuit interrupters monitor the current flow between the hot wire and neutral wire constantly. They’re looking for even tiny imbalances, as small as 4 to 6 milliamps. When current leaks out through any path other than the intended circuit (like through water or through a person touching something they shouldn’t), the GFCI detects that imbalance and shuts off the power within 1/40th of a second. That’s fast enough to prevent electrical shock.
This is why electrical code mandates GFCI protection for all exterior outlets, bathrooms, kitchens, and other wet locations. The risk of ground faults is just too high in places where water and electricity can meet.
Understanding how GFCIs are wired helps when you’re troubleshooting a dead outlet that seems mysterious.
Every GFCI has a line side and a load side. The line side receives incoming power supply from the circuit breaker. The load side sends outgoing power to downstream outlets. Here’s what matters: a single GFCI outlet can protect multiple standard outlets downstream from it.
So when you’ve got a dead outlet in the backyard, the problem might actually be a distant GFCI that tripped in the garage or basement. The dead outlet itself might be perfectly fine. It’s just not receiving power because protection upstream shut everything down.
This is why step one in troubleshooting is always “find the GFCI” rather than assuming the problem is at the dead outlet.
GFCIs trip for reasons beyond actual safety events, and that frustrates people.
Moisture accumulation in the outlet box can cause nuisance tripping. Even a small amount of water creates tiny leakage currents the GFCI interprets as a ground fault.
Current leakage through degraded wire insulation causes trips. Insulation breaks down over time, especially in outdoor temperature extremes.
Shared neutral configurations in older wiring create small imbalance currents that sensitive GFCIs pick up.
Long wire runs generate small imbalance currents just from the electrical properties of the wire itself.
Older GFCI outlets become more sensitive over time as internal components age. An outlet that’s 10 or 15 years old might trip from conditions that wouldn’t have bothered it when it was new.
Modern GFCIs include helpful features that tell you what’s going on.
Indicator lights show protection status at a glance. Green usually means everything’s working. Red indicates a problem.
Automatic self-testing runs internal checks periodically to verify the protection mechanism still works.
End-of-life warnings tell you when the outlet needs replacement due to age.
When a GFCI won’t reset no matter what you try, that’s telling you something specific. Either the outlet itself is faulty and needs replacement, there’s an ongoing ground fault condition somewhere in the wiring that must be found and fixed, or internal damage to the GFCI mechanism has made it non-functional. All three situations require professional diagnosis.
Circuit Breaker Diagnostics and Load Management

Understanding circuit capacity matters more than most people realize when troubleshooting outdoor outlets.
Typical outdoor circuits carry a 15 or 20 amp rating. The outlets often share circuits with multiple exterior locations or even some indoor receptacles. When you’re running common outdoor equipment, you can hit that capacity limit fast.
Power tools pull heavy current. A circular saw draws 10 to 15 amps. A pressure washer motor pulls 12 to 15 amps. Space heaters used in garages or patios draw 12 to 15 amps. Holiday decorations, especially older incandescent lights, can pull 5 to 10 amps for a single string.
If all of that is on one circuit, the breaker trips to protect the wiring from overheating.
Here’s the basic math for calculating circuit load.
Watts divided by voltage equals amps. For example, a 1500 watt space heater on a 120 volt circuit draws 12.5 amps. That leaves only 2.5 amps of capacity on a 15 amp circuit for anything else on that same circuit.
Now plug in some landscape lights (3 amps) and you’ve exceeded capacity. The breaker trips.
This is why dedicated circuits for high draw equipment prevent nuisance tripping. A pressure washer should really be on its own circuit. So should workshop tools that pull over 10 amps.
Breaker trip patterns tell you different things about what’s wrong.
Immediate trip when you reset indicates a short circuit or ground fault somewhere in the wiring. Current is flowing where it shouldn’t, and the breaker protects the wiring by shutting down instantly. This requires professional inspection to find and fix the fault.
Trip only under load suggests an overloaded circuit or a weak breaker that needs replacement. Everything works fine with a lamp plugged in, but when you start the power tool, the breaker gives up.
Trip during rain or wet weather points to moisture infiltration creating a ground fault. Water is getting into an outlet box or junction box and creating a path to ground.
Breakers that feel warm to the touch suggest a poor connection at the main electrical panel. The resistance at that loose connection generates heat, and the breaker isn’t functioning properly.
Breaker age affects reliability more than people expect.
Breakers weaken over time. A typical lifespan is 30 to 40 years, but breakers in heavy use or harsh environments may fail sooner.
Old breakers may trip at lower currents than their amp rating. A 15 amp breaker might start tripping at 12 or 13 amps.
Older main electrical panels may need an upgrade to support modern outdoor electrical demands. Pool equipment, landscape lighting transformers, electric vehicle charging, and outdoor kitchens all add loads that panels from the 1970s or 1980s weren’t designed to handle.
Weather Protection and Moisture Control Strategies

Water causes more outdoor outlet failures than anything else.
Understanding how moisture enters the system helps you prevent problems. Driving rain hits the outlet straight on and works its way around cover edges, especially when wind pushes water horizontally. Condensation forms inside the outlet box when cold outdoor air meets the warmer air inside the sealed box, creating moisture even without rain. Snow accumulation against the outlet melts during the day and seeps into any gaps or cracks. Sprinkler spray hits the outlet repeatedly, and even though weatherproof covers are designed for this, repeated soaking eventually finds a way in. Capillary action draws water along the outside of wire insulation, and that water travels right into junction box connections you can’t see.
You’ll know moisture has compromised an outlet when you see specific evidence.
White or green corrosion on wire connections or screw terminals indicates water has been present. Rust inside the outlet box means serious water infiltration. Repeated GFCI tripping after weather events, especially if it resets fine and works for days until the next rain, tells you moisture is getting in. Moisture visible inside the weatherproof cover when you open it is an obvious sign. Deteriorated gasket seals that no longer provide compression let water slip through.
Weatherproofing Improvement Measures
• Upgrade to an in-use cover or bubble cover that maintains weatherproof protection while devices remain plugged in
• Replace deteriorated gasket seals with proper compression fit models designed for your outlet box
• Apply waterproof sealant or caulking around outlet box mounting edges where the box meets the house siding
• Ensure the outlet box is mounted with a slight forward tilt so water drains away rather than pooling
• Verify weep holes in the outlet box bottom aren’t blocked by dirt, debris, or old caulk
• Install a drip loop in the wiring before entry to the outlet box so water running down the wire drips off before reaching connections
• Seal conduit entry points with weatherproof bushings and fittings
• Consider a GFCI outlet with improved weather sealing and modern gasket designs
Seasonal weatherproofing needs change throughout the year.
Preparing for winter means ensuring covers seal completely against snow infiltration. Snow that melts and refreezes creates ice expansion that can crack covers and boxes. Summer brings intense sun that degrades plastic covers and gaskets over time. UV exposure makes them brittle. Positioning relative to sprinkler systems matters too. An outlet directly in the spray path will always have moisture issues. Same with outlets under roof drainage areas where water pours off during storms.
When you find moisture damage, you need to decide between cleaning and replacement.
Surface corrosion can sometimes be cleaned with a wire brush and electrical contact cleaner if you catch it early. But corrosion deep in wire nuts or burned contacts from a water-caused short circuit means complete outlet and wiring replacement by a licensed electrician. The damage has compromised the safety and function beyond repair.
Internal Wiring Failures and Connection Problems

Outdoor temperature extremes accelerate connection problems in ways that don’t affect indoor outlets.
Daily and seasonal thermal cycling causes wire expansion and contraction. Copper wire expands when hot and contracts when cold. That movement happens every single day during summer. The outlet heats up in afternoon sun, then cools at night. Over years of temperature swings from 100 degree summer days to zero degree winter nights, connections gradually loosen.
Backstab connections are particularly vulnerable to thermal stress. These are the connections where you push a stripped wire into a hole in the back of the outlet rather than wrapping it around a screw terminal. They rely on a small spring clip gripping the wire. Those clips weaken over time, especially with thermal cycling.
Oxidation of copper wiring accelerates when moisture is present. The oxidation creates a layer of corrosion at connection points that increases resistance. Resistance generates heat. Heat causes more damage. The cycle continues until the connection fails completely.
Progressive failure shows specific symptoms before total failure.
Intermittent power, where the outlet works sometimes but not others, indicates a loose connection making and breaking contact. The connection might work when everything’s cool but fail when the outlet heats up during use.
The outlet receptacle or cover feels warm during use. That warmth shows resistance creating heat at a poor connection.
Occasional flickering of connected devices happens when a loose connection briefly interrupts power.
Burning smell or visible charring around screw terminals is the final warning before serious failure or fire risk.
Specific Wiring Failures Common to Outdoor Outlets
• Hot wire connection backing out of a backstab hole from thermal expansion and spring clip weakness
• Neutral wire screw terminal loosening from vibration and thermal stress over years of service
• Grounding wire detachment compromising the safety system that protects against electrical shock
• Corroded connections in an upstream junction box affecting multiple outlets downstream
• Inadequate wire gauge for the circuit load causing voltage drop and connection heating
• Improper wire nuts in an outdoor rated junction box allowing moisture entry to the connections
These repairs require professional expertise for safety and legal reasons.
Work must be performed with power completely off at the main electrical panel. That requires proper lockout procedure to prevent someone from turning the breaker back on while work is happening.
Wire connections must meet electrical code requirements and NEC standards specifically for outdoor applications. Outdoor wiring has different requirements than indoor work.
Proper wire gauge and connection methods are critical for safety and fire risk prevention. Using the wrong size wire or improper connection technique creates hazards that might not show up for months or years.
Outdoor wiring may require specialized weatherproof wire nuts and corrosion resistant connection methods that aren’t needed indoors.
Any evidence of burned contacts, melted wire insulation, or charred outlet components indicates dangerous conditions requiring immediate professional inspection. These aren’t “maybe” situations. Attempting DIY repair of internal wiring creates serious safety hazards including electrical shock and fire risk that can damage your property and harm people.
Testing Your Outdoor Outlet with Proper Tools
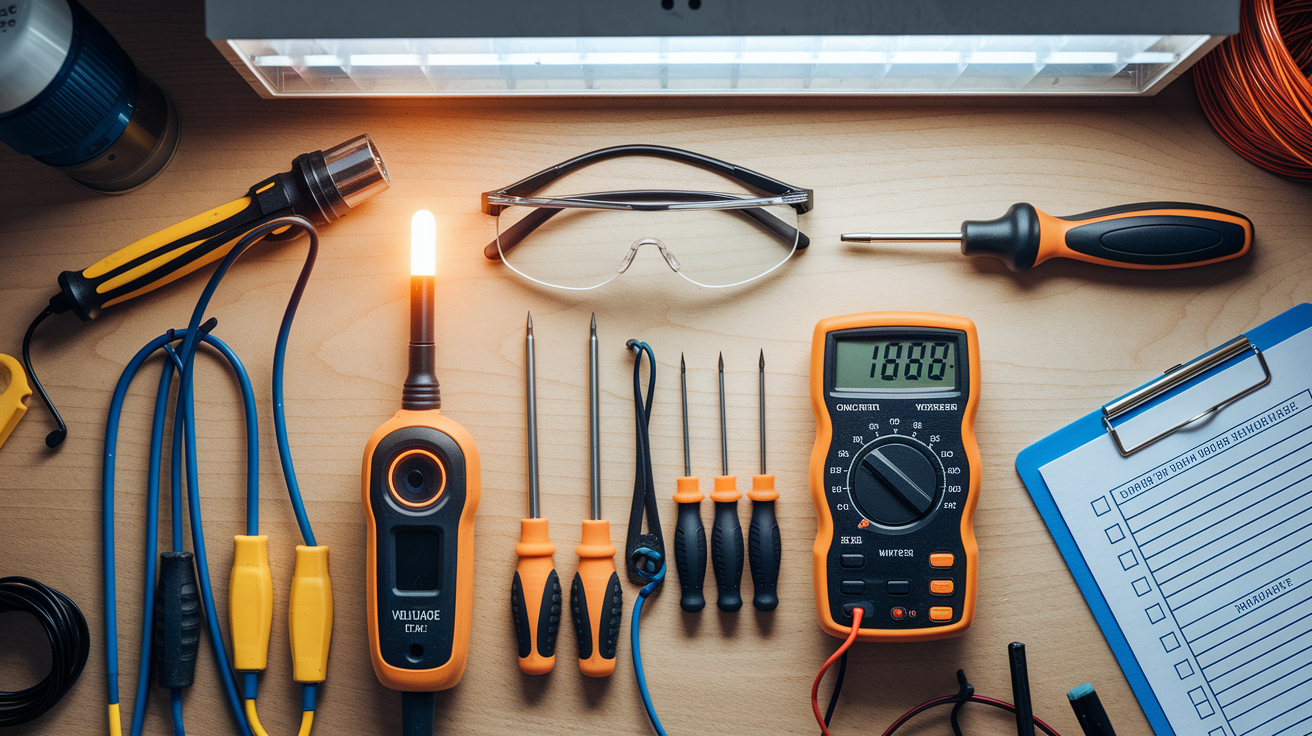
Before attempting any repair, you need to understand what’s wrong and whether it’s safe to proceed.
Electrical safety fundamentals require confirming power status before touching anything. Never assume a circuit is off just because you flipped a breaker. Test before you touch.
Visual Inspection Checklist
• Cracked outlet receptacle or broken housing that exposes internal components
• Damaged or missing weatherproof cover
• Exposed wiring visible through gaps in the outlet box or cover
• Burn marks or discoloration around the outlet face or on the cover
• Moisture or corrosion inside the outlet box when you open the cover
• Loose cover attachment or outlet box movement when you push on it
Using a Voltage Tester Safely
A non-contact voltage tester is the safest first tool for outdoor outlets because it detects voltage without touching wires. It gives both audible and visual alerts, usually a beeping sound and a flashing light when voltage is present. This design is safer for outdoor wet conditions where contact with metal probes could be dangerous. It’s ideal for confirming power is off before opening the outlet to inspect connections.
-
Test the detector on a known working outlet first to verify the tester itself is functioning properly
-
Check all outlet slots and cover screws by holding the tester near them without inserting any metal objects into the outlet
-
Retest after attempting GFCI reset and circuit breaker reset to confirm restoration of power supply
Multimeter testing provides additional diagnostic value in certain situations. It measures actual voltage levels rather than just detecting presence or absence. It can test for voltage drop that indicates resistance somewhere in the wiring. It performs continuity testing of wire connections to verify complete circuits.
But multimeter testing requires understanding of electrical systems and proper probe placement to avoid electrical shock. You need to know where to place the red and black probes, what voltage readings are normal versus abnormal, and how to interpret the results. These tests are better suited for a licensed electrician rather than homeowner troubleshooting.
When to Replace Your Faulty Outdoor Outlet

Several conditions tell you replacement is necessary rather than optional.
Cracked housing or broken outlet receptacle compromises both safety and weatherproofing. Loose prong insertion where plugs don’t fit securely creates arcing and connection heating. A GFCI that won’t reset after complete troubleshooting has failed internally. Visible burning or melting around socket damage means the outlet experienced dangerous overheating. Outlets over 15 years old lack modern safety features that have become standard. Repeated nuisance tripping without identifiable cause indicates internal GFCI mechanism degradation. Missing or broken test button or reset button function means you can’t verify the protection system works.
Specific Replacement Indicators
• Age exceeding 15 years when GFCI protection standards have improved significantly since installation
• Missing or broken weatherproof cover that can’t be replaced separately from the outlet
• Loose outlet box mounting allowing movement when you push on the outlet
• Failure after multiple reset attempts suggesting internal mechanism damage beyond repair
• No indicator light function on GFCI models equipped with status lights
• Inability to test properly with test button indicating the safety mechanism has failed
• Physical cracks in the outlet face allowing moisture entry to internal components
Modern replacement outlets offer significant advantages over older models.
Self-test features automatically verify GFCI protection weekly and alert to failures. The outlet runs an internal diagnostic routine without you having to remember to push the test button.
Indicator lights show protection status at a glance. Green typically means protected and functioning normally. Red indicates a fault condition requiring attention.
Improved gasket seals and weatherproof cover designs provide better moisture protection through better materials and engineering.
Tamper resistant mechanisms prevent foreign object insertion while maintaining ease of use for normal plugs. This is especially important if you have young children.
Combination USB charging ports reduce adapter clutter by letting you charge phones and tablets directly without taking up the standard outlet slots.
Higher amperage GFCI models, 20 amp rating versus standard 15 amp, work better for power tool circuits and other high draw applications.
Replacement as DIY versus professional work depends on several factors.
A straightforward outlet swap on existing wiring may be within DIY capability if you’re comfortable with electrical safety and understand wire color coding. Black is hot, white is neutral, green or bare copper is ground.
But the work requires shutting off the circuit breaker, confirming no power with a voltage tester, following manufacturer line/load terminal instructions carefully, and may require a building permit and electrical code inspection depending on local requirements. That makes a licensed electrician the safer choice for most homeowners who want the job done right without risk.
Professional Electrician vs. DIY Outdoor Outlet Repairs

Understanding where the boundary sits between safe DIY troubleshooting and work requiring professional expertise helps you make smart decisions.
Homeowners can safely perform several diagnostic tasks. GFCI reset is straightforward, just push the button. Circuit breaker inspection and reset follows the same logic. Visual inspection of weatherproof covers and outlets requires no electrical contact. Testing with a voltage tester or non-contact voltage detector is safe when you follow the tool instructions. Weatherproof cover replacement involves removing screws and installing the new cover without touching wiring.
But opening outlet boxes, touching wire connections, diagnosing internal wiring problems, and any work involving wire nuts or junction box connections requires electrical code knowledge. These tasks create serious safety hazards best handled by a licensed electrician who has the training and insurance to work safely.
| Task | DIY Safe | Requires Electrician |
|---|---|---|
| GFCI reset | Yes, straightforward homeowner task | |
| Circuit breaker reset | Yes, basic safety precaution needed | |
| Weatherproof cover replacement | Yes, no electrical contact | |
| Voltage testing with non-contact tester | Yes, with proper tool use | |
| Outlet replacement | Depends on skill and comfort level | Recommended for safety and code compliance |
| Wire connection repair | Yes, electrical shock and fire risk | |
| Circuit troubleshooting beyond breaker | Yes, requires expertise and tools | |
| Code compliance and permit work | Yes, legal requirements |
Specific situations demand professional inspection regardless of your DIY confidence level.
Repeated tripping after resets suggests an ongoing fault you can’t see or easily diagnose. Burning smell indicates overheated connections or fire risk that needs immediate attention. Visible wire damage or melted insulation means dangerous conditions exist. Aluminum wiring systems require special connection techniques because aluminum oxidizes differently than copper. Uncertainty about which wires are hot wire, neutral wire, or grounding wire creates shock risk. Work requiring a building permit or passing inspection must be done by licensed professionals in most jurisdictions. Homes with older electrical systems lacking proper grounding need professional evaluation. Outdoor outlets near pool equipment or hot tub connections have special NEC requirements for bonding and GFCI protection.
Professional service provides value beyond just getting the outlet working.
Typical repair costs range $150 to $400 depending on issue complexity and regional rates. Outlet replacement usually runs $150 to $250. Circuit troubleshooting costs $200 to $350. Extensive rewiring can be $300 to $600 or more. But licensed electricians provide warranty coverage on their work. They ensure electrical code compliance so your work passes inspection. They prevent safety hazards from improper repairs. They carry insurance protecting homeowners from liability if something goes wrong.
The cost-benefit analysis is straightforward for most situations.
Simple GFCI reset saves a service call expense. Absolutely do this yourself first. But attempting complex wiring repairs risks electrical shock to you or family members. Fire risk from improper connections can destroy your property. Voided home insurance coverage from unpermitted work leaves you exposed. Potential property damage far exceeds the professional repair costs you’re trying to save.
Preventive Maintenance for Exterior Outlets
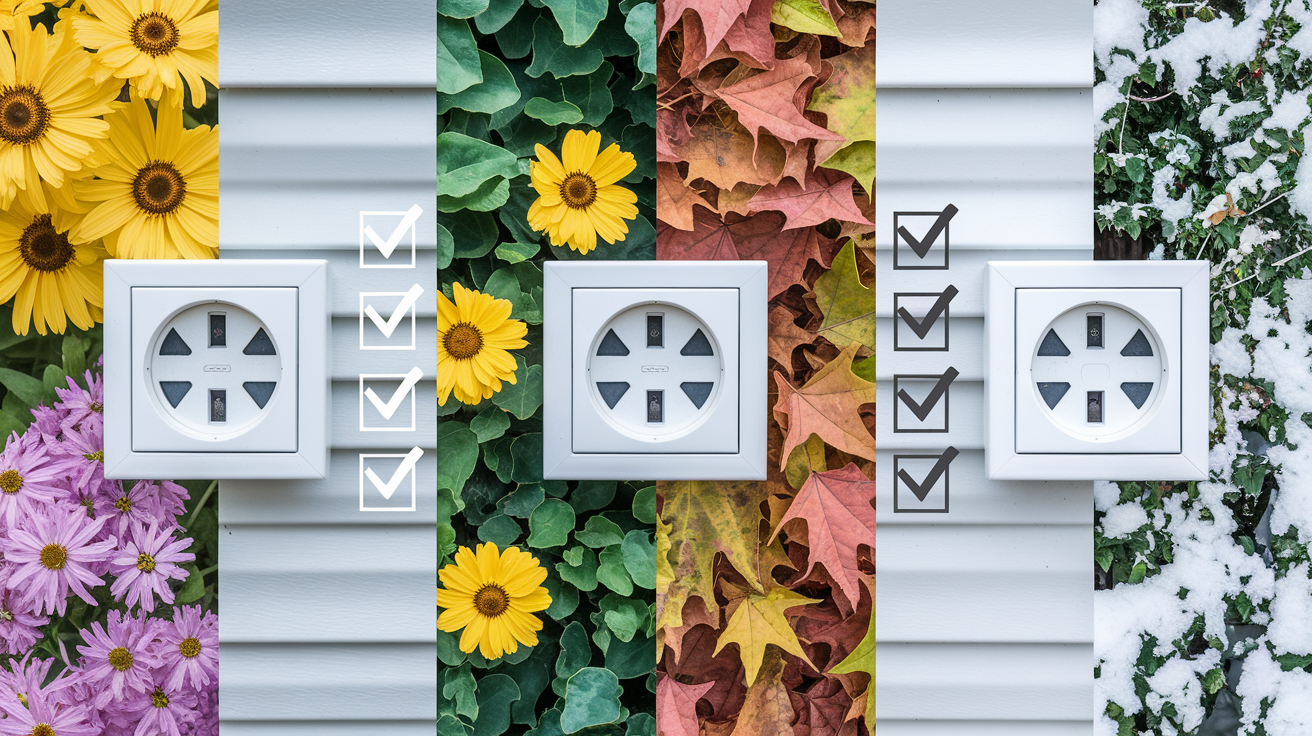
Regular maintenance prevents most outdoor outlet failures before they leave you with no power at an inconvenient time.
Simple quarterly checks catch problems before they cause complete power loss. You’ll save money by dealing with minor deterioration, a worn gasket seal or loose cover, rather than waiting until water infiltration corrodes connections and requires outlet replacement. You’ll prevent inconvenient failures during peak usage periods when you really need that outdoor power for holiday decorations or summer entertaining. Regular attention extends outlet lifespan significantly, often adding 5 to 10 years to the service life.
| Frequency | Maintenance Task | What to Check |
|---|---|---|
| Monthly | Test GFCI function | Press test button, should trip, then reset button, should restore power |
| Quarterly | Visual inspection | Weatherproof cover condition, gasket seal compression, caulking integrity |
| Seasonally | Cover security check | Verify cover closes completely, check spring mechanism, look for moisture signs |
| Annually | Professional inspection | Wire connections tightness, outlet box condition, internal corrosion |
| Before winter | Weather preparation | Protect from snow accumulation, verify gasket seals, test operation |
| After major storms | Damage assessment | Check for water infiltration, test all outdoor outlets, inspect for physical damage |
Understanding the difference between safe homeowner maintenance and tasks requiring a licensed electrician keeps you safe while maintaining your system properly.
Homeowners can safely test GFCI monthly by pressing the test button and reset button. Inspecting weatherproof covers for cracks or deterioration requires no electrical work. Checking gasket seals for compression is visual and tactile. Visual inspection of the outlet receptacle for damage happens with the cover open but without touching wiring. Applying caulking around outlet box edges improves weatherproofing without electrical contact.
Licensed electricians should handle opening the outlet to inspect wire connections. Checking screw terminals for tightness requires working with live electrical components. Testing outlet box grounding involves specialized equipment. Inspecting junction box connections means working inside electrical boxes. Measuring voltage and current properly requires training and the right tools.
Documentation provides value that becomes clear over time.
Keep a maintenance log with dates of seasonal checks. Note when gasket seals or covers were replaced. Record GFCI test results, did it trip properly, did it reset correctly. Schedule annual inspection at the same time each year so you don’t forget.
This helps you identify patterns. You might notice that outlets exposed to direct weather require more frequent attention than those under eaves. You might see that specific circuits have recurring issues pointing to underlying problems. The log provides valuable information for a licensed electrician during professional inspection or troubleshooting visits, helping them diagnose problems faster and more accurately.
Final Words
An outside outlet not working usually comes down to a tripped GFCI, flipped breaker, or moisture working its way into connections.
Most of the time, you can walk through the basic checks on your own. Press that reset button. Check the panel. Look for water damage or corrosion.
But if you’re resetting the same outlet every week, or you smell something burning, that’s when you step back and call someone who does this every day.
A little regular attention goes a long way. Test your GFCI monthly. Check your covers after storms. Catch the small stuff before it turns into a weekend project.
FAQ
Why did my outdoor outlet stop working?
An outdoor outlet stops working most commonly because of a tripped GFCI, a tripped circuit breaker, or moisture damage from rain or snow. Check the reset button on the GFCI outlet first, then inspect your main electrical panel for a breaker in the middle position.
How do you reset your outside outlet?
You reset an outside outlet by locating the GFCI outlet protecting that circuit and firmly pressing the reset button until it clicks. If the button won’t stay in, check your circuit breaker, push it fully off then back on, and try the GFCI reset again.
Why is my outlet not working but the breaker is not tripped?
An outlet with no power despite an untripped breaker usually means a GFCI somewhere in the circuit has tripped, you have a loose wire connection, or there’s internal damage to the outlet itself. One GFCI can protect multiple outlets downstream, so check nearby locations, garage, and basement.
How much does it cost to fix an outdoor electrical outlet?
Outdoor electrical outlet repairs typically cost between $150 and $400 when done by a licensed electrician. Simple outlet replacement runs $150 to $250, while circuit troubleshooting costs $200 to $350, and extensive rewiring can reach $300 to $600 or more.
What is a GFCI and why does it trip?
A ground fault circuit interrupter (GFCI) detects current leakage as small as 4 to 6 milliamps and shuts off power within a fraction of a second to prevent electrical shock. It trips when moisture enters the outlet box, equipment malfunctions, or circuits become overloaded.
Can I replace an outdoor outlet myself?
You can replace an outdoor outlet yourself if you’re comfortable with electrical safety, understand wire color coding, and shut off power completely at the circuit breaker. However, work may require a building permit, and most homeowners find hiring a licensed electrician safer and more reliable.
How do I protect outdoor outlets from weather damage?
You protect outdoor outlets from weather damage by upgrading to in-use covers or bubble covers, replacing deteriorated gasket seals, applying caulking around the outlet box edges, and ensuring the box tilts slightly forward for water drainage. Check weatherproof covers quarterly for proper closure and intact gaskets.
What does it mean when a GFCI won’t reset?
When a GFCI won’t reset, it indicates either a faulty outlet needing replacement, an ongoing ground fault in the wiring, or internal damage to the GFCI mechanism. Check if your circuit breaker has tripped first, reset it, then try the GFCI again before calling an electrician.
How often should I test my outdoor GFCI outlets?
You should test outdoor GFCI outlets monthly by pressing the test button, which should trip the outlet, then pressing the reset button to restore power. Quarterly visual inspections and annual professional inspections catch developing problems before they cause complete failures.
When should I call an electrician for an outdoor outlet?
Call a licensed electrician for any burning smell, visible internal damage, repeated tripping after resets, warm outlet receptacle, sparking, or uncertainty about wire identification. Professional help is essential for loose wiring, corroded connections, or work requiring electrical code compliance.