

You’ve probably ignored that ceiling crack for months, telling yourself it’s no big deal. But here’s the thing: most homeowners can’t tell the difference between a harmless hairline fracture and an early warning sign of something serious. The good news is that repairing ceiling drywall cracks isn’t as tricky as it looks once you understand what you’re fixing and why. We’ll walk you through exactly how to assess your crack, choose the right approach, and get a clean, lasting repair without calling in help.
Assessing Your Ceiling Crack: Severity and Repair Approach
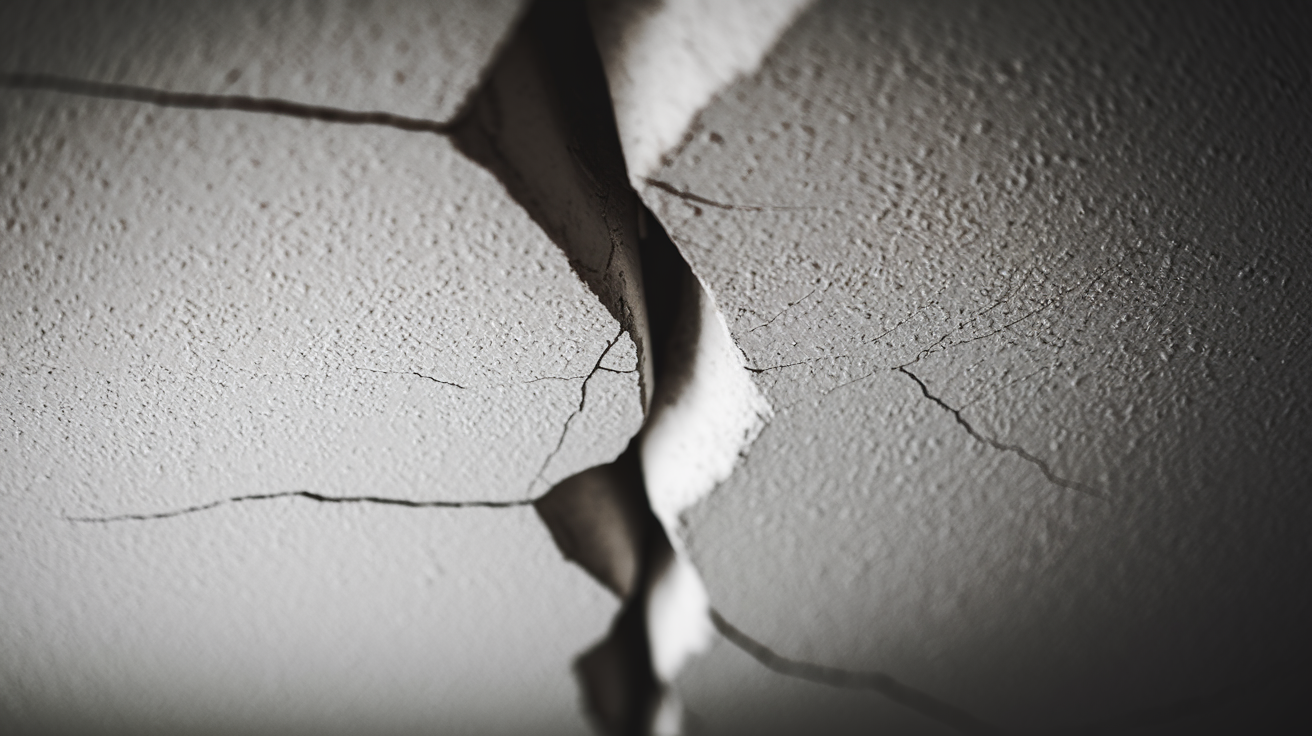
Before you grab the spackle, take a moment to really look at what you’re dealing with. Not all ceiling cracks are the same, and the approach that works for one type will waste time and material on another.
The cracks in your ceiling fall into three basic categories based on how serious they are. Each category needs a different repair strategy.
Crack Severity Categories:
Hairline cracks (less than 1/8 inch wide, stable, cosmetic only). These thin fractures usually show up in a spider web pattern from joint compound that was applied too thick and shrunk as it dried. If the crack has looked the same for months and there’s no water staining nearby, you’re looking at a simple cosmetic fix with spackle on your finger.
Medium cracks (1/8 to 1/4 inch wide, may need tape reinforcement). These wider gaps need mesh or paper drywall tape embedded in joint compound to prevent them from reopening. They often result from normal house settling or minor structural shifts that have stabilized.
Serious cracks (wider than 1/4 inch, accompanied by sagging, water stains, or cracks in adjacent walls). These warning signs point to active structural movement, roof truss uplift, or water damage that softened the joint compound. Professional assessment is the right move here.
The key difference between normal settling and a real problem comes down to accompanying signs. A single hairline crack by itself usually means nothing. But when you see water stains, sagging sections, or cracks that run from the ceiling down the wall, your home is telling you something needs attention beyond patching compound.
Complete Repair Instructions by Crack Severity

The repair steps change based on what you found during your assessment. Here’s exactly how to fix each type.
Hairline Crack Repair (Under 1/8 Inch)
Clean the crack area with a damp cloth to remove dust, cobwebs, and loose paint that would prevent good adhesion.
Apply spackle with your finger or a small putty knife, pressing it into the crack and slightly overfilling since it will shrink a bit as it dries.
Smooth flush with the surface by running your putty knife or finger along the repair in one clean pass to remove excess material.
Allow 2 to 4 hours drying time until the spackle turns bright white instead of pink or gray, which tells you all the moisture has evaporated and it’s ready for the next step.
Light sanding with 220 grit sandpaper wrapped around a block to feather the edges and create a smooth transition you won’t feel when you run your hand over it.
Check for shrinkage by looking at the repair from different angles under good light, and apply a second thin layer if you see a depression where the crack was.
Medium Crack Repair with Tape (1/8 to 1/4 Inch)
Clean and widen the crack slightly with a 6 inch putty knife to remove any loose texture or peeling paper that would create bumps under your repair.
Remove loose material by scraping along the crack edges until you’re working with solid, stable drywall.
Apply thin first coat of joint compound using your 6 inch knife, spreading it about 2 to 3 inches on each side of the crack in the thinnest layer possible.
Embed mesh or paper tape while the compound is still wet, pressing it into the material and removing air bubbles by running your knife along the length with firm, even pressure.
Apply second coat over tape and feather the edges 6 to 8 inches beyond the crack on both sides, which hides the repair by creating a gradual transition instead of a visible ridge.
Allow 24 hours drying between coats because rushing this step causes the next layer to crack or pull away as the moisture underneath tries to escape.
Apply thin final coat using a 10 inch knife if you have one, spreading the compound wider than the previous layer and removing excess with long, smooth strokes.
Final sanding with 220 grit sandpaper on a pole sander to reach the ceiling comfortably and create a surface so smooth you can’t tell where the repair ends and the original ceiling begins.
Primer application over the entire repair area to seal the porous joint compound and prevent the paint from flashing or showing a different sheen than the rest of the ceiling.
Tape Selection: Mesh vs. Paper
Mesh tape sticks to the ceiling by itself and works great if you’re new to drywall repair. You just press it over the crack and it stays put while you apply compound. Paper tape creates a stronger repair that professional installers prefer, but you need to embed it properly in wet compound without trapping air bubbles, which takes practice. For most ceiling cracks in a typical home, mesh tape gives you a solid repair with less frustration.
The drying time between coats matters more than most people think. Joint compound that looks dry on the surface often has moisture trapped underneath, especially in thick applications. Wait until the entire repair area has turned bright white with no gray or darker spots showing through. Thin coats dry faster and shrink less than thick ones, which prevents those frustrating cracks that reappear a week after you think you’re done. Yes, thin coats mean more layers, but each layer goes on easier and causes fewer problems than trying to fill everything at once.
Tools, Materials, and Cost Planning

Gather everything before you start so you’re not making multiple trips to the store with joint compound drying on your knife.
| Tool/Material | Purpose | Cost Range | Best for Crack Type |
|---|---|---|---|
| Spackle | Quick repair for tiny cracks, dries fast | $4-8 | Hairline only |
| Joint compound | Main filler for medium and large cracks | $8-15 | All crack types |
| Mesh tape | Self-adhesive reinforcement, easier for beginners | $5-8 | Medium cracks |
| Paper tape | Stronger reinforcement, requires embedding skill | $4-6 | Medium to large cracks |
| 6-inch putty knife | Removing loose material, applying compound | $6-12 | All repairs |
| 10-inch putty knife | Final coats with wider feathering | $10-18 | Medium cracks |
| Sandpaper assortment | Smoothing dried compound (120 and 220 grit) | $8-12 | All repairs |
| Pole sander | Reaching ceiling without ladder repositioning | $12-20 | Multiple or large repairs |
| Stain-blocking primer | Sealing repair, preventing flashing and stains | $15-25 | All repairs, especially water damage |
| Ceiling paint | Final finish, high-hiding flat or matte | $20-40 | All repairs |
For a simple hairline crack repair, you’re looking at $10 to $20 in materials if you buy just the basics: spackle, sandpaper, primer, and a bit of paint. Medium crack repairs with tape and multiple coats run $25 to $40 when you factor in joint compound, tape, wider putty knives, and finishing supplies. Professional repair costs jump to $150 to $400 depending on how severe the damage is and how many cracks you’re dealing with, which starts making sense when you have water damage or structural concerns that need diagnosis.
Spend money on quality joint compound and stain blocking primer because these prevent problems you’d rather not troubleshoot later. But generic spackle works fine for tiny cracks since you’re applying such small amounts. The difference between a $4 tub and an $8 tub won’t show up in a hairline repair.
Safety Protocols and Work Area Setup

Proper preparation matters more when you’re working overhead, where gravity works against you and mistakes hurt more.
Complete Preparation Steps:
Clear the room or cover furniture with lightweight plastic sheeting that drapes over everything and keeps compound splatters and dust off surfaces you’d rather not clean later.
Lay canvas drop cloths on the floor instead of plastic, which becomes dangerously slippery when wet compound or paint drips hit it.
Set up a stable step ladder with proper height that lets you work comfortably without overreaching, which throws off your balance and makes quality repairs nearly impossible.
Ensure adequate lighting from multiple angles so you can see the crack clearly and spot high or low spots in your compound application that you’d miss with just the ceiling fixture.
Clean the crack area with a damp cloth to remove the dust and cobwebs that prevent good adhesion between your repair material and the ceiling surface.
Wear N95 dust mask and safety glasses because sanding drywall compound creates fine dust that gets in your lungs and eyes, causing irritation that lasts for hours.
Ensure good ventilation especially during sanding by opening windows or running fans that pull dusty air outside instead of circulating it through your home.
Working on a ceiling is different than working on walls. Never use wobbly chairs or stools for overhead work because reaching up shifts your center of gravity in ways that make falls happen fast. Take breaks every 20 to 30 minutes to rest your neck and arms, even when you’re close to finishing a coat. The quality of your work drops when your neck is cramping and your arms are shaking from holding them overhead, and rushing while standing on a ladder creates the kind of accidents that turn a small repair into a hospital visit.
Addressing Water Damage and Moisture Related Ceiling Cracks

Water damage shows up in ceiling cracks that look different than settling cracks, and repairing them without fixing the leak just means you’ll be doing the same repair again in a few months. Brown or yellow water stains around a crack tell you that moisture softened the joint compound and caused it to separate. The source might be obvious like a roof leak after heavy rain, or subtle like condensation from bathroom humidity that’s been accumulating for months.
Common Water Damage Signs:
Brown or yellow staining spreading out from the crack or in a separate area nearby that shows where water traveled before it found a way through.
Soft or sagging drywall that feels spongy when you press it or has a visible depression that wasn’t there before.
Bubbling paint or texture where moisture trapped behind the surface is pushing through and creating small blisters you can feel when you run your hand across the area.
Musty odors in the room below a ceiling crack, which often means moisture is present even when you don’t see obvious staining.
Recurring cracks in the same location that you’ve repaired before but keep reappearing because the moisture source is still active.
Finding the leak source takes some detective work. Roof leaks often show up several feet away from where water actually enters because it travels along rafters or sheathing before dripping through the ceiling. Check the attic after heavy rain for water stains on the underside of the roof deck. Plumbing issues usually show up near bathrooms or kitchens, especially around supply lines, drain stacks, or fixtures on the floor above. If you’re seeing minor plumbing repairs needed, those should happen before you touch the ceiling. Condensation problems come from inadequate ventilation in bathrooms or attics where humid air hits cold surfaces and turns back into water.
Repairing cracks without addressing moisture creates failed repairs and potentially dangerous mold growth in the ceiling cavity. Water damaged drywall that feels soft needs replacement, not patching, and the process for that involves cutting out the damaged section and installing new material, which you can learn more about in our guide on drywall repair and patching.
Matching Ceiling Texture After Crack Repair

The compound repair might turn out perfect, but if the texture doesn’t match, everyone who walks in the room will spot it.
Smooth Finish Ceilings
Achieving a perfectly smooth result means using a wide blade (10 or 12 inch) for your final coat and applying the compound so thin you can barely see it. Let it dry completely, then sand with 220 grit using light, even pressure and checking with your hand frequently to feel for ridges or low spots. The goal is a surface so smooth that when primer and paint go on, you can’t tell where the repair ends.
Orange Peel and Knockdown Textures
Spray texture products in aerosol cans match orange peel and knockdown patterns reasonably well. Practice on cardboard first because the spray pattern and distance from the surface determine how the texture looks. Hold the can 12 to 18 inches away and use short bursts instead of continuous spraying. For knockdown texture, let the sprayed texture set for a few minutes, then lightly drag a knockdown knife across it to flatten the peaks.
Popcorn Texture Matching
Aerosol texture sprays and sponge application methods exist for popcorn ceilings, but getting a perfect match is tough because the original texture built up over multiple applications with specific products that may not be available anymore. Spray lightly from 18 to 24 inches away, building up the texture gradually instead of trying to match it in one heavy coat.
Sometimes texturing an entire ceiling section from corner to corner or beam to beam gives you better results than trying to match a small repair area. And if you’re dealing with dated popcorn texture that’s been staring at you for years anyway, this repair might be the nudge you need to scrape it all off and start fresh with a modern smooth or subtle texture finish.
Priming and Painting Repaired Ceiling Cracks
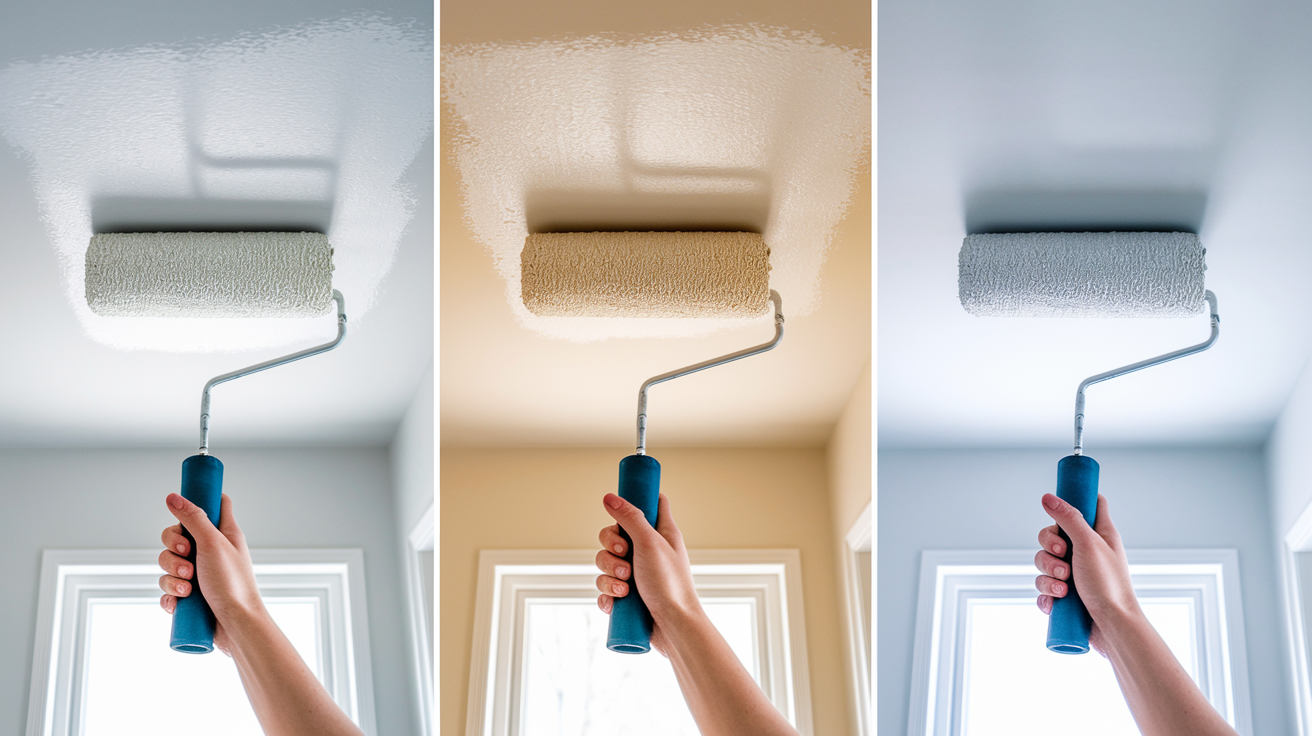
Primer matters even for small repairs because it seals the porous joint compound, prevents the paint from flashing with a different sheen than the rest of the ceiling, and improves adhesion so your finish coat looks uniform.
Primer selection depends on what caused the crack. Standard drywall primer works fine for cracks from settling or workmanship issues. Stain blocking primers with shellac or oil base prevent water stains from bleeding through your new paint when you’re repairing cracks that had moisture damage. Apply primer to the repair area extending a few inches beyond the edges of your compound work.
Painting Steps:
Apply primer to the repair area with a small roller or brush, covering all the compound and feathering out onto the original ceiling.
Allow proper drying for at least one hour or whatever the primer label recommends before you think about topcoat.
Paint the repair with ceiling paint using a roller, starting in the middle of the repair and working outward.
Feather edges beyond the repair by rolling with less pressure as you move away from the center, which blends the new paint into the old.
Apply second coat if needed after the first coat dries and you can see whether the repair shows through or matches the surrounding ceiling.
Select flat or matte finish paint for ceilings because any sheen highlights surface imperfections that you want hidden. High hiding formulas cover in fewer coats, which matters when you’re trying to match existing ceiling color. The white paint on your ceiling might look like “white” but it probably has a specific tint, and buying a small container of paint matched to a chip you cut from an inconspicuous area gives you better results than guessing. Some homeowners paint the entire ceiling to guarantee a perfect match, especially when the existing paint has yellowed over time.
Dealing with Recurring Cracks and Flexible Repair Solutions

Some cracks show up in the same spot every year even after you repair them correctly, which points to ongoing movement that standard joint compound can’t handle.
Recurring cracks usually trace back to roof truss uplift from temperature fluctuations, where trusses in the attic expand and contract with seasonal temperature swings and push against the ceiling drywall. Or ongoing house settling that hasn’t stabilized yet, particularly common in newer homes going through their first few years. Normal joint compound dries hard and rigid, which works great for stable repairs but cracks when the ceiling moves even slightly.
Flexible patching compounds like Elastopatch accommodate minor movement by staying slightly pliable after they cure. These products bridge active cracks better than standard compound because they bend instead of breaking when structural movement happens. Apply flexible compounds directly over filled and sanded cracks in one or two coats, following the product directions for drying time and application thickness.
Working with Recurring Cracks:
Identify movement patterns by marking the crack ends with small pencil marks and checking over several months to see if the crack is extending or staying stable.
When flexible compounds work versus structural repairs needed: flexible products handle seasonal movement of 1/8 inch or less, but larger movements or cracks that are getting dramatically worse need professional structural assessment.
Application methods for flexible products usually match standard joint compound, though some stay tacky longer and require different finishing techniques spelled out on the container.
Realistic expectations help prevent frustration because flexible compounds may reduce but not completely eliminate recurring cracks in areas with active movement like truss uplift zones.
Document crack patterns by taking photos every few months with a ruler in the frame showing the crack width. If you’re seeing the crack get noticeably wider or longer over time, that’s information a structural engineer needs to determine if your home needs repairs beyond cosmetic patching.
Recognizing Structural Issues and When to Call a Professional

Some ceiling situations look like crack repairs but actually need professional assessment because they point to structural problems or hazardous materials.
| Warning Sign | What It May Indicate | Action Required |
|---|---|---|
| Cracks wider than 1/4 inch | Significant structural movement or settlement | Structural engineer assessment before repairs |
| Sagging ceiling sections | Joist failure, water damage, or detached drywall | Immediate professional inspection for safety |
| Cracks accompanied by wall cracks | Foundation settlement or structural shift affecting multiple areas | Foundation specialist evaluation |
| Recurring cracks after multiple repairs | Active structural movement that patching won’t solve | Professional diagnosis of underlying cause |
| Horizontal cracks running across joists | Ceiling drywall pulling away from framing | Contractor assessment and potential re-attachment |
| Water damage with unknown source | Hidden plumbing or roof leaks requiring investigation | Plumber or roofer inspection before ceiling repair |
| Popcorn texture in pre-1978 homes | Potential asbestos-containing material | Professional testing and remediation if positive |
Ignoring structural warning signs turns minor problems into expensive emergency repairs. A crack that seems cosmetic but actually indicates foundation movement will keep getting worse, potentially affecting doors, windows, and other parts of your home. The cost of professional assessment (typically $300 to $500 for a structural engineer) prevents the much larger costs of delayed repairs that spiral into major structural work.
Finding qualified contractors starts with looking for licensed professionals who carry proper insurance. Structural engineers assess foundation and framing problems and provide reports that contractors use to plan repairs. Licensed general contractors handle the actual repair work, and checking their references with recent customers tells you more than advertising claims. For homeowners dealing with damage beyond typical DIY repairs, Home Recovery Pro services provide professional assessment and repair options. Professional diagnosis often prevents costly emergency repairs by catching problems while they’re still manageable.
Common Ceiling Crack Repair Mistakes and Troubleshooting

Understanding what goes wrong helps you avoid the frustration of failed repairs and wasted materials.
Frequent Errors to Avoid:
Applying compound too thickly creates shrinkage cracks as the material dries and pulls in on itself, forcing you to scrape it out and start over.
Not allowing adequate drying time between coats causes the top layer to crack or pull away as moisture trapped underneath tries to escape.
Skipping primer leads to paint flashing where the repair shows a different sheen than the surrounding ceiling even though the color matches.
Over sanding and exposing tape ruins the repair by creating a depression or revealing the mesh pattern that telegraphs through paint.
Inadequate surface cleaning before repair leaves dust and loose material that prevents proper adhesion between your compound and the ceiling.
Not addressing underlying moisture guarantees the same crack will reappear as water continues softening the joint compound.
Painting before compound is fully dry traps moisture and causes bubbling or poor adhesion that shows up days later.
Attempting to match texture without practice creates obvious repair spots that look worse than leaving the area smooth and repainting.
When you see visible repair lines after painting, you’re usually dealing with insufficient feathering during compound application, inadequate sanding that left ridges at the repair edges, or wrong primer that didn’t seal properly. The solution involves light sanding with 220 grit to knock down any ridges you feel with your hand, reapplying primer if you skipped it the first time, then using a blending technique where you paint the repair and several feet beyond it with a nearly dry roller to diffuse the transition.
Compound that cracks or shrinks after application points to material applied too thick, rushed drying where you didn’t wait long enough between coats, or poor quality compound that has too much filler and not enough binder. Fix it by scraping out the cracked material with your putty knife until you’re back to solid ceiling, then reapply in thinner coats with proper drying time. Buy decent quality joint compound because the $2 savings on a cheap bucket costs more in time and frustration than it’s worth.
Preventive Maintenance to Minimize Future Ceiling Cracks
While some cracking from normal house settling is inevitable, you can prevent many of the causes through regular maintenance and environmental control.
Preventive Measures:
Maintain consistent indoor humidity between 40% to 50% using whole house humidification in winter and dehumidification in humid climates to minimize wood movement and drywall stress.
Ensure adequate attic ventilation to minimize roof truss uplift by keeping attic temperatures closer to outdoor temperatures instead of creating the large temperature swings that cause truss movement.
Annual roof inspections for leak prevention catch small problems like lifted shingles or worn flashing before water finds its way through to your ceiling.
Prompt repair of plumbing issues when you notice drips, stains, or water pressure changes prevents the ceiling damage that comes from leaks that go unnoticed for weeks or months.
Address foundation drainage problems by maintaining gutters, downspouts, and yard grading that directs water away from your foundation instead of letting it accumulate and cause settlement.
Allow new homes to complete initial settling before investing in major repairs, since homes typically move the most during their first two to three years as lumber dries and the foundation stabilizes.
Proper attic insulation reduces temperature related movement that causes cracks by minimizing the temperature difference between heated living space and the attic. When warm air from your home meets cold attic air at the ceiling plane, the resulting condensation and temperature stress creates conditions for cracks to form.
Develop a home inspection routine that includes quarterly ceiling checks for new cracks, water stains, or changes in existing cracks that you’ve been monitoring. Take photos with your phone showing any cracks with a ruler or coin for scale reference, then compare those photos every few months to track whether the situation is stable or getting worse. This photo log becomes valuable information if you eventually need professional assessment or if you’re trying to determine whether a crack needs immediate attention or can wait.
Final Words
Ceiling drywall crack repair doesn’t have to overwhelm you. Most hairline and medium cracks are straightforward fixes once you’ve assessed the severity, gathered the right materials, and worked through the steps at a steady pace.
If you spot water stains, serious sagging, or cracks that keep coming back, that’s your signal to call in a pro before things get worse.
For stable, cosmetic cracks, you’ve got this. Take your time with thin coats, let everything dry completely, and don’t skip the primer.
Your ceiling will look clean and solid again.
FAQ
How can you repair cracked drywall seams in a ceiling?
You can repair cracked drywall seams in a ceiling by cleaning the crack, applying mesh or paper tape embedded in joint compound, feathering two to three thin coats over the tape, then sanding smooth once dry. For hairline cracks under 1/8 inch, spackle alone often works without tape.
Can ceiling cracks be repaired?
Ceiling cracks can be repaired using spackle for hairline fractures or joint compound with reinforcing tape for larger cracks. Most cosmetic cracks are straightforward DIY fixes, but cracks wider than 1/4 inch or accompanied by sagging require professional assessment before repair.
What is the best filler for cracks in a ceiling?
The best filler for ceiling cracks depends on crack size. Spackle works well for stable hairline cracks under 1/8 inch, while joint compound combined with mesh or paper tape provides stronger repairs for medium cracks up to 1/4 inch wide.
Is it normal for ceiling drywall to crack?
It is normal for ceiling drywall to develop small hairline cracks from house settling, temperature changes, or minor movement. These cosmetic cracks typically stabilize over time. Wider cracks, sagging sections, or cracks with water stains indicate problems that need attention.
How long does joint compound take to dry on ceiling repairs?
Joint compound takes 2 to 4 hours for thin spackle applications and 24 hours between coats for larger repairs. You’ll know it’s completely dry when the compound turns bright white. Rushing this process causes shrinkage and cracking.
Should you use mesh tape or paper tape for ceiling cracks?
You should use mesh tape for easier application since it’s self-adhesive and beginner-friendly, or paper tape for stronger reinforcement if you have the skill to embed it properly without bubbles. Both work well when applied correctly over joint compound.
How do you know if a ceiling crack is structural?
You know a ceiling crack is structural if it’s wider than 1/4 inch, accompanied by sagging, runs horizontally across joists, or appears alongside wall cracks. Water stains, recurring cracks after repair, or visible ceiling movement also signal serious problems.
What causes ceiling cracks to keep coming back?
Ceiling cracks keep coming back due to ongoing roof truss uplift from temperature changes, active house settling, unresolved water leaks, or structural movement. Using flexible patching compounds designed for movement helps, but recurring cracks may need professional evaluation.
Do you need to prime ceiling repairs before painting?
You need to prime ceiling repairs before painting to seal the joint compound, prevent flashing, and ensure even paint coverage. Stain-blocking primers work best for water-damaged areas, while standard primer suffices for dry repairs.
How do you match ceiling texture after repairing cracks?
You match ceiling texture after repairing cracks by using spray texture products for orange peel or knockdown finishes, or by feathering joint compound smooth for flat ceilings. Practice on cardboard first, and consider texturing the entire section for seamless results.
What tools do you need to repair ceiling cracks?
You need a 6-inch putty knife, joint compound or spackle, mesh or paper tape, 220-grit sandpaper, stain-blocking primer, and ceiling paint. A pole sander helps with overhead work, and a sturdy step ladder is essential for safe access.
When should you call a professional for ceiling cracks?
You should call a professional for ceiling cracks wider than 1/4 inch, sagging ceiling sections, cracks with unknown water sources, or popcorn texture in homes built before 1978. Recurring cracks after multiple repair attempts also warrant expert assessment.