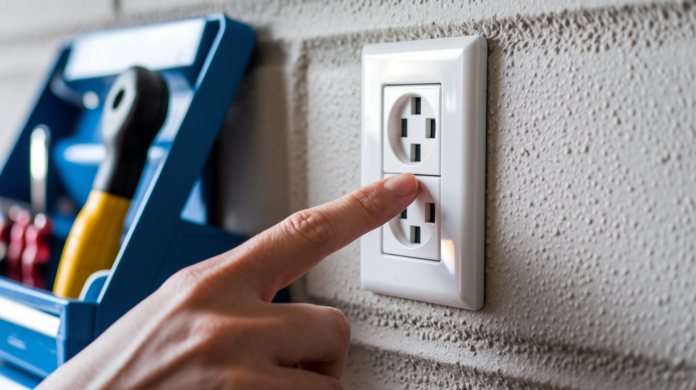

You go to plug in your pressure washer or holiday lights, and nothing happens. That outdoor outlet is completely dead. If you’ve dealt with this on a rainy Saturday or right before the neighbors come over, you know how frustrating it gets. Here’s the part most people don’t realize: about 80% of outdoor outlet failures have nothing to do with the outlet itself. Most of the time, it’s a simple reset or a tripped breaker that gets you back up and running in under five minutes.
Quick Diagnosis: Five Common Causes of Outdoor Outlet Failure

You go to plug in your pressure washer or holiday lights, and nothing happens. The outdoor outlet is completely dead. If you’ve been there, you know the frustration, especially when you need that power right now.
Outdoor outlets fail more often than indoor ones. They take a beating from rain, snow, heat, cold, and everything else the weather throws at them. The good news? About 80% of outdoor outlet failures don’t involve actual outlet damage. Most of the time, it’s a simple reset that gets you back up and running. A systematic approach works best. Start with the easiest fixes first and work your way toward more complex issues.
Here are the five most common causes:
Tripped GFCI outlet. A single GFCI (usually in your garage, bathroom, kitchen, or basement) can control multiple outlets, including the outdoor ones. It trips when it detects moisture or an electrical imbalance.
Tripped circuit breaker. The breaker protecting your outdoor outlets flipped to the off position or landed in the middle position between on and off after detecting an overload or short circuit.
Moisture damage. Water got inside the outlet box or behind a damaged cover, causing corrosion on the wires or internal components that prevents proper electrical contact.
Loose wiring connections. Temperature changes, vibration, or improper installation caused wire connections to work loose inside the outlet box, interrupting power flow.
Defective outlet receptacle. The outlet itself failed due to age, repeated use, or environmental stress, with internal components that no longer make proper electrical contact.
Start with the GFCI reset. Locate the outlet with two buttons labeled TEST and RESET, typically in your garage, bathroom, kitchen, or basement. Press and hold the button labeled RESET until you hear or feel a click. Then walk outside and test your outlet with a lamp or phone charger.
This is where your DIY troubleshooting should begin. But it’s also important to know when to stop. If you smell anything burning, if the outlet or surrounding area feels warm to the touch, if you see visible scorch marks or melted plastic, or if you’re uncertain about what you’re looking at, stop immediately. Those are signs of a more serious electrical problem that needs professional attention right away.
Step 1: Locate and Reset Your GFCI Outlet

GFCI stands for ground fault circuit interrupter. It’s a safety device that detects when electricity isn’t flowing properly through the circuit and shuts off power in a fraction of a second to prevent electrical shock. These outlets have saved countless lives since they became standard in homes.
The tricky part? One GFCI can control multiple outlets throughout your home. Your outdoor outlet might not have the TEST and RESET buttons, but it’s still protected by a GFCI somewhere else. The most common location is your garage. Check there first, near the workbench or along the wall closest to where your outdoor outlets are located. Bathrooms, kitchens, and basements are other typical spots. Before you start hunting, test a small lamp or use a voltage tester in your outdoor outlet to confirm it’s actually dead and the problem isn’t with whatever you were trying to plug in.
Follow these steps for a proper GFCI reset:
Locate the GFCI outlet. Check your garage first, then bathrooms, kitchen, basement, and any outlet within six feet of a water source.
Press the TEST button. This should cause the RESET button to pop out with a click, confirming the GFCI is working properly.
Press the RESET button firmly. Push it all the way in until you hear or feel it click into place and stay depressed.
Test your outdoor outlet. Plug in a lamp or phone charger to confirm power has been restored.
If it trips again immediately. Unplug everything from the outdoor outlet and try resetting one more time. If it still won’t reset or trips right away, there’s likely moisture in the system or a ground fault that needs professional diagnosis.
Stop everything if the outlet feels warm, smells like burning plastic or electrical components, or shows any visible damage like melted plastic, discoloration, or scorch marks. These are danger signs that indicate a serious electrical problem, not just a simple trip. Turn off the power at the breaker and call a licensed electrician.
One important concept to understand is the “master GFCI” or “first outlet” protection. When your home was wired, the electrician likely installed one GFCI outlet at the beginning of a circuit, and that single device protects all the outlets downstream from it. This means your outdoor outlet might be the third or fourth outlet in line, all controlled by that one GFCI in your garage. This is completely normal and meets electrical code. It also means that if anyone pressed the TEST button on that garage GFCI (kids do this sometimes), all the protected outlets stopped working at once.
Step 2: Check Your Circuit Breaker Panel

If resetting the GFCI didn’t solve the problem, head to your electrical panel. You’ll typically find it in the garage, basement, utility room, or sometimes on an exterior wall. It’s the metal box with rows of switch handles, each one protecting a different circuit in your home.
A tripped breaker looks different from one that’s working normally. Most tripped breakers flip to a middle position, somewhere between ON and OFF. Some flip all the way to OFF. Either way, you’re looking for a breaker that’s not lined up with all the others. The handles should all be in a neat row when everything’s working correctly, so the odd one out is usually easy to spot.
Here’s the proper reset procedure:
Identify the tripped breaker. Look for the one that’s not aligned with the others or is marked for outdoor outlets.
Push the breaker firmly to the full OFF position. Don’t just try to flip it to ON from the middle position. This often doesn’t work.
Push the breaker firmly to the ON position. You should feel it click into place and align with the other breakers.
Test your outdoor outlet. Plug something in to confirm power has been restored.
If the breaker trips again right away or within a few minutes, that’s telling you something. It means the circuit is overloaded, there’s a short circuit somewhere in the wiring, or the breaker itself has gone bad. Circuits that trip repeatedly can cause serious damage to your home’s electrical system over time. This is when you need a professional to diagnose what’s drawing too much power or where the fault is located. Don’t keep resetting a breaker that trips frequently. That’s the breaker trying to protect your home from an electrical problem.
Inspecting for Loose Wiring and Connection Problems

Outdoor outlets take more physical stress than indoor ones. Temperature swings make metal expand and contract. Vibration from wind or nearby equipment can work connections loose over time. Sometimes an outlet was installed with terminal screws that weren’t quite tight enough to begin with.
Before you do anything else, turn off the power to the outdoor outlet at your circuit breaker. Flip the breaker all the way to the OFF position, not just partway. This is absolutely mandatory before you remove the outlet cover or touch anything inside the outlet box. There’s no safe way to inspect wiring with the power on.
Once the power is off, you can carefully remove the outlet cover plate and unscrew the outlet from the electrical box to pull it forward slightly. Look for loose terminal screws on the sides of the outlet where wires connect. Check whether any wires have come completely disconnected. Look at the wire insulation for burn marks or areas where it’s melted. Check connection points for corrosion, which shows up as green, white, or brown crusty buildup.
That’s the extent of safe DIY inspection. You’re looking, not fixing. If you see any of these warning signs, stop and call a professional:
Any burning smell, even a faint one.
Warmth coming from the outlet or the wires.
Visible arcing damage (looks like black soot or char marks).
Multiple loose connections or wires that have pulled free.
Loose connections are not a minor problem. When wires aren’t making solid contact, electricity arcs across the gap, generating heat. That heat can start a fire inside your wall. This is why loose connections cause a significant number of house fires every year. The fix requires properly tightening terminal screws to specific torque settings, ensuring wires are stripped to the correct length, and confirming that all connections meet electrical code. This is skilled work.
Hiring a licensed electrician for wiring repairs protects you legally and financially. If an unlicensed person works on your electrical system and something goes wrong, your homeowner’s insurance may not cover the damage. The electrician’s liability insurance covers their work. That peace of mind is worth the service call cost.
Recognizing a Defective or Burned Outlet Receptacle
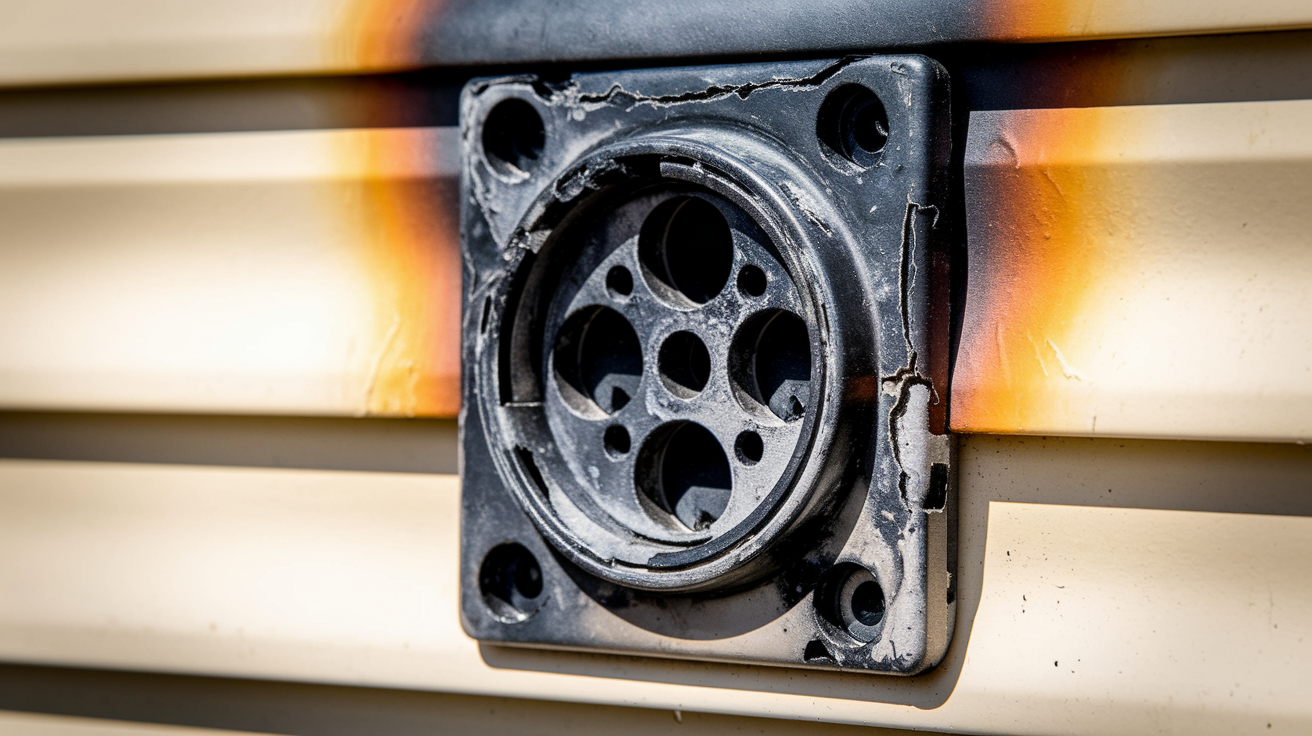
Outlets don’t last forever. An indoor outlet might work reliably for 20 or 30 years, but outdoor units face harsher conditions and typically fail sooner. Weather, moisture, UV exposure, and temperature extremes all take their toll on the internal components.
Watch for these warning signs that indicate the outlet itself has failed:
Scorch marks or discoloration around the outlet face.
Melted, warped, or discolored plastic housing.
Burning smell coming from the outlet.
Outlet feels warm to the touch, even when nothing is plugged in.
Plugs fall out easily or won’t stay in the outlet.
Visible cracks in the plastic housing.
GFCI outlet won’t hold a reset even with the power off and back on.
These signs point to internal damage to the outlet mechanism. The metal contact points inside might have corroded, burned, or bent. The internal GFCI protection circuit might have failed. The plastic housing might have cracked, letting moisture reach the electrical components. Continued use of a damaged outlet creates a real fire risk, especially in an outdoor location where you might not notice smoke or heat as quickly as you would indoors.
Damaged outlets must be replaced, not repaired. There’s no way to fix burned contacts or a failed GFCI circuit. The good news is that outlet replacement is straightforward work for a licensed electrician. They’ll shut off the power, disconnect the old outlet, connect a new weather resistant unit with proper wire connections, test everything to confirm it’s working safely, and make sure the installation meets current electrical code.
Typical costs for outdoor outlet replacement run between $150 and $300 depending on your location and whether any code upgrades are needed. That’s a reasonable price for safe, reliable outdoor power.
When to Call a Licensed Electrician for Outdoor Outlet Repairs

You can safely reset a GFCI outlet or circuit breaker yourself. Those are homeowner level troubleshooting steps. But anything that involves wiring, replacing outlet components, or electrical modifications requires professional help.
Call a licensed electrician in these situations:
GFCI or circuit breaker trips repeatedly.
Any burning smell from outlet, wires, or electrical panel.
Outlet or surrounding area feels warm to the touch.
Water inside the outlet box or visible moisture damage.
Multiple outlets on the same circuit are not working.
Wiring inspection revealed loose connections or damage.
Outlet needs replacement due to physical damage or failure.
You feel uncertain or uncomfortable about any part of the troubleshooting process.
Professional electricians understand electrical code requirements and proper installation techniques. They know how to work safely with live circuits when necessary for testing. They carry specialized tools for diagnosing electrical problems that go beyond what you can see with a visual inspection. Their work is backed by liability insurance, which means you’re protected if anything goes wrong during or after the repair.
Electrical code compliance matters more than most homeowners realize. Properly permitted electrical work creates a paper trail that protects you when you sell your home. Code compliant installations reduce fire risk and meet the standards that your homeowner’s insurance expects. When an inspector or insurance adjuster finds unpermitted electrical work, it creates expensive complications.
A typical service call for outdoor outlet troubleshooting and repair runs between $150 and $400, depending on what’s needed. That covers the electrician’s time to diagnose the problem, explain your options, complete the repair, test the system, and confirm everything meets code. It’s a fair price for skilled labor and the peace of mind that comes with professional work.
Preventing Future Outdoor Outlet Failures

Fixing a broken outdoor outlet costs time and money. Preventing the failure in the first place costs almost nothing and takes just a few minutes of attention every few months. Proactive maintenance wins.
Rain, snow, humidity, and temperature swings attack outdoor electrical components constantly. Moisture works its way into tiny gaps, corroding wires and creating paths for short circuits. This happens faster when outlet covers are damaged or missing. Even a small crack in a cover gasket lets water in, and once water reaches the wire connections or internal contacts, corrosion starts. Heat and cold cause the metal components to expand and contract, which can work terminal screws loose over time.
Follow these prevention strategies:
Monthly GFCI testing. Press the TEST button on your GFCI outlet once a month to confirm it trips properly, then press RESET. This keeps the internal mechanism working smoothly.
Seasonal inspection before summer and winter. Check all outdoor outlets for damage, moisture, corrosion, or loose covers before the harshest weather arrives.
Upgrade to in-use weatherproof covers. Replace standard flat covers with in-use bubble covers if you keep things plugged in for extended periods.
Keep covers closed when not in use. Make sure the cover flips down completely and latches securely after unplugging equipment.
Annual professional inspection. Have a licensed electrician check your outdoor electrical system during routine maintenance.
Immediate replacement of damaged covers. Don’t wait on a cracked cover or missing gasket. They’re inexpensive and take minutes to replace.
Proper cover selection makes a real difference. Standard weatherproof covers work fine for outlets you use occasionally, when you can keep the cover closed between uses. But if you need to keep extension cords plugged in for landscape lighting, holiday decorations, or pool equipment, you need an in-use cover. These have a deeper bubble design that lets you close and latch the cover with cords running out through the bottom. Even standard covers may allow moisture buildup during hot, humid weather, especially in coastal or tropical climates, so periodic inspection matters.
Watch for these signs of weather damage:
Corrosion (green, white, or brown crust) on the outlet face.
Rust forming inside the outlet box.
Moisture or water droplets inside the cover.
Cracked or missing rubber gasket around the cover edges.
Discoloration or water staining around the outlet opening.
Check and maintain the seals around your outdoor outlets. The rubber gasket between the cover and the outlet box is your primary defense against moisture infiltration. When the gasket gets brittle, compressed, or torn, replace it. Most hardware stores carry replacement gaskets for a few dollars. Make sure your outlets are the weather resistant type with sealed backs and proper internal protection against moisture. Current electrical code requires weather resistant receptacles in all outdoor locations, and they handle the elements much better than standard outlets.
Understanding Outdoor Outlet Electrical Code Requirements

Electrical codes exist to protect your safety. The National Electrical Code (NEC) sets standards that most local jurisdictions adopt, sometimes with modifications. Requirements for outdoor electrical outlets have gotten stricter over the years as we’ve learned more about electrical safety.
Current code requirements for outdoor electrical outlets include:
GFCI protection mandatory for all outdoor receptacles.
Weather resistant outlet receptacles required for exposed locations.
In-use covers required for outlets in wet locations.
Proper outlet mounting height above grade to prevent water contact.
Dedicated circuits required for certain outdoor applications.
Tamper resistant receptacles required in residential installations.
These rules weren’t always this strict. Homes built before the 1970s often have outdoor outlets with no GFCI protection. Homes from the 1980s and 1990s might have GFCI protection but not weather resistant outlet receptacles. Older installations often used standard flat covers instead of in-use covers. None of this was wrong when the house was built, but it doesn’t meet today’s safety standards.
When you repair or replace an outdoor outlet, licensed electricians bring the installation up to current code. They install weather resistant GFCI receptacles, proper in-use covers, and ensure correct grounding and wiring methods. This protects your family from electrical shock and reduces fire risk. It also matters for your home’s value and your insurance coverage.
Home insurance companies increasingly scrutinize electrical systems. An inspection that reveals non-compliant or unsafe wiring can complicate your coverage or claims. When you sell your home, buyers or their inspectors will note outdated outdoor electrical installations. Bringing everything up to code during routine repairs avoids these complications and often costs very little extra since the electrician is already there doing the work.
Cost Guide for Outdoor Outlet Repairs and Replacement

Understanding typical costs helps you budget for outdoor outlet repairs and recognize fair pricing when you get estimates. Prices vary by region, with higher labor rates in major metropolitan areas and lower costs in rural locations. Complexity matters too, as does whether code upgrades are needed.
| Repair Type | Typical Cost Range | Time Required |
|---|---|---|
| Service call diagnostic fee | $75-$150 | 30-60 minutes |
| Simple outlet replacement | $150-$250 | 45-90 minutes |
| GFCI outlet installation | $175-$300 | 60-90 minutes |
| Weatherproof cover upgrade | $100-$175 | 30-45 minutes |
| Wiring repair/troubleshooting | $200-$400 | 90 minutes-3 hours |
| New outdoor outlet installation | $300-$600 | 2-4 hours |
Service call diagnostic fees typically get credited toward repair costs if you proceed with the work. Simple outlet replacement includes removing the old unit, installing a weather resistant receptacle, testing the system, and confirming proper operation. GFCI outlet installation costs more because of the additional device cost and testing requirements. Weatherproof cover upgrades involve removing the old cover, installing a new in-use cover with proper gasket sealing, and verifying weatherproof integrity.
Wiring repair and troubleshooting costs vary widely because the problem might be simple or complex. An electrician might need to trace circuits, test multiple connection points, or access wiring in difficult locations. New outlet installation requires running new wire from an existing circuit or the electrical panel, mounting a weatherproof box, installing the outlet and cover, and testing everything.
Several factors increase costs beyond these baseline ranges. Difficult accessibility, like outlets mounted high on walls or in tight spaces, adds time and labor charges. Existing code violations that must be corrected before the outlet can be repaired properly increase material and labor costs. Underground wiring problems require specialized equipment and more extensive troubleshooting. Permits and inspections required by your local jurisdiction add fees and scheduling time.
Get multiple quotes when planning electrical work, but don’t automatically choose the cheapest option. Ask whether the electrician is properly licensed and insured. Confirm that they’ll pull necessary permits and complete the work to current code. Understand what’s included in their estimate and whether they guarantee their work. A slightly higher quote from an experienced, professional electrician often delivers better value than a lowball estimate from someone cutting corners.
Final Words
An exterior outlet not working usually comes down to a tripped GFCI or breaker, not a complicated wiring problem.
Start with the reset buttons. Check your garage, bathroom, and kitchen for the GFCI that controls your outdoor outlets. Then check your breaker panel.
Most of the time, that’s all it takes.
If the problem keeps coming back, feels warm, or shows any burn marks, that’s when you call a licensed electrician. Same goes if you’re just not sure what you’re looking at.
Regular GFCI testing and weatherproof covers go a long way. A little seasonal maintenance keeps those outdoor outlets running when you actually need them.
FAQ
What to do if my outdoor outlet is not working?
If your outdoor outlet is not working, start by locating any GFCI outlets in your garage, bathroom, kitchen, or basement and press the RESET button until it clicks. If that doesn’t restore power, check your circuit breaker panel for a tripped breaker and reset it by flipping it fully off, then back on.
How do I reset an outdoor outlet?
You reset an outdoor outlet by finding the GFCI outlet that controls it, typically located in your garage, bathroom, kitchen, or basement. Press and hold the button labeled RESET until you hear or feel it click, then test your outdoor outlet to confirm power is restored.
Why do my outlets not work but the breaker isn’t tripped?
Your outlets may not work even when the breaker isn’t tripped because a GFCI outlet somewhere in your home has tripped, cutting power to multiple downstream outlets. One GFCI can control several outlets throughout your house, so check all GFCIs in your garage, bathrooms, kitchen, and basement first.
How much does it cost to fix an outdoor outlet?
Fixing an outdoor outlet typically costs between a service call diagnostic fee and full outlet replacement, depending on whether you need a simple GFCI reset, outlet replacement, or wiring repair. A licensed electrician can diagnose the issue and provide an accurate estimate based on the specific problem and any required code upgrades.
Can I replace an outdoor outlet myself?
You can safely reset GFCI outlets and circuit breakers yourself, but replacing the actual outlet or repairing wiring requires a licensed electrician. Any work involving wire connections, outlet replacement, or modifications to your electrical system poses fire and shock risks and may violate local electrical codes.
What causes outdoor outlets to fail more often than indoor outlets?
Outdoor outlets fail more frequently than indoor outlets because they’re exposed to rain, snow, humidity, temperature fluctuations, and physical wear that corrode wires and damage components over time. Moisture infiltration, especially when outlet covers are damaged or missing, creates short circuits and accelerates deterioration of internal connections.
How often should I test my outdoor GFCI outlets?
You should test your outdoor GFCI outlets monthly by pressing the TEST button to verify they trip properly, then pressing RESET to restore power. This simple routine helps catch failing GFCI outlets before they leave you without power when you need it most.
What are the warning signs of a damaged outdoor outlet?
Warning signs of a damaged outdoor outlet include scorch marks around the outlet face, discolored or melted plastic, a burning smell, warmth when touched, plugs that fall out easily, visible cracks in the housing, and outlets that won’t hold reset after a GFCI trip. Stop using the outlet immediately if you notice any of these signs.
Do all outdoor outlets need to be GFCI protected?
All outdoor outlets need to be GFCI protected according to current electrical code requirements, as these devices automatically shut off power when they detect ground faults or moisture exposure. If your outdoor outlets aren’t GFCI protected, upgrading them during repairs improves safety and brings your home up to current code standards.
What type of cover should I use for outdoor outlets?
You should use weather-resistant covers for all outdoor outlets, with in-use bubble covers recommended for outlets that stay plugged in year-round, like holiday lights or fountain pumps. Standard flat covers work for outlets used occasionally, but always keep covers closed when not in use to prevent moisture buildup.