

Ever pressed the reset button on your GFCI outlet and nothing happened? You’re pushing the button, maybe even holding it down for a few seconds, but the outlet stays dead. Before you assume the outlet’s broken, there’s a good chance you’re just missing one simple step. Most GFCI problems come down to tripped breakers, moisture, or a faulty appliance somewhere on the circuit. We’ll walk you through the exact checks to run, what each symptom means, and when it’s time to replace the outlet instead of resetting it.
Why Your GFCI Outlet Has Lost Power and How to Restore It

When your GFCI outlet stops working, it hasn’t failed. It tripped. GFCI outlets are safety devices that cut power automatically when they detect ground faults or current imbalances that could cause electric shock or fire. The outlet’s doing its job.
Before you touch the outlet itself, check your circuit breaker first. This is critical. A GFCI outlet can’t reset without power from the electrical panel. If the circuit breaker tripped and cut power to the outlet, pressing the reset button on the outlet won’t do anything. The outlet’s sitting there waiting for electricity to flow back in. Walk to your panel and check for tripped breakers before you try anything else.
The reset button on your GFCI outlet is usually red, positioned between two outlet slots. You’ll see it next to a black test button. When you press the reset button properly, you should hear a distinct click. That sound means the internal mechanism engaged and the outlet’s ready to supply power again. If the button pushes without clicking, or if it clicks but immediately pops back out, something else is going on.
Here’s the complete diagnostic procedure in order:
-
Check your electrical panel for tripped breakers. Look for switches in the OFF position or stuck between ON and OFF.
-
Reset any tripped breaker by pushing the switch all the way to OFF, then firmly back to ON. Listen for the click.
-
Unplug all appliances from the GFCI outlet and any other outlets connected to the same circuit.
-
Visually inspect the outlet for burn marks, charred areas on the cover plate, or cracks in the plastic housing.
-
Press the RESET button on the GFCI outlet until you hear it click into place.
-
Test the outlet by plugging in a small appliance like a phone charger or lamp to verify power is restored.
If you’ve completed all six steps and the outlet still won’t reset, or if it resets but immediately trips again, the outlet itself is likely faulty. Worn internal components, moisture trapped inside the box, or damage from repeated tripping can all prevent proper function. At that point, the outlet needs replacement.
Common Causes Behind GFCI Outlet Failures

GFCI outlets monitor the flow of electrical current between the hot and neutral wires. When they detect even a tiny difference, as small as 5 milliamps, they shut off power in a fraction of a second. That’s fast enough to prevent serious injury or fire.
Ground faults happen when the live wire touches the ground wire or makes contact with a grounded surface. Appliances with internal shorts create this condition. A frayed cord on a hair dryer, a power tool with damaged insulation, or a lamp with loose wiring inside can all send current where it shouldn’t go. The GFCI detects that misdirected current and trips. Worn insulation on plugs causes the same problem, especially on older extension cords that have been coiled and uncoiled hundreds of times.
Moisture is another frequent culprit. Water and electricity don’t mix, and GFCI outlets are extremely sensitive to moisture exposure. A splash of water near a bathroom outlet, condensation inside an outdoor box, or even plugging in an appliance with wet hands can trigger a trip. Dust and debris create similar issues over time. Fine particles settle inside the outlet box and create tiny pathways for current to leak. It’s not dramatic, but it’s enough to set off the sensor.
Aging and repeated stress eventually wear down the outlet’s internal components. Every time the outlet trips, mechanical parts inside move and reset. Do that enough times and springs weaken, contacts loosen, and the reset button stops engaging properly. If your outlet’s been tripping frequently for months or years, those internal mechanisms are under constant strain. At some point, they just stop working reliably.
Dealing with Downstream Outlets and Series Connections

A single GFCI outlet often protects multiple outlets downstream from it. That means one GFCI near your bathroom sink might also control the outlet by the tub and the one near the linen closet. They’re all on the same circuit, wired in series.
To figure out which outlets share the same circuit, plug a lamp into each outlet one at a time. Turn on the lamp and then trip the GFCI by pressing its test button. Any lamp that goes dark is connected downstream from that GFCI. You might be surprised how many outlets are linked. Once you know which outlets are connected, you can troubleshoot more effectively.
Here’s how to isolate the problem when a GFCI trips:
-
Unplug every device from the GFCI outlet and all downstream outlets on the same circuit.
-
Press the reset button on the GFCI outlet. If it clicks and stays, the outlet itself is fine.
-
Plug your devices back in one at a time, waiting 30 seconds between each one.
-
Whichever device causes the outlet to trip immediately is the source of your ground fault.
Hairdryers, power tools, and space heaters are common offenders. These appliances draw high current and generate heat, which stresses cords and internal wiring. A hairdryer that’s been dropped a few times might have a broken wire inside that only makes contact when you hold it at a certain angle. A circular saw with dust packed around the motor can create a short circuit when it heats up.
Extension cords and power strips add another layer of complexity. When you plug a power strip into a GFCI outlet and then connect multiple appliances to that strip, you might overload the circuit even though each individual device seems harmless. Plug appliances directly into wall outlets when possible, especially high draw items like microwaves and toasters.
Moisture Related GFCI Outlet Problems and Solutions

GFCI outlets treat moisture as an immediate threat. They’re designed that way on purpose. Building codes require GFCI protection near sinks, bathtubs, and any location within six feet of a water source.
Moisture problems show up most often in bathrooms, kitchens, outdoor outlets, and garage circuits. After a rainstorm, outdoor outlets may refuse to reset even though everything looks dry on the surface. Water can seep behind the cover plate and sit inside the outlet box for hours. In bathrooms, steam from hot showers condenses on cool surfaces, including the inside of outlet boxes mounted on exterior walls. Kitchens see splashes from sinks and dishwashers. Even a small amount of water creates enough current leakage to keep the GFCI tripped.
If moisture’s preventing your outlet from resetting, here’s how to dry it safely:
- Unplug everything and leave the outlet alone for 24 hours to air dry naturally in a well ventilated space
- Use a hairdryer on the cool or low setting to blow air across the faceplate, holding it about 12 inches away
- Never stick anything into the outlet slots while attempting to dry them
- Don’t use heat settings on the hairdryer, as excessive heat can damage plastic components
- Keep the hairdryer moving and avoid concentrating air flow on one spot for more than a few seconds
After drying, wait 30 minutes before attempting to reset the outlet. If it still won’t reset, moisture may have penetrated deeper into the wiring connections inside the box, and the outlet needs more time or professional attention.
When the GFCI Reset Button Won’t Push or Stay In

Sometimes the reset button physically fails. You press it and nothing happens. Or it pushes in but immediately pops back out. Or it won’t move at all, like it’s glued in place.
When the reset button won’t depress no matter how hard you push, the internal mechanism has likely seized. This happens after years of exposure to temperature changes, humidity, and vibration. The small spring and lever inside the outlet corrode or bind up. You’re not doing anything wrong. The button’s actually stuck.
If the button pushes in but won’t stay engaged, that means the outlet’s detecting a fault condition and refusing to reset. It’s trying to tell you something’s still wrong with the circuit. Maybe an appliance is still plugged in downstream, or moisture is still present, or the outlet itself has internal damage. The button pops back out because the safety mechanism won’t allow power to flow when it senses a problem.
A stuck test button is less common but equally frustrating. The test button should press in easily and pop back out when you release it. If it stays depressed or feels crunchy when you push it, the internal components have degraded. Some outlets also have a red indicator light that stays on even after you attempt a reset. That light’s telling you the outlet has failed its self check and needs replacement.
When mechanical button failures occur, especially combined with any burning smell, warm faceplate, or buzzing sound, stop using the outlet immediately. Those symptoms point to internal damage that gets worse the longer the outlet remains in service. Replacement is necessary, and continued use creates fire risk.
Inspecting for Visible Damage and Wiring Issues
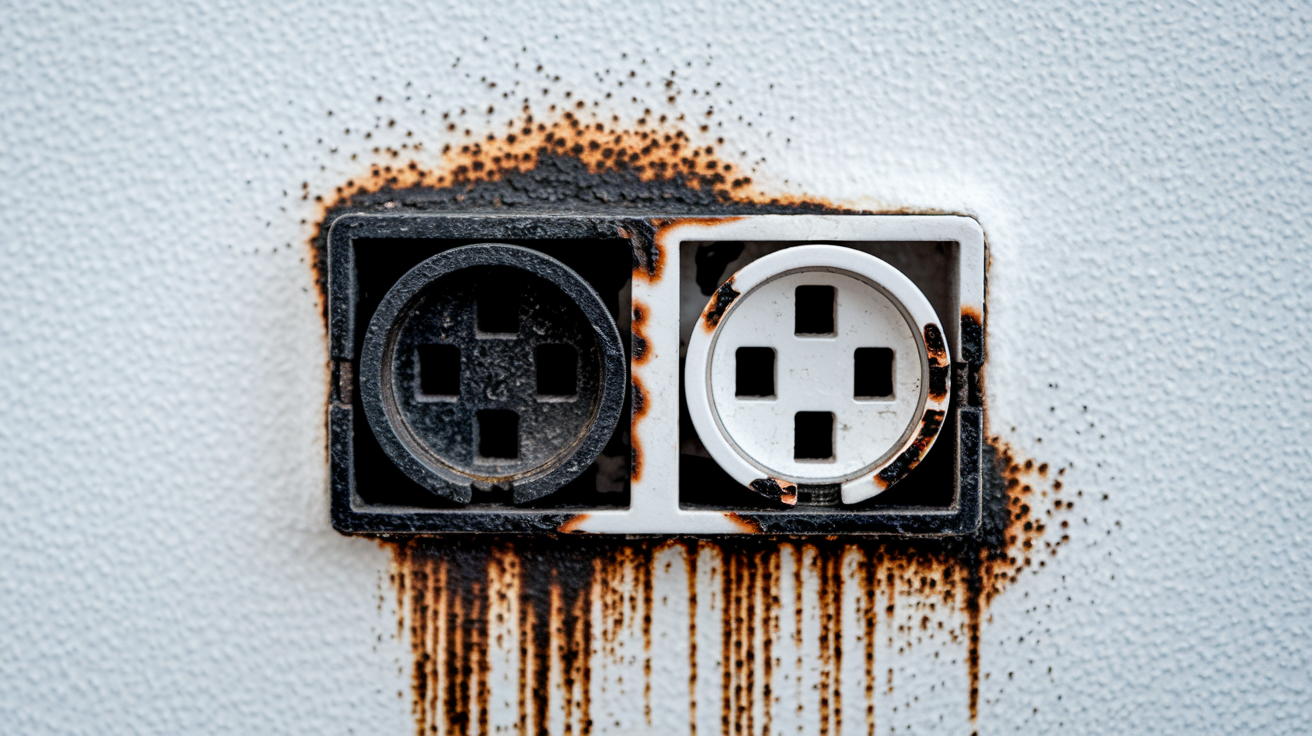
Before you attempt any reset or troubleshooting, take a close look at the outlet itself with the power on (but nothing plugged in). You’re looking for warning signs that something went seriously wrong.
Visual indicators that require immediate professional replacement:
- Black or brown burn marks around the outlet slots
- Melted or deformed plastic on the outlet face or cover plate
- Discoloration or charring on the wall surrounding the outlet
- Cracks in the outlet body or cover plate
- Scorch marks on plugs that were recently used in the outlet
- A persistent burning smell near the outlet even when nothing’s plugged in
Burn marks and melted plastic indicate arcing or excessive heat buildup. Arcing happens when electricity jumps across a gap, usually because of loose wire connections or damaged contacts inside the outlet. That creates intense, localized heat. Repeated arcing degrades the plastic housing and metal components. The outlet might still work intermittently, but it’s compromised. Each time you plug something in, you risk a more serious arc that could ignite surrounding materials.
Discoloration around the outlet tells a similar story. Outlets get warm during normal use, but they should never get hot enough to change the color of paint or wallboard. If you see yellowing, browning, or heat damage on the wall, that outlet’s been running too hot for too long. The wiring connections inside might be loose, the circuit might be overloaded, or the outlet itself might be failing. Continuing to use a damaged outlet like this is how electrical fires start. If you see any of these signs, turn off the breaker to that circuit and call for replacement.
How to Replace a Faulty GFCI Outlet Safely

Turn off power to the outlet at your circuit breaker before you start. Not just unplugging everything, actually flip the breaker to OFF. Use a non contact voltage tester to confirm the outlet is dead before you touch any wires. Test both outlet slots and verify zero voltage.
You’ll need a few basic tools: a screwdriver (usually flathead and Phillips), wire strippers, needle nose pliers, and a voltage tester. Pick up a new GFCI outlet that matches the amperage rating of your circuit (15 amp or 20 amp). Most residential circuits use 15 amp outlets.
Complete replacement steps:
-
Remove the cover plate by unscrewing the single screw in the center.
-
Unscrew the two screws holding the outlet to the electrical box and carefully pull the outlet straight out, exposing the wired connections.
-
Take a photo of the existing wire connections before disconnecting anything so you have a reference.
-
Note which wires connect to LINE terminals (these bring power into the outlet from the breaker) and which connect to LOAD terminals (these carry power to downstream outlets). LINE terminals are usually marked with tape by the installer.
-
Disconnect the wires by loosening the terminal screws. You’ll typically find a black hot wire, a white neutral wire, and a bare copper or green ground wire.
-
Connect the wires to your new GFCI outlet, matching LINE to LINE and LOAD to LOAD. The hot wire connects to the brass terminal, neutral to the silver terminal, and ground to the green screw.
-
Carefully fold the wires back into the box and push the outlet in, making sure no wire insulation gets pinched. Screw the outlet to the box with the mounting screws.
-
Attach the cover plate, turn the breaker back ON, and press the reset button on the new outlet. Test it with an appliance, then press the test button to verify the outlet trips properly.
If you’re replacing an outlet and discover damaged drywall around the electrical box or need to patch holes from previous outlet work, that’s a separate but manageable fix. You can find guidance on drywall repair and patching to restore the wall surface before installing your new cover plate.
After installation, press the test button. The outlet should trip and cut power immediately. Press reset and power should return. That confirms the GFCI is functioning correctly. If the outlet won’t reset or doesn’t trip when you press test, recheck your wire connections, especially LINE versus LOAD placement.
Understanding GFCI Outlet Specifications and Code Requirements
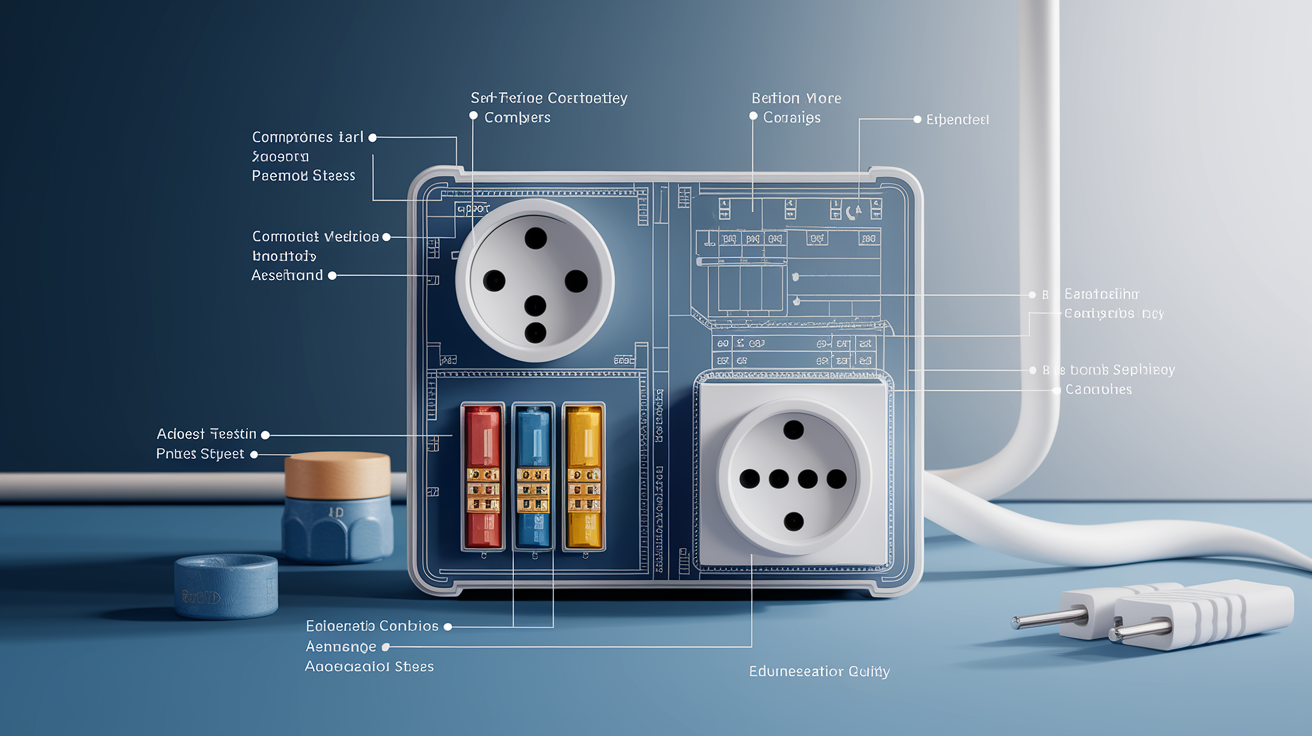
Building codes require GFCI protection in specific locations throughout your home. Bathrooms need GFCI outlets for all receptacles. Kitchens require them for countertop outlets within six feet of the sink. Garages, unfinished basements, crawl spaces, and all outdoor outlets need GFCI protection. Laundry areas and utility sinks also fall under these requirements.
Amperage ratings matter when selecting a replacement outlet. Your circuit is either 15 amp or 20 amp, and the outlet must match or exceed that rating. A 20 amp outlet has a T shaped slot on one side and can handle higher power loads. Most bathroom and kitchen circuits run at 20 amps because they supply power to high draw appliances. Standard bedroom and living room circuits typically run at 15 amps. Check your existing outlet or the circuit breaker label to confirm the amperage before buying a replacement.
Modern GFCI outlets include additional safety features beyond basic ground fault protection. Tamper resistant outlets have spring loaded shutters that block foreign objects from entering the slots. If you have young children, tamper resistant models add a layer of protection against curious fingers and metal objects. Weather resistant GFCI outlets have sealed components and corrosion resistant materials designed for outdoor use and damp locations. These cost slightly more but last longer in harsh conditions. Newer self test GFCI outlets automatically check their own functionality every few seconds and alert you with an indicator light if they fail the test.
Staying current with code requirements protects your home value and insurance coverage. If you’re replacing outlets in an older home, upgrading to current code GFCI outlets in required locations makes sense even if the existing outlets still work. It’s a worthwhile investment in safety and compliance.
When to Call a Licensed Electrician for GFCI Problems

Some electrical work falls outside safe DIY territory. Replacing a single GFCI outlet is usually manageable if you’re comfortable turning off breakers and following instructions. Beyond that, professional help makes sense.
Situations requiring professional electrical assistance:
- Multiple GFCI outlets tripping simultaneously on different circuits
- Outlets that spark or arc when you plug in appliances
- GFCI outlets that feel warm or hot to the touch even when not in use
- Repeated tripping with no identifiable faulty appliance or moisture source
- Burn marks, melted components, or any burning smell near outlets
- Uncertainty about which wires connect to LINE versus LOAD terminals
- Older homes with aluminum wiring or ungrounded two prong outlets
Electricians carry liability insurance, understand local code requirements, and have tools to diagnose problems you can’t easily see. A licensed electrician can test your home’s grounding system, measure circuit loads, identify backstabbed wire connections that create intermittent faults, and trace downstream wiring through walls and attics. That diagnostic capability alone often justifies the service call cost.
Professional GFCI outlet replacement typically costs $100 to $200 per outlet, including labor and materials. That covers proper installation, code compliance, and a warranty on the work. If your troubleshooting hits a wall and you’ve already spent time and money on DIY attempts, calling a pro often ends up being the faster and more cost effective solution.
Safety and liability considerations matter here. Insurance companies can deny claims if faulty DIY electrical work contributed to a fire or injury. Homebuyers can request electrical inspections that reveal non compliant work, creating issues during sale. For peace of mind and protection, Home Recovery Pro and similar professional services handle electrical repairs that exceed comfortable DIY scope. When you’re uncertain about a repair or the problem keeps coming back, professional assessment makes sense.
Preventing Future GFCI Outlet Problems
Regular testing catches problems before they become failures. GFCI outlets need monthly testing to verify they’re working correctly. It takes 30 seconds.
Press the test button once a month. The outlet should immediately cut power and you should hear a click. The reset button will pop out. Press the reset button and power returns. That simple test confirms the internal sensor is functioning. If the outlet doesn’t trip when you press test, or if it won’t reset after tripping, the outlet needs replacement. Don’t wait for it to fail completely.
Early warning signs tell you an outlet’s aging out. If your GFCI trips more frequently than it used to, even when you haven’t changed what you plug into it, the internal components are getting sensitive. Repeated trips stress the mechanism and accelerate wear. If the reset button feels mushy instead of clicking firmly, or if you have to press it multiple times before it engages, the spring mechanism is weakening. If the outlet body feels loose in the wall box or the faceplate has hairline cracks, physical deterioration is underway.
GFCI outlets typically last 10 to 15 years under normal use. Outlets in damp locations or high traffic areas wear out faster. If your home still has the original GFCI outlets from 15 years ago and they’ve never been replaced, plan for proactive replacement soon. Keep a record of installation dates for all GFCI outlets in your home. Mark the date on the back of the cover plate with a permanent marker or keep a maintenance log. That helps you track lifespan and schedule replacements before failures happen at inconvenient times.
Final Words
A GFCI outlet not working usually points to a tripped circuit breaker or a safety trip from moisture, a faulty appliance, or internal wear. The fix often starts at your electrical panel, not the outlet itself.
Walk through the reset sequence, check downstream outlets, and give moisture time to dry if that’s the issue. If you see burn marks, stuck buttons, or the outlet won’t hold a reset, it’s time for replacement.
Most of these problems are straightforward once you know what to look for. And when something feels off or keeps happening, bring in a licensed electrician to keep your home safe.
FAQ
How do you fix a GFCI outlet that won’t reset?
A GFCI outlet that won’t reset usually needs power from the electrical panel first. Check for tripped circuit breakers, reset them fully to the ON position, then unplug all devices from the outlet. Press the RESET button until you hear a click to restore function.
Why is my GFCI outlet not working but the breaker is not tripped?
A GFCI outlet not working when the breaker appears fine often means moisture inside the outlet box, a faulty appliance creating a ground fault, or internal outlet damage. Unplug all devices, allow time for any moisture to dry, then try resetting the outlet.
Why is my GFCI outlet not getting power?
A GFCI outlet not getting power typically results from a tripped circuit breaker that hasn’t fully switched positions. Reset the breaker by moving it all the way to OFF, then firmly back to ON. Listen for the click that confirms proper reset.
What is the life expectancy of a GFCI outlet?
The life expectancy of a GFCI outlet ranges from 10 to 15 years under normal conditions. Frequent tripping, moisture exposure, and high electrical loads can shorten this lifespan. Test monthly and replace outlets showing signs of wear, damage, or repeated failures.
Can moisture cause a GFCI outlet to stop working?
Moisture can cause a GFCI outlet to stop working because these outlets detect even tiny amounts of current leakage as safety protection. Bathrooms, kitchens, and outdoor locations experience this most often. Allow complete drying time or use a hairdryer on cool, low setting before attempting reset.
How do you test if a GFCI outlet is working properly?
You test if a GFCI outlet is working properly by pressing the TEST button, which should immediately cut power and cause the RESET button to pop out. Plug in a lamp or small appliance, press TEST, and confirm the device turns off. Then press RESET to restore power.
What does it mean when the GFCI reset button won’t stay in?
When the GFCI reset button won’t stay in, the outlet detects an ongoing ground fault or the internal mechanism has failed. Check for moisture, unplug all devices, and try again after several hours. If the button still won’t engage, the outlet needs replacement.
Can one GFCI outlet protect multiple outlets?
One GFCI outlet can protect multiple downstream outlets connected on the same circuit. When the GFCI trips, all connected outlets lose power. To identify which outlets share protection, reset the GFCI and test each outlet with a small lamp or device.
What appliances commonly cause GFCI outlets to trip?
Appliances that commonly cause GFCI outlets to trip include hairdryers, power tools, space heaters, and kitchen appliances with worn cords or internal shorts. Devices with motors or heating elements create more opportunity for ground faults. Unplug and test each device individually to identify the problem.
When should you replace a GFCI outlet instead of resetting it?
You should replace a GFCI outlet instead of resetting it when you see burn marks, melted plastic, cracks, or charring on the faceplate. Outlets that trip repeatedly without cause, won’t reset after troubleshooting, or are over 10 years old also need replacement.
Do GFCI outlets need special wiring?
GFCI outlets need proper connection to LINE terminals for incoming power and optionally LOAD terminals for protecting downstream outlets. The hot, neutral, and ground wires must connect to the correct terminals. Incorrect wiring prevents the outlet from functioning or providing downstream protection.
Are GFCI outlets required in all bathrooms and kitchens?
GFCI outlets are required by building codes in bathrooms, kitchens, garages, outdoor areas, and within six feet of sinks or water sources. These requirements protect against shock hazards in wet locations. Local codes may have additional requirements for GFCI protection throughout the home.