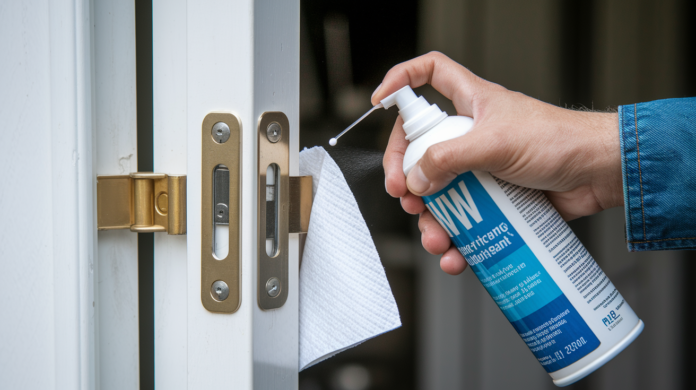

That squeaky door isn’t just annoying. It’s a sign your hinges need about three minutes of attention and a couple dollars’ worth of lubricant. Most people live with the noise for months, but the fix is faster than finding your keys. We’ll show you exactly how to quiet that squeak using tools you already have, plus which lubricants actually last and which ones just buy you a week of peace before the noise comes back.
The Fastest Ways to Silence a Squeaky Door

Most squeaky doors come from friction in the hinges. The metal parts rub together without enough lubrication, creating that annoying sound every time you open or close the door. Good news? You can fix it in minutes with a quick application of the right lubricant.
The basic fix involves three simple steps. First, identify which hinge is squeaking by slowly opening and closing the door while listening carefully. Second, apply lubricant directly to the hinge pin and the barrel where the pin sits. Third, work the door back and forth several times to spread the lubricant inside the hinge mechanism. That’s it for most squeaky doors.
Here’s the fastest five step process:
- Open the door fully and place a paper towel or old rag on the floor beneath the hinge
- Position the lubricant applicator about one inch away from the top of the hinge pin
- Spray or apply lubricant in short bursts along the hinge pin and into the seams where the hinge barrel meets the pin
- Swing the door slowly back and forth 5 to 10 times to work the lubricant into all the moving parts
- Wipe away any excess drips with a clean cloth to prevent dust buildup or staining
If the squeak continues after lubrication, you’re likely dealing with loose screws, misaligned hinges, or the door rubbing against the frame. Those fixes take a bit more work, but we’ll walk through each one so you know exactly what to check and how to address it.
Identifying Which Hinge Is Causing the Squeak

Before you start spraying lubricant everywhere, spend 30 seconds figuring out which hinge actually needs attention. Most doors have three hinges, but usually only one or two are squeaking. Treating only the problem areas saves you time and keeps your repair clean.
Here’s the five step diagnostic process:
- Stand next to the door and slowly swing it open about halfway while listening closely to each hinge
- Close the door slowly and listen again, noting whether the squeak happens during opening, closing, or both
- Have someone else move the door while you crouch down and watch each hinge, looking for visible movement or gaps
- Mark the squeaking hinge with a small piece of painter’s tape or a pencil mark on the door frame
- Test each hinge individually by pressing on the door at different heights to see if pressure changes the noise
Different squeak patterns tell you different things.
Top hinge only usually means that hinge carries the most weight and needs lubrication or the screws have loosened. Bottom hinge only often indicates the door is sagging slightly or that hinge is taking uneven pressure. All hinges squeak points to general lack of lubrication or humidity changes affecting the entire door. Squeak only when closing suggests alignment issues or the door rubbing against the frame rather than just dry hinges.
When you only hear squeaking during the closing motion, that’s your hint that something beyond simple lubrication might be going on. The door could be catching on the frame or the hinges might be slightly out of position.
Tools and Materials Needed for Door Squeak Repair

Get everything together before you start. Having it all within reach means you won’t be making trips to the garage halfway through the job.
Essential tools you’ll need:
Flathead screwdriver for tapping hinge pins upward. Phillips or flathead screwdriver matching your hinge screws. Small hammer for gentle tapping on stubborn hinge pins. Needle nose pliers to grip and pull hinge pins if needed. Paper towels or old rags to catch drips and wipe excess lubricant. Optional: utility knife or small putty knife for prying stuck pins. Optional: step stool or small ladder if top hinge is out of reach. Optional: steel wool or wire brush if hinges are rusty or dirty.
Lubricant options from most effective to household alternatives:
Silicone spray lubricant gives you the best long term solution and won’t attract dust. White lithium grease works great for high use doors and resists weather. WD-40 works quickly but it’s temporary and needs reapplication every few months. Graphite powder is a dry lubricant that won’t attract dirt, though it’s messy to apply. 3 in 1 household oil is a decent middle ground and lasts several months. Petroleum jelly requires pin removal, it’s sticky but effective short term. Bar soap you can rub directly on the hinge for an emergency fix only. Olive oil or vegetable oil is last resort, it attracts dust and can turn sticky.
Most door squeak repairs cost under 10 dollars total. A can of WD-40 runs about 5 to 8 dollars at any hardware store, while silicone spray costs 6 to 10 dollars and lasts for multiple doors. The actual work takes 10 to 15 minutes, even if you’re being thorough and doing all three hinges. If you’ve got the tools already, you’re just paying for lubricant.
How to Lubricate Door Hinges

Silicone spray gives you the longest lasting fix. It doesn’t attract dust the way oil based products do, and it won’t dry out or get sticky over time. White lithium grease runs a close second, especially for exterior doors that see weather and temperature swings.
| Lubricant Type | Effectiveness | Longevity | Best Use Case |
|---|---|---|---|
| Silicone Spray | Excellent | 12 to 18 months | All interior and exterior doors, won’t attract dust |
| White Lithium Grease | Excellent | 12 to 24 months | Heavy doors, high use doors, weather exposed hinges |
| WD-40 | Good | 2 to 4 months | Quick fixes, temporary solution, readily available |
| Graphite Powder | Good | 6 to 12 months | Locks and hinges where you want dry lubrication |
| 3-in-1 Oil | Moderate | 3 to 6 months | Light duty interior doors, occasional use doors |
| Petroleum Jelly | Moderate | 2 to 4 months | Emergency fix when you have nothing else available |
| Bar Soap | Fair | 2 to 6 weeks | Temporary fix, guest arrives in 5 minutes situations |
| Olive Oil | Fair | 1 to 3 weeks | Absolute emergency only, will attract dust and grime |
Silicone spray and white lithium grease work better because they’re designed to handle pressure and movement without breaking down. They create a protective barrier that resists moisture, doesn’t evaporate quickly, and stays slippery even after months of door swings. Both are weather resistant, so they work equally well on front doors that see rain and temperature changes as they do on interior bedroom doors.
Household alternatives like bar soap, petroleum jelly, and olive oil can get you through in a pinch. Bar soap rubbed directly on the hinge barrel provides immediate relief, even if it’s short lived. Petroleum jelly works decently if you remove the hinge pin, coat it generously, and reinsert it. Olive oil applied with a cotton swab will quiet the squeak for a week or two. The problem with all household products is they attract dirt and dust, which eventually makes the squeaking worse than before. Keep the application concentrated on the hinge parts and avoid getting it on the door surface where it creates a sticky mess.
Cleaning Rusty or Dirty Hinges Before Applying Lubricant
Rust, corrosion, and built up grime prevent lubricant from reaching the metal surfaces that need it. If you spray lubricant onto a rusty hinge without cleaning it first, you’re just coating the dirt. The squeak might quiet down for a day or two, then come right back.
Five step cleaning process for rusty or dirty hinges:
- Remove the hinge pin by tapping it upward with a flathead screwdriver and hammer
- Scrub the pin with steel wool or a wire brush until you see clean metal
- Wipe down the hinge plates (the parts attached to the door and frame) with a damp cloth to remove surface grime
- Dry everything thoroughly with a clean rag or paper towel
- Inspect the pin and hinge barrel for pitting, cracks, or severe damage
A simple dish soap and water solution handles most dirt buildup. For rust, white vinegar works surprisingly well. Soak the hinge pin in vinegar for 10 to 15 minutes, then scrub with steel wool. Avoid harsh chemical cleaners that can damage the hinge finish or leave residue that interferes with lubrication.
If the hinge is so rusted that the metal is flaking apart or the pin won’t turn smoothly even after cleaning, you’re past the point where lubrication helps. Replace those hinges instead of trying to rehabilitate them.
Lubricating Without Removing the Hinge Pin
This method works for hinges in decent shape that just need fresh lubrication:
- Open the door fully so you have clear access to all the hinges
- Place a paper towel on the floor directly beneath the hinge you’re treating
- Hold the lubricant can or applicator about one inch away from the top of the hinge pin
- Apply lubricant in short 1 to 2 second bursts along the pin and into the seams where the barrel meets the pin
- Swing the door slowly back and forth 5 to 10 times to work the lubricant into all the moving parts
- Wipe away any excess drips or overspray with a damp cloth
This approach takes about 2 minutes per hinge. It’s clean, fast, and handles most squeaky door situations. The lubricant works its way down into the hinge barrel through gravity and the pumping action of opening and closing the door.
Lubricating with Hinge Pin Removed
For stubborn squeaks or hinges that haven’t been maintained in years, removing the pin gives you better access:
- Place a flathead screwdriver at the bottom of the hinge pin and tap upward gently with a hammer until the pin head rises
- Grip the pin head with pliers or your fingers and pull it straight out
- Clean the pin thoroughly with steel wool, a wire brush, or a rag to remove old lubricant and grime
- Apply your chosen lubricant generously along the entire length of the pin
- Coat the inside of the hinge barrel by spraying or applying lubricant directly into the opening
- Reinsert the pin by aligning it with the barrel and tapping it down with a hammer until it’s flush
- Swing the door several times to distribute the lubricant
After you’ve treated all the squeaking hinges, test the door through its full range of motion. Open it slowly, close it slowly, and open it quickly like someone’s in a hurry. If you still hear noise, move on to the mechanical adjustment steps because the problem isn’t just lubrication.
Fixing Squeaky Doors Through Mechanical Adjustments

Loose screws and misaligned hinges create movement between the hinge plate and the wood it’s attached to. Every time the door swings, those loose parts shift slightly and rub against each other. That friction produces the squeak, and no amount of lubricant will fix it because the problem isn’t dry metal, it’s unstable mounting.
Tightening Loose Hinge Screws
Four step process for inspecting and tightening hinge screws:
- Open the door fully and examine each screw in all three hinges, looking for any that sit above the surface of the hinge plate
- Use a screwdriver that fits the screw head properly (too small and you’ll strip it, too big and you’ll mar the hinge)
- Tighten each screw firmly but stop when you feel solid resistance, over tightening can strip the screw hole in the wood
- Test the door after tightening each hinge to see if the squeak disappears
Sometimes you’ll tighten a screw and it just keeps spinning without grabbing. That’s a stripped screw hole. The wood fibers have compressed or broken away, leaving nothing for the screw threads to grip. Here’s the fix: remove the screw completely, break off 2 to 3 wooden toothpicks and dip them in wood glue, then insert them into the stripped hole. Break the toothpicks off flush with the surface. Let the glue dry for an hour. The toothpicks give the screw threads something solid to bite into again. Re-drive the screw and it’ll hold tight.
When multiple screws on the same hinge won’t hold even after the toothpick repair, the hinge itself is likely damaged or the screw holes are so enlarged that a simple fix won’t work. That’s your signal to replace the hinge entirely rather than fighting with temporary repairs that’ll fail again in a few weeks.
Correcting Door Misalignment
Doors sag over time, especially heavy solid core doors. The weight pulls down on the hinges, the house settles slightly, and suddenly the door isn’t hanging square in the frame anymore. When it swings, the edge rubs against the frame at the top or bottom. That rubbing creates friction, and friction creates squeaks.
Visual signs of misalignment: you’ll see an uneven gap around the door when it’s closed (wider at the top than the bottom, or vice versa), the door rubs or sticks when you open or close it, or it doesn’t latch smoothly without a push. Those are all hints that the door has shifted out of position.
Six step process for realigning a misaligned door:
- Check and tighten all hinge screws first, since loose hardware is often the root cause of sagging
- Look for screws in the door frame itself (the jamb) that have loosened, especially on older doors
- Cut thin cardboard shims (like from a cereal box) into small rectangles about 1 inch by 2 inches
- Loosen the hinge screws on the side where the door is rubbing (usually top or bottom hinge)
- Slide one or two cardboard shims behind the hinge plate to angle the door away from the rubbing point
- Tighten the screws firmly and test the door swing, adding or removing shims until the door moves freely without rubbing
When the door is sagging significantly (half an inch or more out of square), or when the gap is very uneven all the way around, you might be looking at a structural issue. Foundation settling, framing movement, or a frame that was never installed square in the first place. Those situations need professional assessment because adjusting the hinges won’t solve the underlying problem.
Troubleshooting: Why Your Door Still Squeaks After Lubrication

Sometimes you do everything right, you lubricate the hinges properly, the door still squeaks.
Seven alternative squeak sources with diagnostic checks:
Wrong lubricant for the situation. If you used WD-40 or oil on an exterior door exposed to temperature swings, it may have dried out already or attracted so much dust it’s causing more friction than it’s preventing. Try silicone spray or white lithium grease instead.
Squeak is from the door rubbing the frame, not the hinges. Close the door slowly while watching the gap all the way around. If you see the door edge touching the frame at any point, that’s your squeak source. Sand or plane that contact area.
Doorknob or latch hardware is squeaking. Remove the doorknob assembly temporarily and test the door. If the squeak disappears, lubricate the latch mechanism or replace worn doorknob components.
Weatherstripping is rubbing and creating friction. Worn or improperly installed weatherstripping can drag against the door edge. Check for compressed, torn, or misaligned strips and replace them.
Door bottom is scraping the floor or threshold. Open the door and look underneath. If there are scuff marks on the bottom edge or the threshold, the door is hanging too low. Adjust the hinges or trim the bottom edge.
Strike plate is loose and rattling. The strike plate (the metal piece on the door frame where the latch fits) can work loose over time. Tighten those screws or shim behind the plate if needed.
Foundation settling causing frame distortion. If multiple doors in your home are suddenly squeaking or sticking, especially after construction nearby or seasonal ground movement, the door frames may be shifting. Look for cracks in walls or uneven floors as additional clues.
You can test each potential source by isolating the movement. Take the doorknob off completely and test the door. If the squeak continues, it’s not the knob. Adjust the strike plate and test again. Work through each possibility until you find the actual cause.
Complex issues like a door frame that’s twisted or out of square because the house has settled need more than DIY fixes. If the door frame itself has shifted to the point where the door can’t hang properly no matter how you adjust the hinges, that’s a job for a carpenter who can assess the framing and make structural corrections.
When Door Warping and Humidity Create Squeaks

Wood doors expand when humidity rises and contract when the air dries out. That seasonal movement is normal, but it can create squeaks that come and go depending on the weather. In summer, the door swells slightly and suddenly rubs against the frame in spots where it used to clear with room to spare. In winter, the wood contracts and the hinge screws loosen as the wood pulls away.
The relationship between humidity and squeaking works like this: as wood absorbs moisture from humid air, it swells across the grain. A door that fit perfectly in February might be tight in August because it’s absorbed enough moisture to expand by 1/8 inch or more. That creates new friction points where the door edge rubs the frame. Those friction points squeak even if the hinges themselves are perfectly lubricated.
Check and replace worn weatherstripping first. Old weatherstripping compresses unevenly and creates drag points where the door rubs during opening and closing. New weatherstripping provides a consistent seal without friction. For spots where the door is rubbing the frame, you’ll need to sand those high points. Remove the door, identify where it’s making contact (you’ll see shiny spots or scuff marks on the door edge), and sand those areas lightly with 120 grit sandpaper. For more significant rubbing, use a hand plane to shave off a thin layer of wood. Exterior doors need proper sealing after any sanding or planing, hit those raw wood edges with exterior paint or sealant to prevent moisture absorption.
Some seasonal squeaking is normal and will quiet down when humidity levels shift with the seasons. If the squeak only happens in July and August when humidity peaks, you might choose to just lubricate the hinges during that time rather than modify the door. But persistent rubbing that’s creating deep wear marks or preventing the door from closing properly? That needs intervention now, before the constant friction damages the door edge or frame.
Replacing Worn or Damaged Door Hinges Permanently
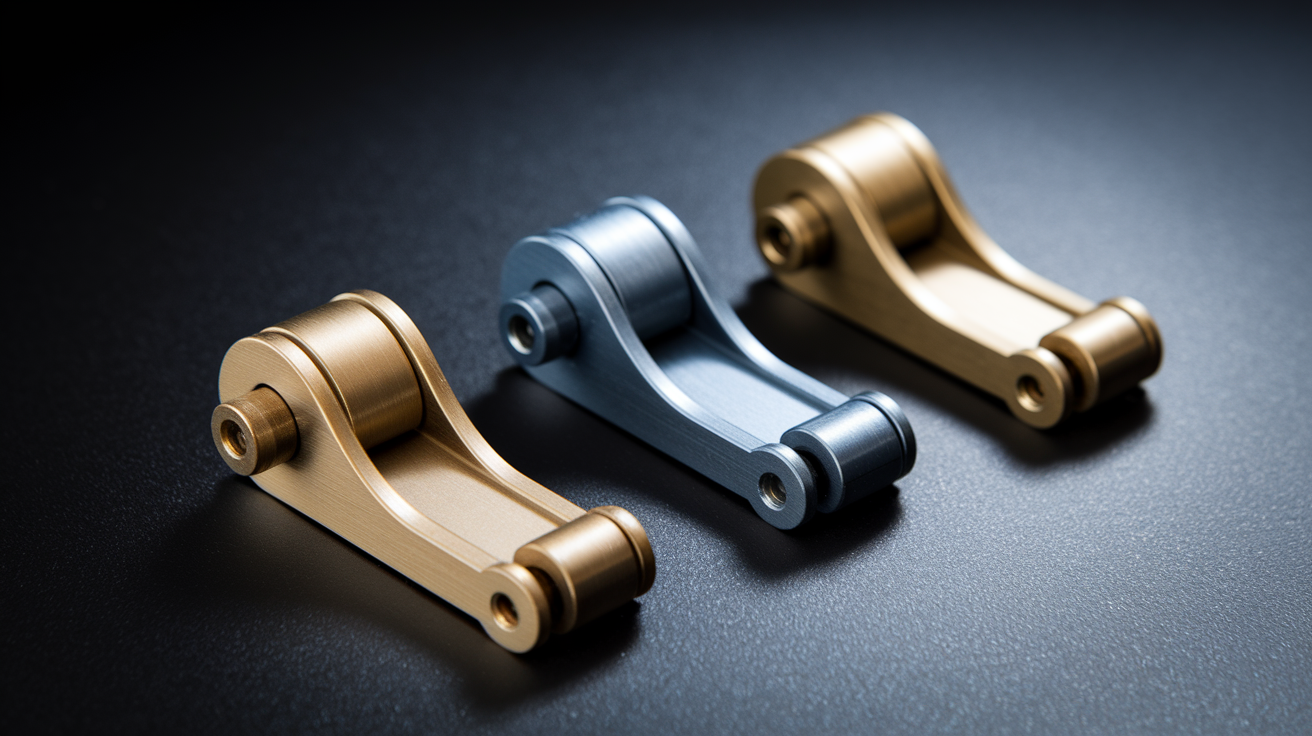
Signs that hinges are beyond repair: severe rust that’s eaten into the metal and created pitting, bent hinge plates that no longer sit flat against the door or frame, stripped screw holes that won’t hold screws even after repair attempts, visible cracks in the hinge barrel, or the hinge pin that’s worn so thin it rattles inside the barrel. When you see any of those conditions, replacement is your best move.
Six hinge types and their specific benefits:
Standard butt hinges are basic residential hinges for interior doors, lightweight and inexpensive, work for most bedroom and closet doors. Ball bearing hinges contain ball bearings between the hinge knuckles for smooth operation, best for heavy solid core doors or high traffic areas, reduce squeaking through better mechanical design. Spring loaded hinges have a self closing mechanism built in, common for screen doors and doors that need to close automatically, require specific installation. Continuous (piano) hinges run the entire length of the door, distribute weight evenly, used for heavy cabinet doors or specialty applications. Nylon bushing hinges have plastic bushings inside the hinge barrel that eliminate metal on metal contact, naturally quiet operation, great for bedroom and bathroom doors where noise is a concern. Decorative hinges come in various finishes and styles to match door hardware, same mechanical function as standard butt hinges but with aesthetic considerations.
Seven step hinge replacement process:
- Measure your existing hinge dimensions (typical residential sizes are 3.5 inches by 3.5 inches or 4 inches by 4 inches)
- Purchase matching replacement hinges at a hardware store (expect to pay 16.99 to 19.99 dollars per hinge depending on size and finish)
- Remove the old hinge from the door first, keeping the door supported or having someone hold it
- Remove the old hinge from the frame
- Clean the mortise area (the recessed area where the hinge sits) with a damp cloth to remove old paint or debris
- Install the new hinge by positioning it in the mortise and driving the screws that came with the new hinge
- Check that the door swings freely and closes properly before moving to the next hinge
Replace one hinge at a time. Never remove all the hinges at once, or the door becomes awkward to handle and you lose the reference positioning. Work from top to bottom: replace the top hinge, test the door, then move to the middle hinge, test again, then finish with the bottom hinge.
Match the new hinge finish to your existing door hardware. If your doorknobs and deadbolts are oil rubbed bronze, get hinges in the same finish. Mismatched hardware looks unfinished even after a perfect mechanical installation. Most manufacturers offer hinges in standard finishes: satin nickel, oil rubbed bronze, antique brass, matte black, and polished chrome.
Preventing Future Door Squeaks Through Regular Maintenance
Preventive maintenance is easier than reactive repairs. Spending five minutes once a year on each door keeps squeaks from developing in the first place.
Five item annual door maintenance schedule:
Lubricate hinges every 6 to 12 months. Quick spray of silicone lubricant or white lithium grease on each hinge, work the door back and forth a few times, wipe excess.
Check and tighten screws annually. Quick pass with a screwdriver to snug up any hinge screws or hardware screws that have loosened from vibration and use.
Inspect weatherstripping each season. Look for compressed sections, tears, or gaps where weatherstripping has pulled away from the door or frame.
Clean hinges when visibly dirty. Wipe down hinge plates with a damp cloth when you notice dust buildup or grime, prevents contamination of lubricant.
Check door alignment after any settling or nearby construction. After earthquakes, major construction, or noticeable settling, verify doors still swing freely and close properly.
High use doors need more frequent attention. Your front door that opens 20 to 30 times a day sees more wear than a guest bedroom door that opens twice a month. Bathroom doors, especially in family bathrooms, get constant use and humidity exposure. Lubricate those every 6 months instead of annually. Bedroom doors in kids’ rooms and primary bedrooms also benefit from twice yearly maintenance since they’re used multiple times daily.
Five minutes of annual maintenance prevents most squeaking problems. If you establish a routine of checking all your doors during spring cleaning or when you change the clocks for daylight saving time, you’ll catch small issues before they become annoying squeaks. A quick tightening of loose screws, a spray of silicone, and a visual check of the door alignment keeps everything running quietly. For more complete guidance on maintaining various home components, check out our door and window maintenance tips.
DIY Door Squeak Repair vs. Professional Help

Ninety percent of squeaky doors can be fixed DIY in under 20 minutes. You don’t need special skills, just basic tools and the willingness to spend a few minutes diagnosing and fixing the problem.
| Issue Type | DIY Difficulty | Time Required | Cost Estimate |
|---|---|---|---|
| Basic hinge lubrication | Very Easy | 5 to 10 minutes | 5 to 10 dollars for lubricant |
| Tightening loose screws | Very Easy | 10 to 15 minutes | 0 dollars (tools you have) |
| Replacing worn hinges | Easy | 30 to 45 minutes per door | 17 to 20 dollars per hinge |
| Fixing stripped screw holes | Moderate | 15 to 20 minutes plus drying time | 3 to 5 dollars for wood glue |
| Realigning sagging door | Moderate | 20 to 30 minutes | 0 dollars (cardboard shims) |
| Sanding or planing door edge | Moderate to Difficult | 1 to 2 hours (door removal, work, reinstall) | 10 to 25 dollars for sandpaper or plane if needed |
Situations requiring professional help: door frame damage from impact or rot where the wood is structurally compromised and needs replacement, structural settling that’s caused multiple doors throughout the house to bind or squeak simultaneously (indicates foundation or framing issues), custom or antique doors where replacement parts aren’t standard sizes and modifications need careful execution, commercial grade hardware on heavy doors that requires specialized tools or knowledge, or multiple doors showing the same symptoms suggesting a building wide problem rather than individual door issues.
Professional door repair typically costs 75 to 150 dollars for the service call plus materials. That makes DIY highly cost effective for simple squeaks. A 10 dollar can of silicone spray versus a 100 dollar service call is an easy calculation. But when you’re dealing with frame damage, structural shifts, or situations where the wrong fix could make things worse, the professional cost is worth it. If you’re not certain about the underlying cause or the repair feels beyond your comfort level, reach out to Home Recovery Pro for an assessment. We’ll help you figure out what’s actually going on and whether it’s a quick fix or something that needs more attention.
Final Words
Most squeaky doors just need a quick shot of lubricant and 10 minutes of your time.
Start by figuring out which hinge is making noise, then apply the right lubricant using the methods we covered. If the squeak continues, check for loose screws, misalignment, or friction between the door and frame.
Regular maintenance every 6-12 months keeps things quiet, and most fixes cost less than 10 dollars. If you run into frame damage or stubborn issues that won’t respond to lubrication and adjustments, that’s when it makes sense to call in help.
But for everyday squeaks? You’ve got this. Your home will be quieter by the end of the day.
FAQ
How do you stop a door from squeaking?
You stop a door from squeaking by applying lubricant to the hinge pins and barrels where metal-on-metal friction creates the noise. Most squeaks disappear after a quick spray of silicone lubricant or WD-40 on each hinge while opening and closing the door several times to work it in.
What is the best lubricant for squeaky doors?
The best lubricant for squeaky doors is silicone spray because it lasts longer than other options, doesn’t attract dust or dirt, and works well in all weather conditions. White lithium grease is another excellent choice for heavy-use doors that need long-lasting protection against friction and wear.
Is WD-40 good for squeaky doors?
WD-40 is good for squeaky doors as a quick temporary fix, but it will dry out over time and require reapplication every few months. For a longer-lasting solution, silicone spray or white lithium grease works better because they stay effective without evaporating or collecting dust.
Can you use vaseline on a squeaky door?
You can use vaseline on a squeaky door by removing the hinge pin, coating it with petroleum jelly, and reinserting it, though this creates a temporary fix. Keep the vaseline only on the hinge parts and avoid getting it on the door surface where it can attract dust and create a sticky mess.
Why does my door squeak even after lubricating the hinges?
Your door squeaks even after lubricating the hinges because the noise may come from loose hinge screws, the door rubbing against the frame, or squeaking doorknob hardware instead. Check if the squeak happens when the door is fully open, which indicates the problem isn’t friction in the hinges at all.
How often should I lubricate door hinges to prevent squeaking?
You should lubricate door hinges every 6 to 12 months to prevent squeaking, with high-use doors like front doors and bathrooms needing attention more frequently. This quick maintenance takes about 5 minutes per door and prevents most friction-related squeaks from developing in the first place.
When should I replace door hinges instead of lubricating them?
You should replace door hinges instead of lubricating them when you see severe rust, bent hinge plates, stripped screw holes, visible cracks, or damage that lubrication won’t fix. Replacement hinges cost 16.99 to 19.99 dollars each and provide a permanent solution when components are worn beyond simple repair.
Can humidity cause a door to squeak?
Humidity can cause a door to squeak because wood absorbs moisture and expands, creating new friction points where the door rubs against the frame or weatherstripping. This seasonal squeaking often appears during humid summer months and may decrease when indoor humidity levels drop, though persistent rubbing requires sanding or weatherstripping replacement.