

You probably checked the breaker twice already and it’s not tripped. So why is your outdoor outlet completely dead? The answer usually has nothing to do with that panel. Most outdoor power problems hide in tripped GFCI outlets somewhere else on the circuit, corroded connections inside weatherproof boxes, or loose wiring that finally gave up. We’ll walk through the most common fixes you can check yourself before calling for help.
Why Your Outdoor Outlet Has No Power Despite an Untripped Breaker
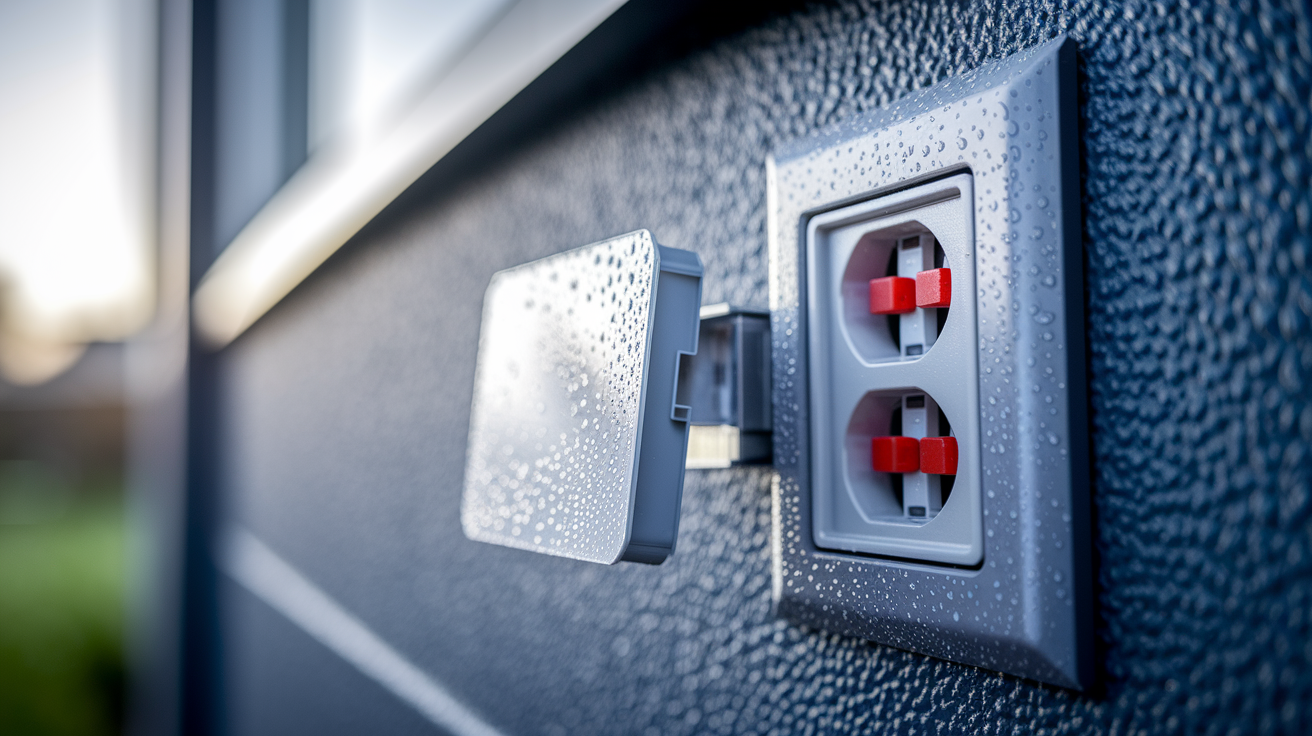
When your outdoor outlet quits working but the breaker looks fine, you’re usually not dealing with a breaker problem at all. Loose wiring, worn contacts, damaged receptacles, or bad connections upstream can kill power without ever touching that breaker switch.
The usual suspect? A tripped GFCI outlet somewhere else on the circuit. One GFCI can control several downstream outlets in your outdoor areas, and when it trips, everything connected after it goes dark. The ground fault circuit interrupter does its thing by catching tiny electrical leaks and cutting power instantly, but it works separately from your main breaker. You check the panel, everything looks normal, because the GFCI already handled it at the outlet level. The outdoor receptacle you’re trying to use might be completely fine. It just lost power from a GFCI that tripped somewhere else.
Here’s how to track down and reset a tripped GFCI:
-
Check the outdoor outlet itself for a GFCI with a raised reset button sitting between the two plug slots.
-
Look for GFCI outlets in your garage, basement, under exterior eaves, or inside the house near the exterior wall where your outdoor circuit starts.
-
Check bathrooms and kitchens close to the outdoor outlet, since these sometimes share circuits with exterior outlets.
-
Once you find a GFCI with a raised reset button, push it hard until you hear and feel a click. The button should stay down and flush with the outlet face.
-
Test your outdoor outlet again to see if power came back.
If the GFCI reset brings power back, you’re done. If the outdoor outlet still has no power after resetting every GFCI you can find, you’ll need to dig deeper into what’s interrupting the circuit.
Essential Tools and Safety Precautions for Outdoor Outlet Diagnosis
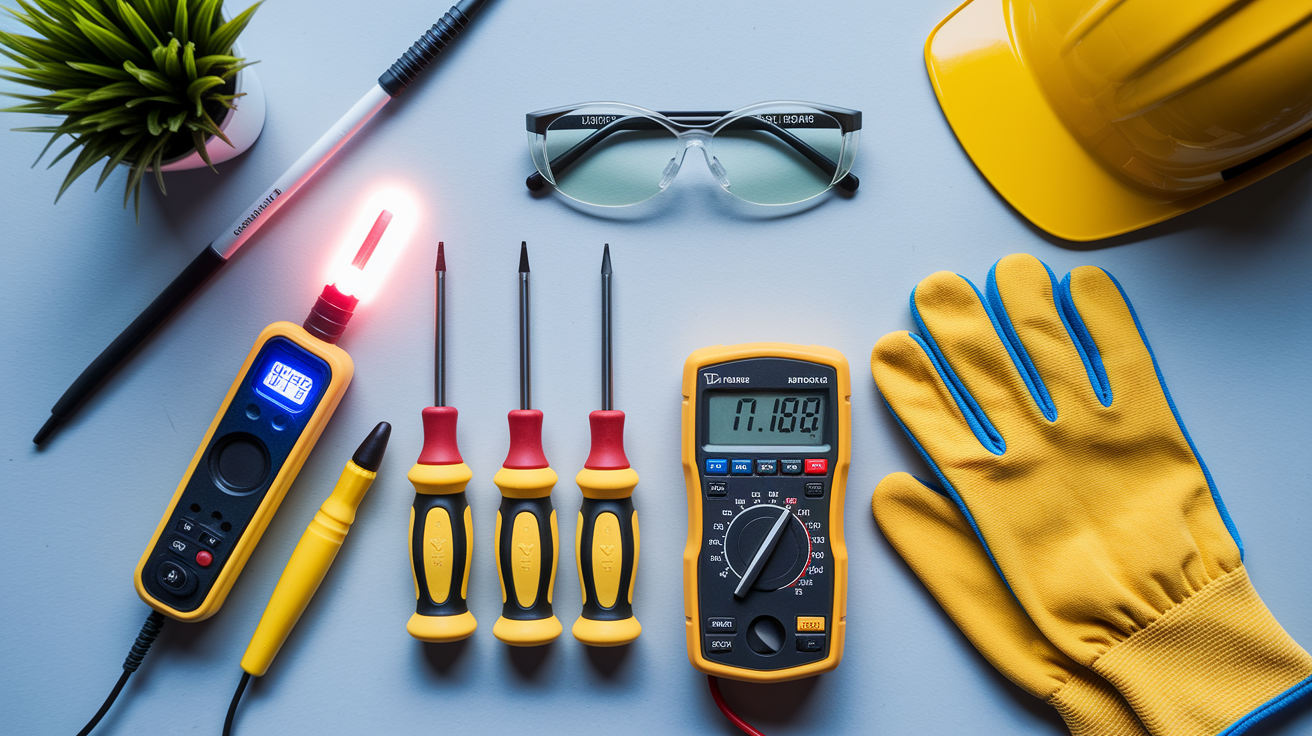
Working with electrical systems exposed to weather needs extra caution compared to indoor work. Before you start poking around your outdoor receptacle, understand that moisture and electricity create serious shock risks. Even with the breaker looking normal, voltage can still be sitting in the outlet box or along the circuit path.
You’ll need these tools for safe outdoor outlet troubleshooting:
- Non-contact voltage tester to verify power is actually off before touching any wires or terminals
- Multimeter for testing voltage levels and circuit continuity when needed
- Bright flashlight or headlamp since outdoor boxes are often in shaded or awkward spots
- Insulated screwdriver set for removing outlet covers and weatherproof enclosures
- Camera or phone for documenting what you find before making changes
- Personal protective equipment including safety glasses and insulated gloves rated for electrical work
Weather creates extra complications. Never work on outdoor outlets during rain, snow, or when you’re standing in puddles. Wait for dry conditions, and if the outlet cover or box interior shows any moisture, let it dry completely before you do anything.
Turn off power at the breaker panel before inspecting outlet wiring or connections. But here’s where you need to stop immediately: if you see scorch marks, melting plastic, smell burning, feel warmth coming from the outlet or cover, or notice moisture actually inside the outlet box, this means overheating or internal damage that needs professional service. Don’t try to clean it up or fix it yourself.
You can safely proceed with DIY troubleshooting when the outlet and surrounding area show no signs of burning, the weather is dry, you have the proper tools, and you’re comfortable turning off the correct breaker and verifying power is off with a voltage tester. If any of those conditions aren’t met, call a professional.
Step-by-Step Visual Inspection of Your Outdoor Outlet
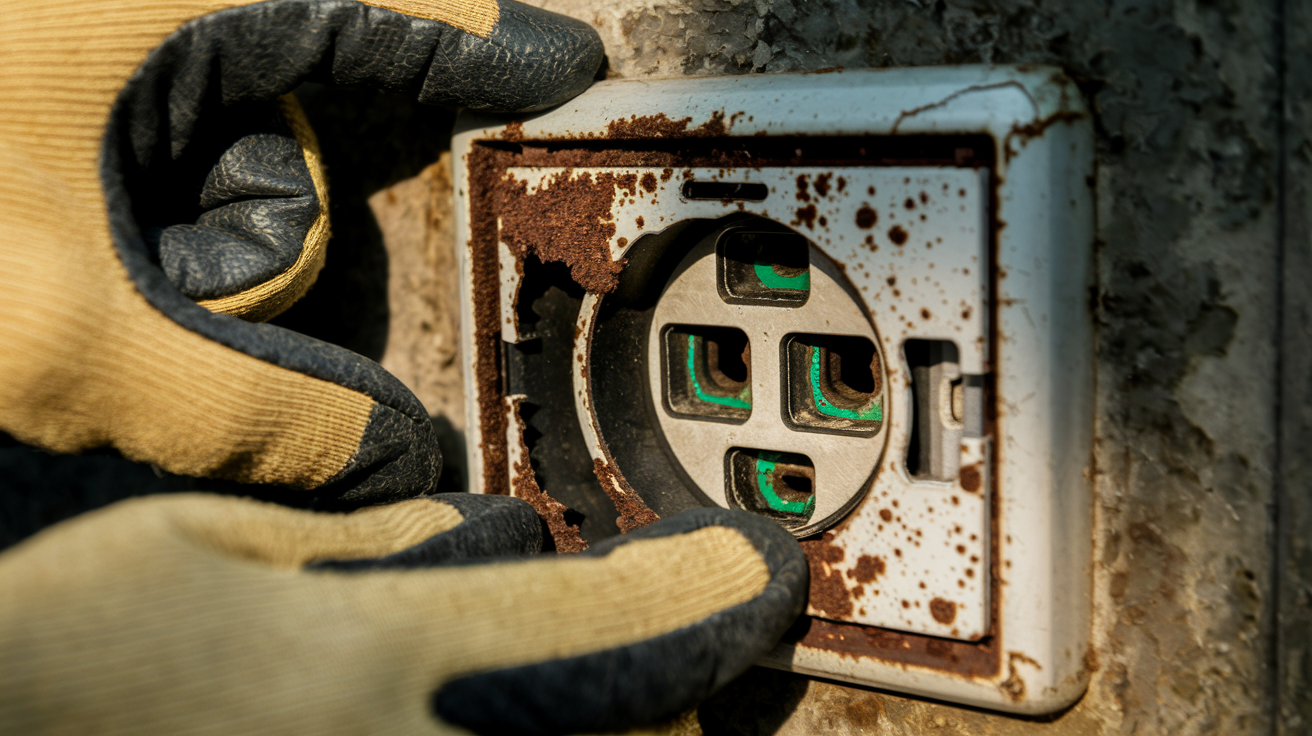
Visual inspection is your safest first move because you’re not touching electrical components yet. You’re looking for obvious damage that explains the power loss.
Start with the weatherproof outlet cover. These take a beating from sun, temperature swings, and physical impacts from lawn equipment or tools. Check the cover for cracks in the plastic, gaps where it meets the mounting surface, deteriorated foam gaskets that should seal against moisture, and whether the cover closes properly. If you have an in-use cover (the kind with a hinged door that closes over a plugged-in cord), check if the door latches completely and if the gasket inside is intact or compressed flat from age. A compromised cover lets water get to the outlet contacts and wiring.
Next, look at the outlet face itself by opening the cover. Look for discoloration around the plug slots, which shows up as brown or black marks from arcing or overheating. Check for melted plastic around the outlet edges or between the outlet and the cover. Inspect the metal contact points you can see inside the plug slots for green or white corrosion, which looks like crusty buildup on the brass terminals. Look for any moisture evidence. Water droplets, dampness, or dried water marks inside the cover cavity.
Check the area surrounding the outlet. Look at the siding or wall surface for water staining that runs down from above. Check if sprinklers hit the outlet area. Look for insect nests in and around the box, especially wasp nests since they love the protected cavity. Check for physical damage to the box itself from impacts. Dented metal or cracked plastic.
What you find tells you what happened. Discoloration and melting mean electrical arcing from loose connections or internal outlet failure. Corrosion means moisture got in and attacked the metal components. Water stains mean the outlet location has drainage problems. Insect damage means the box wasn’t properly sealed. Each of these points you toward a specific fix, but they all might mean the outlet needs replacement rather than simple repairs.
Testing Upstream GFCI Outlets and Downstream Circuit Configuration

Understanding how your outdoor outlets are wired helps you troubleshoot faster. Most outdoor electrical circuits use series wiring, where one GFCI outlet acts as the master and protects several standard outlets connected after it. When that master GFCI trips, every downstream outlet loses power even though those outlets themselves are fine. This daisy chain configuration is code compliant and cost effective, but it means a tripped GFCI in your garage can knock out the outlet on your back patio.
The master GFCI could be almost anywhere. Start in your garage, especially near the garage door where outdoor circuits often start. Check your basement or crawl space along exterior walls. Look under roof eaves near outdoor outlets. Check inside the house in rooms next to the dead outdoor outlet, particularly in a utility room, laundry area, or along the wall closest to the exterior. The master GFCI might not look obviously connected to your outdoor circuit. It might look like it’s just protecting the garage or basement.
When you find a GFCI with a raised reset button, push it hard until it clicks and stays down. Test your outdoor outlet again.
Here’s what it means if the GFCI trips again immediately after you reset it: there’s an active ground fault somewhere in the circuit right now. The GFCI is doing its job by detecting that fault and refusing to stay on. Repeatedly trying to reset a GFCI that immediately trips creates safety hazards and won’t solve anything. The fault could be in the outdoor outlet itself, in the buried wire running to it, in the connections inside the boxes, or in a tool or device still plugged in somewhere on the circuit. You need to isolate the problem by unplugging everything from the circuit and resetting again. If it holds, start plugging things back in one at a time to find what’s causing the trip.
Document which outlets go dead when the GFCI trips so you know the circuit configuration for future troubleshooting. Take a photo or make a note. This saves time next time something trips.
Connection Failures: Mechanical and Environmental Causes

Loose wiring is one of the most common causes of dead outlets with untripped breakers. Outdoor outlets face constant mechanical stress from plugging and unplugging extension cords, power tools, and lawn equipment. Every time you push a plug in or pull it out, the outlet shifts slightly in the box. Over years, this movement loosens the wire connections at the back of the outlet. Temperature swings make the problem worse. The expanding and contracting metal components gradually work their way loose from the connection points.
The way wires attach to outlets matters. Outlets have two connection methods: backstabbed wires that push into rear slots or wires wrapped around outlet screws. Backstabbed connections are faster to install but more prone to failure, especially outdoors. The spring loaded mechanism inside those rear slots weakens over time and with temperature cycling. Screw terminals create a more mechanical connection, but they can loosen too, particularly if they weren’t tightened properly during installation. Older outlets are particularly prone to loose wiring because installation methods decades ago weren’t as rigorous as current standards.
Loose connections at the outlet terminals aren’t the only failure point. Inside the electrical box, wires connect to each other using wire nuts (the twist-on plastic caps that hold multiple wires together). These can loosen from vibration, corrosion of the copper wire inside the nut, or improper initial installation. A loose wire nut disconnects the circuit just as effectively as a loose outlet terminal.
Moisture creates a completely different failure mechanism. Water enters outdoor electrical boxes through damaged or missing weatherproof covers, worn out gaskets that no longer seal, gaps where conduit enters the box, or cracks in the box itself. Once moisture gets to the brass or copper terminals, corrosion starts immediately. The corrosion looks like green or white crusty buildup, and it creates high electrical resistance. As resistance increases, power can’t flow properly to the outlet. The corrosion might only affect the connection points, or it can spread to the copper wire itself where it gets exposed.
Copper wire oxidation progresses in stages. First, the bright copper wire develops a dark tarnish. Then white or green powdery corrosion appears at connection points. Eventually, the corrosion penetrates the wire strands, making them brittle and breaking the electrical continuity. This affects everything in the box: the outlet itself, the wire connections to the outlet, the wire nut connections, and even the ground wire connection to the metal box.
Here’s the frustrating part: you can’t clean corroded electrical components and expect them to work reliably. Wire brushing or scraping the corrosion might temporarily restore contact, but the corrosion will return and the connection will fail again. Corroded outlets, wire ends, and terminals need replacement.
Preventing corrosion means keeping water out with proper weatherproof covers and regular gasket inspection, but diagnosing existing corrosion usually requires shutting off power and opening the electrical box for inspection. If you’re not comfortable with that, call a professional.
Watch for these warning signs of loose wiring:
- Power works on and off when you wiggle the outlet or plug
- Buzzing or crackling sounds coming from the outlet when devices are plugged in
- The outlet face or cover feels warm to the touch during use
- Lights or devices plugged into the outlet flicker or dim randomly
| Corrosion Level | Visual Signs | Action Required |
|---|---|---|
| Minimal Surface Tarnish | Copper wire appears dull or darkened but still intact | Monitor condition, ensure weatherproofing is intact, recheck in 6 months |
| Light Corrosion | Green or white powder visible on terminals or wire ends, connections still tight | Replace outlet and clean wire ends back to bright copper, improve weatherproofing |
| Moderate Corrosion | Crusty buildup on multiple components, wires show discoloration beyond connection points | Replace outlet and cut back wires to clean copper, inspect box and conduit for water entry |
| Severe Corrosion | Wire strands brittle or broken, corrosion throughout box, connections falling apart when touched | Professional evaluation required, may need complete circuit segment replacement including buried cable |
Testing for Voltage and Diagnosing Circuit Continuity Issues
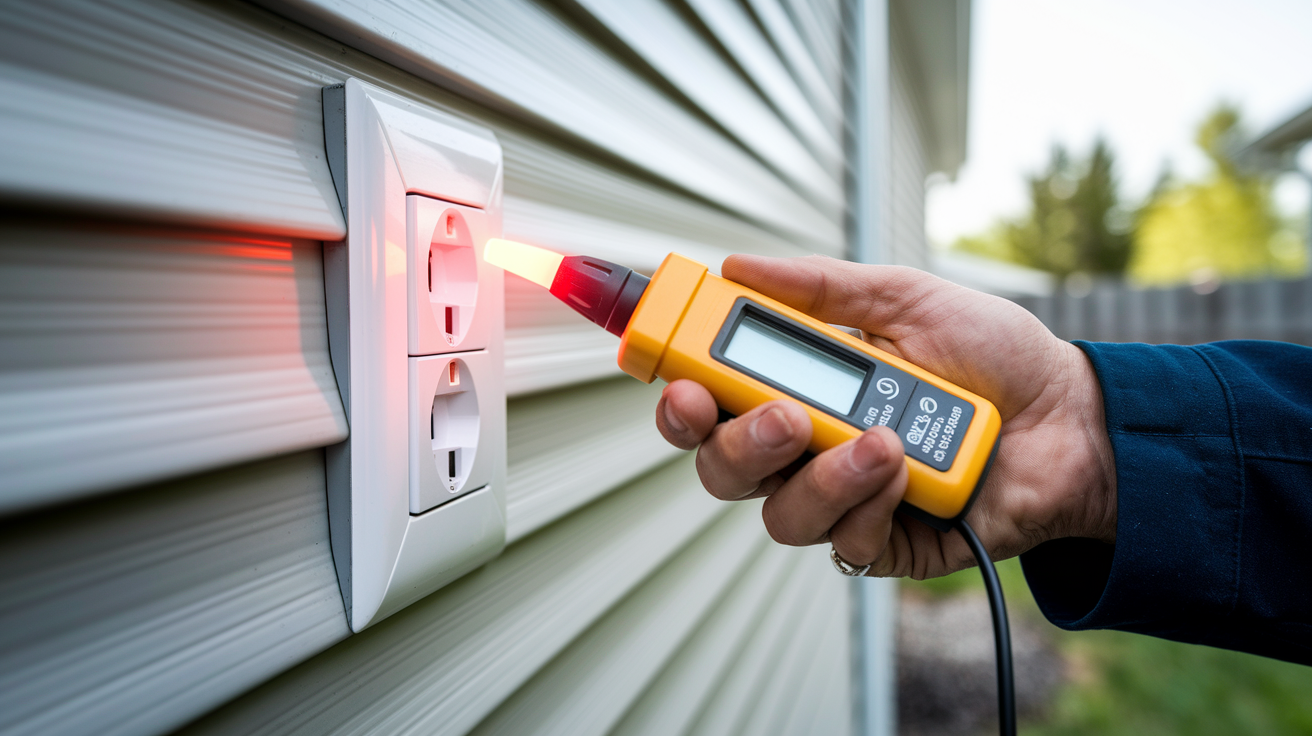
The non-contact voltage tester is your safest starting point because you don’t need to touch anything or remove any covers. Hold the tester near the outlet face with the outlet still installed and covered. The tester will beep or light up if voltage is present anywhere in that area, even through plastic covers.
Start by testing the dead outdoor outlet. If the tester indicates no voltage, move to the next outlet on the same circuit (usually another outdoor outlet, a garage outlet, or a basement outlet near the exterior wall). Keep testing outlets working backward toward your breaker panel. The point where voltage disappears tells you where the problem is. If you have voltage at one outdoor outlet but not at the next one further out, the issue is in the wire run or connections between those two outlets.
Different test results point to specific problems. If you have power at the breaker panel but no power at any outlet on that circuit, the issue is in the circuit wiring between the panel and the first outlet, possibly a loose connection at the breaker itself or damaged wire in the wall. If you have power at the garage outlet but not at the outdoor outlet, the problem is in the outdoor outlet, its connections, or the wire running outside. If you have no power anywhere on the circuit including the breaker panel connections, you might have a breaker problem even though it hasn’t visibly tripped.
Here’s where professional multimeter testing becomes necessary. A non-contact voltage tester tells you if voltage is present or absent, but it doesn’t tell you if the voltage is correct, if both hot legs of a circuit are working, or if there’s continuity through a wire run. Electricians use multimeters to measure actual voltage levels, test circuit resistance, check wire continuity, and diagnose partial failures where some voltage gets through but not enough to operate the outlet properly. They can identify high resistance connections by measuring voltage drop under load.
Never open your breaker panel as a homeowner. Testing and replacing breakers is extremely dangerous and must be left to professionals. The bus bars inside the panel carry full voltage from the utility service, and there’s no way to turn that off without the utility company disconnecting your service. Breaker testing requires specialized equipment and training.
Failed Outlet Receptacles and Internal Component Breakdown

Outlets wear out. A typical outlet lasts 15 to 25 years with normal indoor use, but outdoor exposure speeds that up. Repeated plugging and unplugging causes mechanical wear. Temperature swings from summer heat to winter cold stress the plastic body and metal components. Moisture exposure corrodes internal parts even when it doesn’t reach the visible terminals. Sun exposure breaks down plastic. Eventually, the outlet fails internally even when the wiring feeding it is perfect.
The internal contact springs that grip plug prongs are the most common wear point. These springs are thin brass or copper pieces that must maintain constant pressure on the plug prongs to make good electrical contact. Every time you insert and remove a plug, the springs flex. After thousands of cycles, they fatigue and lose their spring tension. When that happens, the plug sits loose in the outlet, the connection becomes intermittent, and eventually power stops flowing reliably. You might notice the plug feels loose before complete failure, or the outlet might just stop working suddenly.
GFCI mechanisms add another layer of complexity and another failure mode. The GFCI contains a small transformer that constantly monitors current flow on the hot and neutral wires. When it detects even a tiny imbalance (meaning some current is leaking to ground), the mechanism trips and cuts power. This electronic sensing component can fail from age, moisture exposure, lightning induced voltage spikes, or cumulative damage from repeated tripping. When the GFCI mechanism fails, the outlet might not reset, might trip randomly with no actual ground fault, or might stop providing protection even though it appears to work.
Thermal damage happens when poor connections or overloading cause heat buildup inside the outlet. The heat gradually melts plastic components, carbonizes insulation, and anneals metal parts so they lose their mechanical properties. You see this as discolored or melted plastic around the outlet, or brown/black marks on the outlet face. Once thermal damage occurs, the outlet cannot be repaired. The plastic has lost its structural integrity and insulating properties, and the metal contacts are permanently damaged.
Identifying an outlet that needs complete replacement is usually straightforward. If the outlet won’t reset after a GFCI trip and you’ve verified there’s no ground fault on the circuit, the GFCI mechanism is shot. If plugs fall out or sit loose in the receptacle, the contact springs are worn out. If you see any discoloration, melting, or burn marks, thermal damage has destroyed the outlet. If the outlet worked fine for years and suddenly stopped with no obvious cause, internal component failure is likely. When you’re dealing with outdoor outlets that have been exposed to weather for a decade or more, replacement is almost always the right answer rather than troubleshooting individual components.
Watch for these signs your outdoor outlet needs complete replacement:
- Reset button won’t stay in after pushing it, or pops back out immediately
- Test button on GFCI doesn’t trip the outlet when pressed
- Visible cracks in the outlet body or mounting ears
- Plugs fit loosely or fall out of the receptacle without mechanical retention
- Outlet face is discolored brown or black around the plug openings
Switched Circuits and Outdoor Lighting Control Configurations

Some outdoor outlets aren’t dead. They’re just turned off. This catches people off guard because we expect outdoor outlets to have power all the time, but some are intentionally wired through switches for landscape lighting, holiday decorations, or security lighting control. The outlet only receives power when the corresponding switch is on.
These switched outdoor outlets are common in several scenarios. Landscape lighting systems often use switched outdoor outlets so you can control pathway lights, spotlights, or fountain pumps from inside the house. Holiday decoration installations use switched outlets so you don’t need to go outside to turn lights on and off. Security and motion activated outdoor lighting sometimes shares a circuit with a switched outlet. Deck and patio outlets might be switched so outdoor speakers or string lights can be controlled from inside.
Finding the controlling switch takes some detective work. Start by checking inside the house in rooms next to the outdoor outlet. Look for switches near sliding doors, in mudrooms, or in the garage. The switch might be labeled, but often it’s not, especially in older homes. Check for timer controls, which look like standard switches but have a dial or digital display. Look for photocell sensors mounted on the exterior that automatically control the circuit based on daylight. Some outdoor circuits use a combination: a manual switch and a timer or photocell working together.
Test by toggling every switch that isn’t obviously connected to a light fixture you can see. This is tedious but effective. Have someone watch the outlet while you flip switches, or plug a lamp into the outlet so you can see when power comes on.
Split receptacle configurations complicate things further. These outlets have the metal tab between the two receptacles broken off, allowing each receptacle to connect to a different circuit. One half might be switched while the other half stays hot all the time. You might plug into the top receptacle and get nothing, then plug into the bottom receptacle and have power. This configuration is less common outdoors than indoors, but it exists, especially in deck and patio areas where constant power is needed for grills or refrigerators while switched power controls decorative lighting.
Before you assume you have an electrical problem and start taking things apart, spend ten minutes systematically checking for switches that might control the outlet. You’ll feel pretty silly after calling an electrician if the problem was just a switch someone turned off.
Buried Wire and Underground Cable Damage to Outdoor Circuits

Underground wiring is invisible, and that makes it frustrating to diagnose. The cable running from your house to your detached garage, shed, or remote outdoor outlet spends its entire life buried in soil where you can’t see what’s happening to it. When that cable gets damaged, your outdoor outlet stops working, but there’s no obvious sign of what went wrong.
Common causes of underground cable damage include digging for landscaping projects where someone hits the cable with a shovel or trencher. Garden bed installation and fence post digging are frequent culprits. Tree and shrub roots can gradually crush or puncture cables over years, especially if the cable wasn’t buried deep enough during installation. Freeze thaw cycles in cold climates cause soil movement that can shear cables or pull them apart at connection points. Ground settling from water erosion or compaction puts tension on cables, and rocks in the soil can cut through cable insulation when the ground shifts.
Here’s why this is particularly difficult: partial cable damage often creates high resistance faults rather than dramatic short circuits. If a shovel nicks the insulation and slightly damages the copper conductor, current can still flow, but not easily. The damaged section gets hot, which further damages the conductor, which increases resistance, which increases heat. Eventually, the damaged conductor fails completely, and power stops. But this progression doesn’t necessarily trip your breaker because it’s not a direct short circuit. It’s a slow degradation. Water infiltration through damaged insulation creates similar high resistance problems as corrosion builds up inside the cable.
Proper underground cable installation requires either direct burial rated cable like UF-B or regular cable protected inside watertight conduit. Direct burial cable has thick insulation designed to resist moisture and soil chemicals. Conduit protected cable uses PVC or metal conduit as a physical barrier. Both methods require proper depth (typically 18 to 24 inches depending on circuit voltage and local code requirements). Cables installed too shallow or without proper protection are vulnerable to all the damage mechanisms mentioned above.
Symptoms suggesting buried wire damage include power loss that correlates with wet weather, since moisture in damaged cable creates ground faults. Multiple outdoor outlets affected at the same time when they share the underground cable run. Gradual failure where the outlet worked on and off before dying completely, rather than sudden failure. Outlets that worked fine for years but stopped working after landscape work, heavy equipment use in the yard, or severe frost.
Diagnosing and repairing underground cable faults is legitimately difficult and often expensive. It requires locating the exact damage point in potentially hundreds of feet of buried cable, excavating carefully to avoid causing more damage, and running new cable through the same path or around the damaged section. Sometimes replacement of the entire underground run is more cost effective than trying to splice in a repair. This is professional work requiring specialized cable locating equipment and knowledge of burial depth requirements and safe trenching practices.
Circuit Capacity and Breaker Issues Affecting Outdoor Outlets

Outdoor outlets handle some of the highest loads in your electrical system. You plug in electric lawn mowers that draw 10 to 12 amps, string trimmers, hedge trimmers, pressure washers that pull 13 to 15 amps, air compressors, shop vacs, and power tools. Outdoor kitchens add electric grills, refrigerators, and warming drawers. Pool and pond equipment includes pumps and filters that run continuously. Landscape lighting transformers, fountain pumps, and holiday decoration strings add more load. All of this hits a circuit that’s often shared among multiple outdoor outlets and sometimes shared with garage or basement outlets too.
Sustained high loads cause problems even when they don’t trip the breaker. When you’re running power tools continuously, the wiring and connections heat up. Voltage drop occurs. The voltage at the outlet is measurably lower than at the breaker panel because resistance in the wire and connections consumes some of the electrical energy as heat. At the outlet terminals, this heat speeds up connection loosening and can slowly damage the outlet’s internal components. The outlet might work fine for a while, then fail completely when the accumulated thermal damage reaches a breaking point.
Most outdoor circuits are 15 amp or 20 amp circuits, often shared among three or four outlets plus any interior outlets on the same circuit. A 15 amp circuit provides 1,800 watts at 120 volts, and a 20 amp circuit provides 2,400 watts. But you shouldn’t load a circuit continuously at more than 80 percent of its capacity. That’s the National Electrical Code standard for safety and preventing nuisance trips. So realistically, you have 1,440 usable watts on a 15 amp circuit and 1,920 usable watts on a 20 amp circuit. When you plug in a pressure washer, an electric grill, and landscape lights on the same circuit, you can easily exceed that capacity, especially at startup when motors draw surge current.
High draw devices like air compressors, electric heaters, and some power tools really need dedicated circuits that serve only one outlet with nothing else connected. Calculating total load means adding up the amperage of everything you might use at the same time. Most power tools have an amp rating on the nameplate. Add them up and compare to your circuit capacity.
Breaker internal mechanism failure presents a different problem. Even though the breaker handle is in the ON position and hasn’t visibly tripped, the contacts inside might not be making good connection anymore. Breaker contacts are heavy duty switch points that open and close to control current flow. Over time, especially after they’ve tripped a few times from overloads or short circuits, those contacts can become pitted or worn. The breaker handle might look normal, but the contacts aren’t touching properly, so no current flows to the circuit.
Damaged breakers show specific symptoms. The breaker handle feels loose, wobbly, or doesn’t click firmly like other breakers when you move it. The breaker body feels warm or hot to the touch compared to surrounding breakers. The breaker recently tripped due to a power surge, lightning strike, or short circuit and hasn’t worked right since. Age matters too. Breakers typically last 30 to 40 years, but they can fail sooner in panels that experience frequent overloads or if manufacturing defects exist.
Testing breakers requires removing the panel cover, working with exposed bus bars carrying full voltage, using specialized testing equipment to measure contact resistance and voltage on both sides of the breaker, and sometimes load testing the breaker while it’s energized. This is genuinely dangerous work. Testing and replacing breakers is extremely dangerous and must be left to professionals. Electricians have the training, tools, and experience to work safely inside panels, including proper arc flash protection and isolation procedures.
| Device | Typical Amperage | Circuit Impact |
|---|---|---|
| Electric lawn mower | 10 to 12 amps | High, uses 60 to 80% of 15 amp circuit capacity during operation |
| Pressure washer | 13 to 15 amps | Very high, exceeds safe continuous load on 15 amp circuit, needs 20 amp circuit |
| Shop vacuum | 6 to 8 amps | Moderate, uses 40 to 50% of circuit, safe to combine with light loads |
| String trimmer | 4 to 6 amps | Low to moderate, safe on shared circuits with other light tools |
| Pool pump | 8 to 11 amps continuous | High, continuous operation requires dedicated circuit or careful load management |
| Holiday lights (LED 100 ft) | 0.5 to 1 amp per string | Low, multiple strings can share circuit, but calculate total load |
Ground Fault Sensitivity and Nuisance Tripping in Outdoor GFCI Outlets
GFCI outlets are incredibly sensitive by design. They detect ground faults as small as 4 to 6 milliamps and shut off power in about 1/40th of a second. That sensitivity protects you from electrical shock, but it also means outdoor GFCIs trip more often than indoor ones because outdoor environments create more conditions that look like ground faults to the GFCI’s sensing mechanism.
Ground faults occur when electricity takes an unintended path to ground rather than flowing through the proper circuit path. Outdoor conditions create ground faults constantly. Morning dew condenses inside outlet boxes and creates tiny conductive paths between terminals. Rain blown sideways under damaged weatherproof covers reaches wire connections. Extension cords laying in wet grass leak tiny amounts of current to ground through their insulation. Power tools with slightly damaged housings leak current when you’re using them on damp surfaces. All of these situations create the tiny current imbalances the GFCI detects, and the GFCI trips to protect you.
Legitimate protective tripping includes moisture in outlet connections when the weatherproof gasket has failed, wet power tools or appliances where water has penetrated the housing, damaged extension cords with nicked or cut insulation exposing the conductors, and actual ground faults where wiring insulation has failed and current is leaking into the outlet box or conduit. In all these cases, the GFCI is working exactly as designed, even though it’s inconvenient.
Nuisance tripping is different. This is when the GFCI trips even though there’s no actual ground fault or safety hazard. Aging GFCI internal components become oversensitive and trip at lower thresholds than they should. Lightning strikes or utility voltage surges nearby can induce voltage transients in your wiring that trigger the GFCI even though no ground fault occurred in your circuit. Repeated trips from legitimate ground faults can damage the GFCI’s internal sensing transformer, making it unstable. Temperature extremes sometimes affect the GFCI’s electronic components, causing trips during very hot or cold weather.
The immediate re-trip test reveals a lot. Reset the GFCI and it holds. You probably had a temporary ground fault that’s now cleared. Reset the GFCI and it immediately trips again without anything plugged in. There’s an active ground fault in the circuit wiring or outlets downstream. Reset the GFCI and it trips again randomly within seconds or minutes without load. The GFCI itself is likely failing.
When GFCI replacement solves persistent tripping, you had a worn out GFCI. When replacing the GFCI doesn’t stop the trips, you have a ground fault somewhere in the circuit that needs investigation: damaged wire insulation, moisture in downstream outlet boxes, or failing outlets downstream that are leaking current to ground. This is when professional diagnosis with insulation resistance testing and systematic isolation of circuit segments becomes necessary to find the fault location.
When to Call a Licensed Electrician for Outdoor Outlet Problems
Outdoor electrical work carries higher risk than indoor work. The combination of electricity and weather exposure, buried wiring, circuit protection requirements, and code compliance for exterior installations means the threshold for professional help is lower than for indoor outlet issues.
Stop your DIY troubleshooting and call a professional immediately in these situations:
- Any burning smell coming from the outlet, box, or nearby wiring, or visible scorch marks on outlets or covers
- GFCI outlet that won’t reset at all, or reset button pops back out immediately even with nothing plugged in
- Suspected underground cable damage based on symptoms, recent digging in the area, or visual evidence of damaged conduit
- Water present inside electrical boxes when you open the cover, indicating failed weatherproofing and potential shock hazard
- Multiple outdoor outlets affected on the same circuit suggesting a problem in buried wire runs or at the circuit origin
- Any work requiring access to the breaker panel interior, including breaker testing or replacement
- Uncertainty about which breaker controls the outdoor circuit, inability to verify power is off, or confusion about circuit configuration
- Modifications requiring electrical permits like adding new outdoor outlets, extending circuits, or upgrading from 15 amp to 20 amp circuits
Typical professional diagnosis and repair costs vary by problem complexity and regional labor rates, but expect diagnostic service calls around 100 to 150 dollars, outlet replacement including GFCI upgrade around 150 to 250 dollars per outlet, underground cable repair requiring excavation 500 to 1,500 dollars depending on distance and access, and breaker replacement 150 to 300 dollars plus panel evaluation. These costs include the electrician verifying the entire circuit is safe, not just patching the immediate problem.
Professional diagnosis provides value beyond fixing the immediate failure. Electricians test the entire circuit to ensure the repair won’t just fail again in six months. They verify proper grounding, check wire gauge matches circuit breaker rating, confirm weatherproof covers and boxes meet current code, test GFCI function, and identify other potential problems before they cause failures. Professional electricians follow National Electrical Code and local regulations when diagnosing and repairing electrical issues, which protects your home’s safety and value.
Licensed electricians carry insurance, understand outdoor specific installation requirements including proper depth for buried cables and weatherproof fittings, know which work requires permits, and stand behind their repairs. When you’re dealing with outdoor electrical issues, the combination of safety, code compliance, and reliable repair makes professional help worth the cost.
Outdoor Outlet Replacement Process and Code Requirements
Replacing an outdoor outlet involves more than swapping an old outlet for a new one. Current electrical code has specific requirements for outdoor installations that weren’t enforced when older homes were built, and bringing the outlet up to current standards might be required depending on your local jurisdiction and the extent of work.
National Electrical Code requires GFCI protection for all outdoor outlets. If your outdoor outlet isn’t a GFCI, replacing it means either installing a GFCI outlet at that location or ensuring an upstream GFCI protects it. The outlet must have weather resistant (WR) rating, indicated by “WR” marked on the outlet face. WR outlets have additional sealing around the wiring termination points and more robust internal components designed for moisture exposure. For outlets in accessible locations (anywhere a child could reach), tamper resistant (TR) features are required. TR outlets have internal shutters that block objects from entering the plug slots unless both prongs of a plug push at the same time.
Proper box selection matters as much as the outlet itself. The electrical box must be rated for exterior use, made of weatherproof materials like die cast aluminum, PVC plastic rated for outdoor exposure, or galvanized steel with weatherproofing treatment. The box must be deep enough to accommodate a GFCI outlet, which is deeper than a standard outlet due to the internal ground fault protection mechanism. The box must mount solidly to the structure (house siding, deck post, or standalone post) with proper flashing or caulking to prevent water from getting behind the mounting surface. The outlet cover must be an in-use cover, also called a bubble cover, that protects the outlet even when a cord is plugged in. The old flat covers that only protect the outlet when nothing is plugged in don’t meet current code.
Wire gauge requirements depend on circuit amperage. A 20 amp outdoor circuit requires 12 AWG wire throughout the entire circuit. Using 14 AWG wire on a 20 amp circuit creates a code violation and safety hazard because the wire can overheat before the breaker trips. Most outdoor circuits should be 20 amp rather than 15 amp due to the high power draw of typical outdoor equipment
Final Words
When your outdoor outlet stopped working breaker not tripped, you’re dealing with a GFCI issue, loose connection, corroded terminal, or failed outlet component rather than a circuit overload.
Start with the quick fixes. Check nearby GFCIs, inspect covers for moisture damage, and look for visible warning signs like scorch marks or corrosion.
But if you see burn marks, smell anything unusual, or the GFCI won’t reset, stop there. That’s the line between helpful troubleshooting and electrical risk.
Most outdoor outlet failures happen quietly. Connections loosen from temperature swings. Moisture creeps in. Components wear out from weather exposure.
The good news? Once you identify the cause, you’ll know whether it’s a simple reset or time to call someone in.
FAQ
Q: Why is my outdoor outlet not working but the breaker not tripped?
A: Your outdoor outlet is not working despite an untripped breaker because a GFCI outlet somewhere on the circuit has tripped, loose wiring has created a connection failure, or the outlet itself has failed internally without creating the overload needed to trip the breaker.
Q: What would cause an outlet to stop working without tripping the breaker?
A: An outlet stops working without tripping the breaker when a tripped upstream GFCI cuts power, wire connections loosen from weather exposure and movement, moisture corrodes terminals, or the outlet’s internal components fail mechanically after years of outdoor use.
Q: What to do when an outdoor outlet won’t reset?
A: When an outdoor outlet won’t reset, the GFCI mechanism has failed internally and the outlet needs complete replacement. Stop trying to reset it. If it resets but immediately trips again, there’s an underlying ground fault that requires professional diagnosis.
Q: What would cause an outdoor outlet to stop working?
A: An outdoor outlet stops working from tripped GFCI protection on the circuit, corroded wire connections from moisture infiltration, failed internal outlet components, damaged underground cable feeding the outlet, or switched circuit controls you haven’t identified yet.
Q: How do I locate a tripped GFCI that’s affecting my outdoor outlet?
A: You locate a tripped GFCI affecting your outdoor outlet by checking nearby outdoor outlets first, then garages, basements, and inside walls near exterior locations. One GFCI often protects multiple downstream outlets, so look for a raised reset button.
Q: Can moisture cause an outdoor outlet to fail without tripping the breaker?
A: Moisture causes outdoor outlet failure without tripping the breaker by corroding wire connections and creating high-resistance faults. Water infiltration through damaged covers gradually degrades brass terminals and copper wiring until power flow stops completely.
Q: What are the warning signs that an outdoor outlet needs professional repair?
A: Warning signs requiring professional repair include scorch marks or burning smell, outlets that feel warm to the touch, GFCI outlets that won’t reset or immediately re-trip, visible moisture inside the box, or multiple outdoor outlets failing simultaneously.
Q: How often should I test my outdoor GFCI outlets?
A: You should test outdoor GFCI outlets annually using the test button to verify the mechanism works correctly. More frequent testing every six months helps catch failing components before complete failure, especially after severe weather or heavy use periods.
Q: Can a bad GFCI outlet affect other outlets on the same circuit?
A: A bad GFCI outlet affects other outlets on the same circuit when it’s wired to protect downstream outlets. One tripped or failed GFCI can disable multiple standard outlets connected after it, which is common in outdoor circuit configurations.
Q: What causes underground cable damage to outdoor outlet circuits?
A: Underground cable damage to outdoor outlet circuits happens from digging during landscaping, freeze-thaw soil cycles, tree root intrusion, and ground settling. This creates partial cable breaks that stop power without causing the dramatic short circuit that trips breakers.
Q: Should I replace an outdoor outlet myself or hire an electrician?
A: You should hire a licensed electrician for outdoor outlet replacement when you see burn marks, suspect underground wiring damage, need breaker panel work, or aren’t confident about proper weatherproof installation and current code requirements including GFCI protection.
Q: Why does my outdoor outlet work intermittently?
A: Your outdoor outlet works intermittently because wire connections have loosened from repeated plug insertion, thermal cycling, or outlet movement. The connection makes and breaks contact depending on temperature, vibration, or how the plug sits in the receptacle.