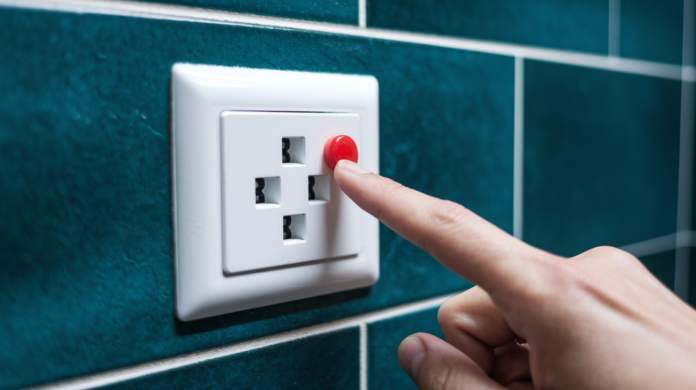

Power came back on after the outage, but some of your outlets stayed dead. Frustrating, right? The good news is most outlet failures after power loss come from simple protective shutoffs that reset in minutes. About 70 to 80 percent of cases involve a tripped breaker or GFCI outlet doing exactly what it’s designed to do. We’ll walk you through fast checks and safe fixes to get your outlets working again, plus show you when it’s time to call in a pro.
Quick Reset Procedures: Circuit Breakers and GFCI Outlets

Most outlet failures after power outages happen because protective devices shut off to guard your wiring from damage. The good news? These breakers and GFCI outlets don’t automatically reset when power returns, but fixing them takes only a few minutes and solves the problem in 70 to 80 percent of cases.
Resetting Tripped Circuit Breakers
Your electrical panel is probably in your basement, garage, utility room, or mounted on an exterior wall. Head there first.
Here’s the proper reset procedure:
- Locate your electrical panel and open the metal door
- Identify the tripped breaker. It won’t be fully in the OFF position but sitting midway or slightly out of alignment with the others
- Push the breaker handle firmly all the way to the complete OFF position first
- Push the breaker handle firmly to the ON position. It should align with the other breakers
- Test the affected outlet to verify power restoration
If the breaker flips back to the tripped position immediately or within a few minutes, stop. That repeated tripping signals a short circuit or overload that needs a licensed electrician to diagnose safely. Forcing a breaker to stay on when it keeps tripping can overheat wiring and create fire hazards.
Keep the area around your panel dry when working. Never touch the panel or breakers with wet hands or while standing in water.
Testing and Resetting GFCI Outlets
GFCI outlets show up in bathrooms, kitchens, garages, outdoor locations, and basements. Anywhere water and electricity might meet. They have two rectangular buttons between the outlet slots labeled TEST and RESET. One tripped GFCI can shut down several regular outlets connected downstream on the same circuit.
Follow this reset sequence:
- Check bathrooms, kitchens, garage, and outdoor areas for outlets with TEST and RESET buttons
- Press the TEST button first to make sure the outlet’s functioning. The RESET button should pop out
- Press the RESET button firmly until you hear a clicking sound
- Check both the GFCI outlet and any other dead outlets in nearby areas to confirm power restoration
That clicking sound tells you the reset worked. If the RESET button won’t stay pressed in, the GFCI detected a ground fault and it’s doing its job by staying off. That usually means water got into the outlet or the device itself sustained damage and needs replacement.
Visual Inspection and Power Surge Damage Identification
When quick resets don’t restore power, start with a systematic check to figure out whether the outlet, the appliance, or the circuit is causing the problem.
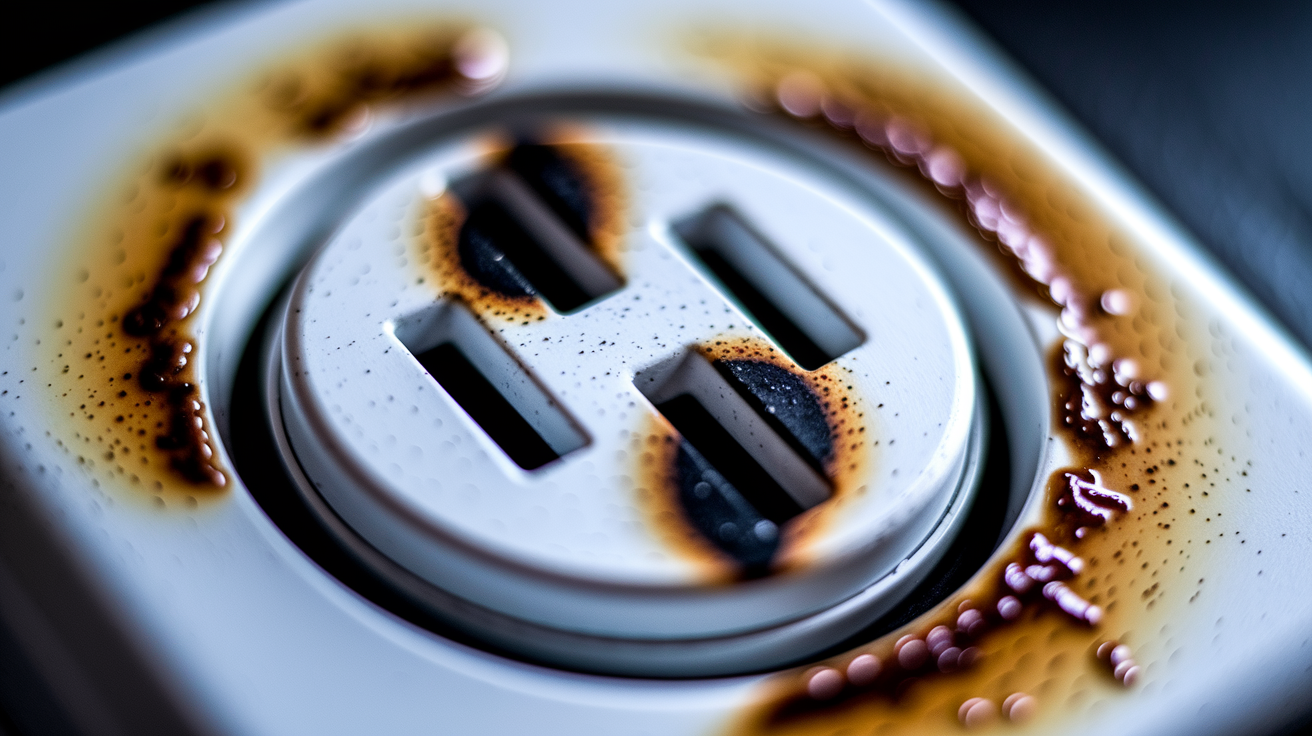
Look closely at the outlet face. Power surges leave visible evidence. Check for black or brown discoloration around the slots, melted or warped plastic, cracks in the outlet face, or any deformation. If you catch a burning plastic smell near the outlet, that’s a red flag for internal component damage from excessive heat during the surge.
| Warning Sign | What It Indicates |
|---|---|
| Black or brown scorch marks around outlet slots | Electrical arcing from surge |
| Melted or discolored plastic | Excessive heat damage |
| Burning odor near outlet | Internal component failure |
| Outlet warm or hot to touch | Dangerous internal resistance |
| Cracks in outlet face | Physical damage or stress |
| Outlet loose in wall box | Connection problems |
| Known-working device fails in outlet | Outlet failure, not device |
| Voltage present but outlet non-functional | Internal outlet component damage |
| Debris or visible damage inside outlet slots | Physical or surge damage |
Test with a device you know works, like a lamp or phone charger that functions in other outlets. Plug it into the dead outlet. If it doesn’t work there but works everywhere else, the outlet’s the problem. If it doesn’t work anywhere, the device itself failed during the outage.
A non-contact voltage tester gives you the next piece of information without touching any wires. Test the voltage tester first on an outlet you know is working to confirm the tester itself is functioning. Then hold it near the affected outlet slots. If the tester indicates voltage is present but your devices still won’t work, the outlet’s internal connections failed and need replacement. An outlet that feels warm or hot to the touch has dangerous internal resistance damage and must be replaced immediately, not used until it cools down.
Troubleshooting Multiple Dead Outlets on Shared Circuits

Outlets in the same room or adjacent rooms typically connect to one circuit breaker. When several outlets go dead at once, you’re dealing with a shared circuit problem rather than individual outlet failure.
Test outlets systematically. Try every outlet in the affected room, then check outlets in the rooms next to it and above or below it if you have multiple floors. Map out which ones work and which don’t. This pattern tells you where the problem lives.
Think of outlets as a chain. Power flows from the electrical panel through the first outlet, then continues to the next, and so on. The first dead outlet in that sequence is usually where the problem exists. It’s the upstream source. Everything after that point, the downstream outlets, depends on that first connection. GFCI outlets work the same way. One GFCI protects multiple regular outlets downstream, so a tripped GFCI can kill power to outlets that don’t even have reset buttons.
Loose wire connections are one of the most common reasons multiple outlets die. Wires can work loose over time from the outlet’s screw terminals, especially in older homes or heavily used outlets. When that first outlet in the chain loses its connection, everything downstream goes dead too. Fixing that one loose connection often brings the entire chain back to life.
Here’s how to identify the source systematically:
- Test all outlets in the affected room with a lamp or phone charger
- Test outlets in adjacent rooms to see if the problem extends beyond one space
- Identify which outlet is first in the sequence to lose power
- Check for any GFCI outlets upstream in bathrooms, kitchens, or garage that may have tripped
- Focus your inspection on that first dead outlet as the likely problem source
DIY Outlet Replacement with Integrated Safety Steps

You’ll need a screwdriver, voltage tester, wire strippers, and a replacement outlet. Most homes use 15 amp outlets, but some circuits, especially in kitchens, use 20 amp outlets. Match the amperage stamped on your old outlet.
Electrical work carries real risks. Shocks and fires can result from mistakes, so careful attention to each step matters.
Here’s the complete safe replacement process:
- Gather your tools and a replacement outlet that matches the amp rating of the old one
- Locate the correct breaker for the outlet by testing which breaker controls it. Flip breakers until the outlet loses power
- Switch that breaker to the complete OFF position
- Test your voltage tester on a known working outlet to confirm the tester functions properly
- Verify the affected outlet has zero power using the voltage tester on both top and bottom slots
- Keep your work area and hands completely dry
- Remove the wall plate with a screwdriver
- Take a photo of the existing wire connections with your phone before touching anything
- Unscrew and carefully pull the old outlet from the wall box
- Connect wires to the new outlet in this specific order. Connect the ground wire first to the green terminal, neutral wire second to the silver terminal, and hot wire last to the brass terminal
- Secure the outlet firmly in the box with mounting screws, making sure it sits straight
- Restore power at the breaker, test with your voltage tester and a working appliance, then install the wall plate
Wire connections need proper technique. Strip back wire insulation about 3/4 inch. Form a hook shape with the exposed wire and wrap it clockwise around the screw terminal so it tightens when you turn the screw clockwise. Tighten each screw firmly but don’t overtighten and crack the plastic. Push-in connections on the back of outlets fail more often than screw terminals, so use the screws on the sides.
| Wire Color | Function | Terminal Connection |
|---|---|---|
| Black wire | Hot/live power | Brass screw terminal |
| White wire | Neutral return | Silver screw terminal |
| Green or bare copper | Safety ground | Green screw terminal |
After securing all connections and mounting the outlet, restore power and test before installing the cover plate. Plug in a lamp that you know works. If it lights up, the outlet’s functioning correctly.
When Professional Electrical Help Is Required

Some electrical problems signal the need to step back and call in someone with professional training, specialized tools, and code knowledge. Recognizing those signals protects both you and your home.
Sparks, smoke, burning smells, electrical shocks, or breakers that repeatedly trip immediately after resetting are emergencies requiring same day professional service. Don’t wait on these. Burning smells from your electrical panel or outlets can mean wires are overheating inside walls where you can’t see them.
These situations require a licensed electrician:
- Breaker repeatedly trips immediately after you reset it
- Burning smell from electrical panel or outlets
- Sparks or smoke visible from outlets or switches
- Electrical shocks felt when touching outlets, switches, or appliances
- Multiple separate circuits dead simultaneously after an outage
- Aluminum wiring present in your home, common in homes built between 1965 and 1973
- GFCI outlet won’t reset even after you install a new one
- You don’t have electrical experience or confidence in your abilities to work safely
- Outlets show confirmed damage from a power surge with scorching or melting
Electrical repairs cost less than you might expect for straightforward work. Service calls typically run $75 to $150. Replacing a single damaged outlet usually costs $100 to $200 including labor. Circuit level repairs where an electrician traces wiring problems range from $200 to $500. Work on your electrical panel, like replacing a faulty breaker, runs $300 to $1,000 depending on complexity.
Professional diagnosis prevents dangerous mistakes. Licensed electricians understand electrical code requirements, carry insurance that protects you if something goes wrong, and have the training to work safely on energized panels when necessary. If you’ve completed the basic troubleshooting steps in this guide and your outlets still don’t work, that persistent problem indicates complex wiring issues beyond quick fixes.
Preventing Future Outlet Damage from Power Outages

Preventing outlet damage costs significantly less than repeatedly repairing or replacing failed outlets and damaged electronics. A few proactive steps protect your entire electrical system.
Whole house surge protectors install at your main electrical panel and guard every outlet and hardwired appliance in your home from surges coming through utility lines. Licensed electricians install them for $300 to $600 including equipment and labor. That upfront investment protects thousands of dollars in electronics and prevents outlet damage from surges you never even notice.
These prevention practices keep your outlets and circuits functioning longer:
- Install a whole house surge protector at your main electrical panel
- Use quality surge protector power strips rated for minimum 1,000 joules for computers, TVs, and sensitive electronics
- Avoid overloading outlets by plugging in multiple high wattage appliances, like space heaters or window AC units, to the same outlet simultaneously
- Unplug sensitive electronics, computers, TVs, and routers during severe thunderstorms when you can
- Proactively replace outlets older than 15 to 20 years before they fail
- Schedule a professional electrical system inspection every 3 to 5 years to identify aging components
- Never daisy chain power strips together or use power strips with damaged cords
Not all power strips offer surge protection. Basic power strips and extension cords just add more outlets without protecting anything plugged into them. Real surge protector power strips list a joule rating on the packaging or the device itself. Look for at least 1,000 joules for meaningful protection. Higher joule ratings absorb more surge energy before the protector wears out.
Avoid overloading circuits by spreading high power devices across multiple outlets on different circuits. Space heaters, window air conditioners, hair dryers, and power tools draw heavy current. Plugging several into one outlet or even one circuit can trip breakers repeatedly or cause outlet connections to overheat. When you notice a breaker tripping regularly even without an outage, that circuit probably carries too much load and needs professional evaluation to determine if additional circuits or outlets would balance the electrical demand properly.
If your neighborhood experiences frequent power quality problems, flickering lights during normal operation, or repeated outages, contact your utility company. Sometimes the issue stems from aging transformers or utility lines that need attention on their end rather than anything wrong with your home’s system.
Final Words
An outlet not working after power outage usually comes down to a tripped breaker or GFCI that needs a manual reset. Most of the time, you’ll get power back in under five minutes.
If the outlet shows burn marks, won’t reset, or keeps tripping after you’ve followed the steps, that’s when you call a licensed electrician. Those situations point to damage that needs professional repair.
Keep surge protectors in place, avoid overloading circuits, and you’ll be in much better shape next time the power flickers. Your home’s electrical system is built to protect itself. You just have to help it finish the job.
FAQ
Why are outlets not working after a power outage?
Outlets stop working after a power outage when protective systems like circuit breakers or GFCI outlets trip during surges and don’t automatically reset when power returns. These shutoffs protect your home’s wiring from damage, but they require manual resetting to restore function.
How do you reset an outlet after a power outage?
To reset an outlet after a power outage, first check your electrical panel for tripped breakers and push them fully off then back on. Next, locate GFCI outlets in bathrooms, kitchens, or garages and firmly press the RESET button until you hear a click.
Can a power outage damage an outlet?
A power outage can damage an outlet when power surges occur during restoration, causing internal components to burn or melt. Damaged outlets show scorch marks, melted plastic, burning smells, or feel warm to the touch and must be replaced immediately for safety.
Why don’t outlets work when the breaker isn’t tripped?
Outlets don’t work with untripped breakers when a GFCI outlet upstream has tripped, cutting power to downstream standard outlets, or when loose wire connections exist. Check for tripped GFCI outlets in wet areas first before inspecting individual outlet wiring connections.
What are the signs of surge-damaged outlets?
Surge-damaged outlets show black or brown scorch marks around slots, melted or discolored plastic, burning odors, warm surfaces, or visible cracks in the outlet face. Any of these signs indicate the outlet poses a fire hazard and needs immediate replacement by a professional.
How do you test if an outlet has power?
To test if an outlet has power, plug a known-working device like a lamp or phone charger into the outlet, or use a non-contact voltage tester. Test your voltage tester on a working outlet first to confirm it’s functioning properly before checking suspect outlets.
When should you call an electrician for dead outlets?
Call an electrician for dead outlets when breakers repeatedly trip after resetting, you smell burning odors, see sparks or smoke, multiple circuits fail simultaneously, or basic troubleshooting doesn’t restore power. Professional help prevents dangerous mistakes and ensures code-compliant repairs.
What causes multiple outlets to stop working at once?
Multiple outlets stop working at once when they share the same circuit and an upstream connection fails, a single GFCI outlet protecting downstream outlets trips, or loose wiring interrupts power flow. The problem typically exists at the first dead outlet in the chain.
How do you prevent outlet damage from power outages?
Prevent outlet damage from power outages by installing a whole-house surge protector at your main panel, using quality surge protector power strips for electronics, and unplugging sensitive devices during severe storms. Avoid overloading outlets with multiple high-wattage appliances.
Can you replace an outlet yourself safely?
You can replace an outlet yourself safely by turning off power at the breaker, verifying no voltage with a tester, photographing wire connections before disconnecting, and properly connecting ground, neutral, and hot wires to correct terminals. Skip DIY if you lack confidence or experience.