

Ever notice how ceiling cracks have this sneaky habit of getting longer every time you glance up? You’re not imagining it. Most ceiling cracks start small and keep spreading because the real problem underneath never gets fixed. The good news is most repairs take less than an hour of actual work and maybe $20 in supplies. You just need to know what’s causing the crack, pick the right materials for your situation, and resist the urge to rush through drying time. Skip those steps and you’ll be staring at the same crack six months from now.
Essential Overview of Ceiling Drywall Crack Repair

Ceiling cracks show up in most homes eventually. The good news? Most of them are totally fixable without calling in help. You don’t need special training or a garage full of tools. If you’ve patched a wall before or even just painted a room, you’ve got enough experience to handle this.
Getting it right comes down to four things: figuring out what caused the crack, picking materials that match your situation, putting compound on with a light hand, and not rushing the drying time between coats. It’s not complicated. But it does require waiting around between steps.
Diagnosing Ceiling Cracks: Types and Underlying Causes

Before you crack open that joint compound, spend a few minutes actually looking at what you’re dealing with. The crack’s appearance and location tell you what’s happening behind the surface. That info shapes how you fix it and whether you’re looking at a quick cosmetic patch or something bigger.
Identifying Crack Types and Patterns
Hairline cracks are super thin, barely wider than a hair. They don’t grow and usually come from minor settling or humidity changes. Easiest type to fix.
Straight line seam cracks run where two drywall sheets meet. They happen when the tape or mud fails at the joint. Pretty common in newer homes that are still settling.
Spiderweb patterns radiate out from one spot in multiple directions. These often point to foundation movement underneath. Worth keeping an eye on.
Wide structural cracks are bigger gaps, sometimes with visible sagging or bowing nearby. These mean serious problems. Foundation shifting, major water damage, or bad workmanship during construction.
Discolored cracks show up with brown, yellow, black, or green staining around them. The discoloration means water damage, either active or past. Sometimes mold. You need to fix the leak before you touch the crack.
Recurring cracks keep coming back in the same spot after you repair them. They’re telling you the real problem hasn’t been fixed yet. Stop patching and start investigating.
Common Causes Behind Ceiling Cracks
Most ceiling cracks start with movement. Houses shift as ground settles beneath them, especially during the first few years after construction. Temperature swings make framing lumber expand when it’s humid and contract when it’s dry. Roof truss uplift happens when attic trusses move up and down with temperature, pulling the ceiling away from walls at the edges. All of this is normal. But it stresses rigid drywall.
Poor installation creates different problems. Drywall installed without proper support or seams that didn’t get taped right eventually crack at those weak spots. Joint compound put on too thick shrinks while drying, creating those spiderweb hairline patterns. Screws driven too deep or nails that pop through over time leave small cracks around fasteners.
Water causes cracks differently. Roof leaks or plumbing issues from upstairs soften the joint compound holding everything together. Wet compound loses strength, and the drywall’s weight creates cracks as joints fail. High humidity alone can do this in poorly ventilated homes, though it takes longer. Seeing a crack with staining around it means you’ve got a water damage restoration services situation beyond simple crack repair.
Watch for warning signs elsewhere. Doors and windows that suddenly stick. Floors that slope when you drop a marble. Step pattern cracks in exterior walls. A leaning chimney. The ceiling cracks might be showing you foundation movement. Those situations need a structural engineer before you do cosmetic work.
Materials and Tools Required for Ceiling Crack Repair

Knowing what you need and why makes shopping easier. Materials split into two groups: what goes into the repair and what you use to apply it. Most repairs use similar tools. Material selection depends on crack size.
You’ll already own some of what’s needed for basic supplies. The specialized drywall items cost almost nothing and you can find them at any home center. The difference between a repair that holds and one that cracks again often comes down to using the right product for your specific crack.
| Item | Type | Best Used For |
|---|---|---|
| Joint compound (premixed) | Material | All crack repairs, especially those needing tape reinforcement |
| Spackle | Material | Very thin hairline cracks that don’t need reinforcement |
| Mesh tape (self-adhesive) | Material | Reinforcing cracks 1/8 inch and wider, easier for beginners |
| Paper tape | Material | Stronger reinforcement, requires more skill to embed properly |
| Flexible patching compound | Material | Sealing repaired cracks in areas prone to movement |
| Drywall primer | Material | Sealing compound before painting to ensure even color |
| Ceiling paint | Material | Final finish, high-hiding formulas work best |
| Putty knife or 6-inch taping knife | Tool | Applying compound, removing loose material, feathering edges |
| Utility knife or five-in-one tool | Tool | Cleaning crack edges and removing loose debris |
| Drywall sanding sponge | Tool | Smoothing dried compound, wet or dry use |
| Sturdy step ladder | Tool | Safe overhead access, never use chairs or stools |
| Canvas drop cloth | Tool | Floor protection, doesn’t get slippery when wet like plastic |
| Mixing paddle or stick | Tool | Stirring settled joint compound before use |
| Spray bottle with water | Tool | Wet sanding technique to eliminate airborne dust |
Quality materials cost a bit more but create repairs that last. Premixed joint compound stays workable longer than powder you mix yourself, and shrinks less while drying. For overhead ceiling work, safety matters. Use a solid step ladder with a wide base. Never climb on wobbly chairs, stools, or makeshift platforms. The risk isn’t worth it.
Surface Preparation and Cleaning Before Drywall Repair
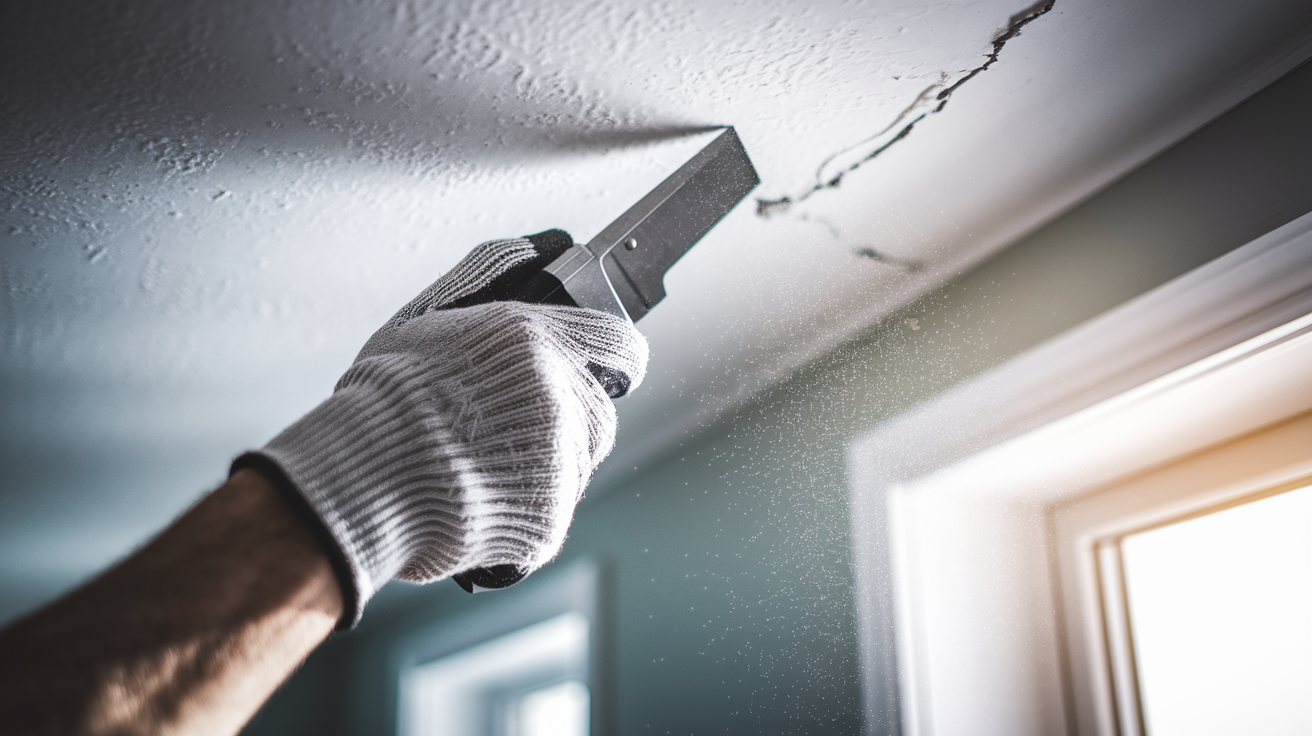
A clean surface makes the difference between compound that bonds permanently and a repair that fails in six months. Joint compound needs direct contact with solid drywall. Any loose material, dust, or debris between the compound and ceiling creates a weak layer that eventually gives way.
Start by using a utility knife or five-in-one tool to clean out the crack edges. Scrape away any loose or crumbling drywall, peeling paper facing, or old paint that’s not sticking well. Widen the crack slightly if you need to remove all the unstable material. You want to see solid drywall before applying anything new.
Wipe down the area around the crack with a slightly damp cloth. This gets rid of fine dust that settles on ceiling surfaces over time. Let the ceiling dry completely before opening your compound container. Even a thin layer of dust prevents proper adhesion.
Protect your floors and furniture before starting. Canvas drop cloths work better than plastic sheeting because they absorb drips and don’t turn into skating rinks when compound spatters. Move small furniture out if you can. Dust from sanding later will settle on everything, so the less you have underneath, the easier cleanup becomes.
Complete Repair Process for All Ceiling Crack Sizes

The repair approach changes based on how wide the crack measures. Hairline cracks under 1/8 inch get simpler treatment. Wider cracks need reinforcement to prevent them from opening back up after you finish. Both methods follow similar principles but use different materials and steps.
Repairing Hairline and Small Cracks (Up to 1/8 Inch)
Clean the crack completely using your utility knife to remove any loose material or debris inside.
Apply a thin first coat of spackle or joint compound with your putty knife, pressing it into the crack and smoothing it flush with the ceiling surface. For very thin hairline cracks, you can work spackle into the gap using your finger. Keep the layer as thin as possible.
Allow the compound to dry completely. You’ll know it’s ready when the color turns from gray or tan to bright white. Drying typically takes four to six hours depending on humidity and how thick you applied it.
Apply a second thin coat if the crack still shows or if the first coat shrunk slightly. Feather the edges out an inch or two beyond the first application to create a gradual blend.
Sand lightly with a fine grit sanding sponge once everything dries, using gentle circular motions to smooth the surface and blend the edges into the surrounding ceiling.
Repairing Wide Cracks (1/8 Inch and Larger) with Tape Reinforcement
Choosing between mesh and paper tape comes down to experience level. Mesh tape is self-adhesive and more forgiving for DIY repairs. You stick it over the crack and then embed it in compound. Paper tape creates a stronger repair but requires more skill because you have to bed it in wet compound without creating bubbles or wrinkles.
Clean the crack thoroughly, removing all loose material and widening slightly if needed to reach solid drywall on both sides.
Apply your first layer of joint compound at least three inches wide, centered directly over the crack. Use your taping knife to press it firmly into the crack and spread it evenly on both sides.
Embed your tape choice into the wet compound. For mesh tape, press it into place and smooth from center outward to eliminate air bubbles. For paper tape, center it over the crack and use your knife to press it flat, squeezing out excess compound while ensuring the tape makes full contact.
Apply a second coat of compound over the tape, covering it completely and feathering the edges. This coat should extend about six inches wide. Let it dry for 24 hours.
Check for any low spots or visible tape texture after drying. Apply a third coat if needed, spreading it even wider (eight to ten inches) and feathering the edges out farther for a gradual transition.
Wait another full 24 hours for drying. The compound will turn bright white when it’s ready for the next step.
Apply a final light coat if you want an extra smooth finish, or move to sanding if the surface already looks level and smooth.
Most repairs need between two and four coats total. The specific number depends on crack depth, how smooth you got each application, and how much the compound shrinks as it dries. Thin coats are your friend here. They dry faster, shrink less, and create fewer problems than thick applications. The compound will tell you when it’s dry by changing color to bright white. If you see any gray or dark areas, it’s still wet inside and needs more time.
Proper Sanding Techniques for Ceiling Drywall Repairs
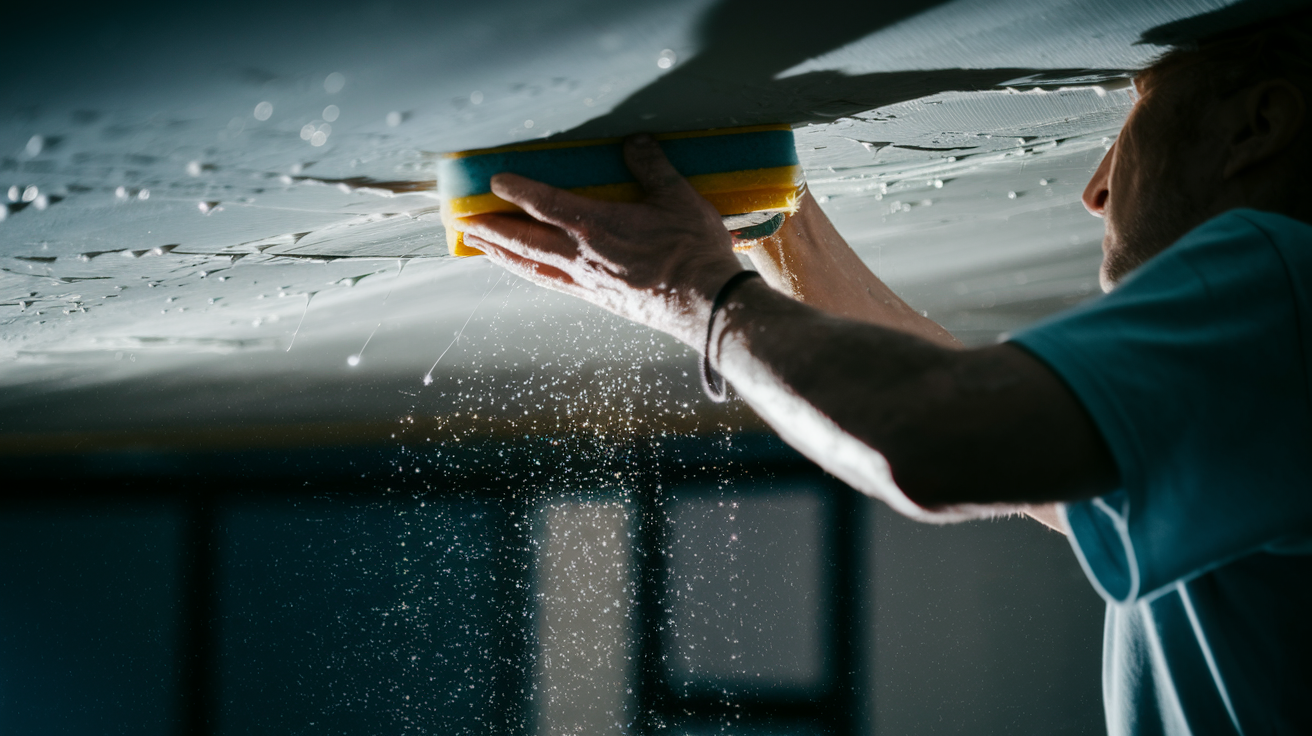
Sanding removes the small ridges and high spots left by your taping knife and creates the smooth surface you need before primer and paint. You’ve got two methods available, and each has advantages depending on your situation.
Dry sanding works quickly and gives you good control. Use fine grit sandpaper between 150 and 220 grit. Coarser paper cuts too aggressively and leaves scratches you’ll see through paint. Wrap the sandpaper around a sanding block or use a sanding sponge for better control. Work in gentle circular motions, applying light pressure. Check your progress frequently by running your hand over the repair. You should feel a smooth transition with no edges or bumps. The downside to dry sanding is dust. It creates clouds of fine powder that settle everywhere and hang in the air. Wear a dust mask and eye protection.
Wet sanding eliminates the dust problem completely and works especially well for ceiling repairs where the dust would fall on your face. Fill a spray bottle with clean water and saturate your sanding sponge. When fully soaked, the sponge works like coarse grit sandpaper, cutting faster for initial smoothing. As you wring out excess water, the slightly damp sponge acts more like fine grit paper for your final finishing passes. The water dissolves the surface layer of compound, letting you smooth it without creating airborne particles. Keep a bucket of clean water nearby to rinse your sponge frequently as it loads up with dissolved compound.
After sanding, run your hand across the repair in different directions and at different angles. Your fingers detect imperfections your eyes might miss. Feel for any ridges, bumps, or sudden edges where the repair meets the original ceiling. If you find problems, apply another thin coat of compound to those specific spots, let it dry, and sand again.
Matching Ceiling Texture After Drywall Crack Repair

A perfectly smooth repair stands out like a spotlight on a textured ceiling. The texture pattern has to match the surrounding surface or your eye will catch the difference immediately. The challenge level depends on what type of texture you’re working with.
Smooth ceilings demand the most careful work. Any imperfection shows. You need near perfect sanding and sometimes an extra coat of compound just to get the surface completely flat and feather the edges invisibly into the existing ceiling. The advantage is you don’t need to replicate a texture pattern.
Textured ceilings come in several common patterns. Knockdown texture gets created by spraying or stomping joint compound onto the surface, then lightly flattening the peaks with a trowel after it starts to set. You can replicate this with a texture spray product designed for patches, then gently knock down the high points with a clean taping knife after a few minutes. Orange peel texture looks like tiny bumps across the surface, similar to an orange skin. Spray-on texture products in cans work well for small patches. Apply light coats from about 12 inches away, building up the texture gradually. Skip trowel texture shows random arcing patterns from joint compound applied with a trowel in sweeping motions. This one takes practice to match convincingly.
Popcorn ceiling texture creates its own set of problems. Those bumpy, cottage cheese looking ceilings were popular decades ago but have fallen out of favor. They reduce home value in many markets. More importantly, popcorn texture installed before 1978 may contain asbestos fibers. If your home was built before that year, have the ceiling tested before you disturb the texture. Asbestos removal requires professional remediation and isn’t a DIY project. Even if your popcorn ceiling is asbestos free, matching the texture perfectly is difficult. Spray texture products exist for popcorn repairs, but results vary. Some homeowners use this as motivation to remove the popcorn texture entirely and finish with a smooth or lightly textured ceiling instead.
Priming and Painting Ceiling Drywall Repairs

Skipping primer might seem like a shortcut, but it creates visible problems. Joint compound is porous and absorbent. Paint soaks into it unevenly, creating a flat, dull spot that stands out against the surrounding sheen even when you use the exact same paint. Primer seals the compound and creates a consistent base for your finish paint.
Apply primer formulated specifically for drywall to your repaired area. Brush or roll it on, extending a few inches beyond the edges of your compound application. Let the primer dry completely according to the manufacturer’s instructions, usually one to two hours. The primed patch should look uniform in color and sheen with no blotchy areas. If you see uneven absorption, apply a second coat of primer.
Painting technique matters for invisible repairs. Use ceiling paint with high hiding pigments. These paints have extra titanium dioxide that covers better in fewer coats. Apply your first coat with a roller, working the paint well beyond your repair area. Let it dry, then apply a second coat. Two thin coats cover better than one thick application. Feather your paint strokes so the edges of where you painted blend gradually into the unpainted areas.
Painting just the repair rarely looks perfect. Even with matching paint from the same can, slight color differences show between old and fresh paint. The old paint has aged, collected dust, and maybe yellowed slightly from exposure. If you want truly invisible repairs, paint the entire ceiling. Yes, it’s more work, but it guarantees perfect color matching. The repaired crack will disappear completely under uniform fresh paint.
Warning Signs of Serious Structural Problems in Ceiling Cracks

Most ceiling cracks are cosmetic problems that don’t threaten your home’s structure. But some cracks are messengers telling you about bigger issues developing in the foundation or framing. Recognizing the difference matters because repairing the crack without addressing the underlying cause just wastes time and money.
The crack comes back a few months after you fix it, looking nearly identical to the original. That’s your ceiling telling you the force that created the first crack is still active.
Cracks that extend from the ceiling down the wall in one continuous line, especially near corners.
Visible bowing, sagging, or drooping sections of ceiling near the crack.
Spiderweb patterns radiating out from a central point, particularly over structural elements.
Doors and windows that suddenly stick or don’t close properly when they used to work fine.
Floors that feel sloped or where balls and marbles roll to one side.
Cracks in exterior foundation walls, especially step pattern cracks following mortar lines.
Cracks that keep appearing in the same location after multiple repairs.
When you notice these patterns, the ceiling crack is a symptom, not the problem itself. Something underneath is moving. Foundation settlement, soil shifting, inadequate structural support, or water damage affecting load bearing members all create forces that push and pull on your drywall. Patching the crack at that point is like putting a bandage on a broken bone. It doesn’t fix what’s actually wrong.
These situations need evaluation from a structural engineer or foundation specialist. They’ll identify what’s causing the movement and recommend repairs that address the source. Once the foundation or structure gets stabilized, then your ceiling crack repairs will hold permanently.
When to Call a Professional for Ceiling Crack Repair

Knowing your limits isn’t about skill level. It’s about recognizing situations where professional expertise, specialized tools, or structural knowledge become necessary for proper repairs. Many ceiling cracks fall within DIY capability, but some cross that line.
Call a professional when cracks keep coming back in the same spot after you’ve repaired them correctly. Recurring cracks mean you’re fighting an ongoing structural issue that needs diagnosis beyond what a visual inspection provides. Water damage and mold also require expertise. If you see discoloration around cracks, brown or yellow water stains, or any signs of mold growth (black, green, or fuzzy spots), you’re dealing with moisture problems that need to be traced to their source and properly remediated. Trying to patch over active water damage is pointless. Large cracks accompanied by ceiling sagging or noticeable bowing indicate serious structural problems that could involve framing failure or major foundation issues. That’s not patchwork territory. When cracks suggest foundation settlement, especially if you notice other warning signs throughout the house like sticking doors or sloped floors, a structural engineer needs to evaluate the situation before anyone does cosmetic repairs. Extensive cracking throughout multiple rooms sometimes indicates whole house issues that require comprehensive assessment.
Professional repair contractors bring advantages beyond just doing the physical work. They properly diagnose what caused the crack in the first place. They own specialized tools for texture matching and large repairs. They understand structural issues and know when to bring in engineers or foundation specialists. Most importantly, they warranty their work. If the repair fails, they come back and fix it properly.
The cost benefit calculation sometimes favors calling home repair and recovery services even for repairs you could technically do yourself. If the crack sits in a difficult location requiring significant ladder work, if you’re not confident in your diagnosis of the cause, or if you simply don’t want to invest the time in multiple coats and drying periods, professional help makes sense. A contractor can complete in one day what might take you a week of scattered effort between other obligations.
Cost Estimates and Timeline for Ceiling Drywall Crack Repair
Understanding time and money investment helps you decide between DIY and professional repair. The numbers vary based on crack size and whether underlying issues need addressing, but most straightforward repairs fall into predictable ranges.
| Repair Type | DIY Cost | DIY Time | Professional Cost |
|---|---|---|---|
| Single hairline crack | $15-30 | 4-6 hours over 2 days | $150-250 |
| Small crack with tape (under 2 feet) | $25-45 | 6-8 hours over 3 days | $200-350 |
| Large crack with tape (2-6 feet) | $35-60 | 8-12 hours over 3-4 days | $300-500 |
| Extensive cracking (multiple cracks, large area) | $60-120 | 12-20 hours over 4-5 days | $500-1,200 |
Timeline depends mostly on drying time between coats, not actual work hours. You might spend only 30 minutes applying each coat of compound, but then you wait 24 hours before the next step. A typical three coat repair takes three days minimum. Hairline cracks that only need two coats can finish in two days. Add another day for priming and painting. Realistically, plan on two to four days from start to painted finish for most ceiling crack repairs.
Material costs for DIY remain fairly consistent. Joint compound runs ten to twenty dollars for a container that handles multiple repairs. Drywall tape costs five to ten dollars. Sanding sponges add another five. Primer ranges from fifteen to twenty five dollars per quart, and ceiling paint runs twenty five to forty dollars per gallon. If you already own basic tools (putty knives, drop cloths, ladder), your total material investment for a typical crack repair stays under fifty dollars. The biggest cost becomes your time, particularly the waiting periods between coats.
Preventing Future Ceiling Drywall Cracks
Fixing cracks that keep appearing gets old fast. Prevention focuses on controlling the conditions that cause cracks and using materials that tolerate the normal movement every house experiences. You can’t stop a house from settling or wood from expanding and contracting with seasons, but you can reduce the stress those movements place on your drywall.
Maintain indoor humidity between 40 and 50 percent year round using humidifiers in winter and dehumidifiers in summer. Extreme humidity swings cause more expansion and contraction in building materials.
Ensure proper attic ventilation so temperature extremes don’t build up above your ceiling. Soffit vents and ridge vents keep air moving and reduce stress on roof trusses.
Address water leaks immediately when you discover them. Even small leaks weaken joint compound and drywall over time, eventually causing cracks and more serious damage.
In new construction, wait six to twelve months before doing final finish work. New homes settle significantly in the first year. Finishing too early means you’ll just be repairing cracks shortly after.
Use quality materials during installation. Cheap joint compound shrinks more as it dries. Skimping on tape or rushing the taping process creates weak points that crack later.
Fix foundation issues promptly when they’re discovered. Small foundation problems get worse, and the damage spreads to your drywall and other finishes the longer you wait.
Avoid rapid temperature changes in your home. Cranking the heat up fifteen degrees or running the AC on maximum causes building materials to expand and contract quickly, stressing the joints.
Inspect ceilings annually for hairline cracks that are just starting. Catching them early means simpler repairs before they grow into larger problems.
For areas prone to recurring cracks, flexible patching compounds provide an extra layer of insurance. Products like Elastopatch Smooth Flexible Patching Compound have some give to them rather than being completely rigid like standard joint compound. After you repair a crack normally and sand it smooth, apply one or two coats of flexible compound with a small brush directly over the repair area. The flexibility accommodates minor movement without cracking, essentially breaking the cycle of repair and recracking.
Troubleshooting Common Ceiling Crack Repair Problems
Even when you follow instructions carefully, repairs sometimes don’t turn out as planned. Most problems have straightforward fixes once you understand what went wrong.
Crack Reappears After Repair
The crack opens back up in the same location weeks or months after you finished. This usually means one of three things went wrong. First, you might have applied compound too thick in your eagerness to fill the crack quickly. Thick applications shrink more as they dry, and that shrinkage can reopen the crack from within. Use thinner coats next time. Second, you may have skipped the tape reinforcement on a crack that needed it. Any crack wider than a hairline benefits from tape. Third, and most likely, the underlying cause of the crack is still active. Something is still moving underneath. Review the earlier section on structural warning signs and investigate whether foundation settlement, water damage, or framing issues need addressing before you attempt another cosmetic repair.
Visible Repair Line or Hump
You can see exactly where the repair is because it creates a visible ridge or line on the ceiling. The compound dried higher than the surrounding surface, or you didn’t blend the edges properly. This happens when you don’t feather your compound applications far enough beyond the repair area. Each coat should extend several inches wider than the previous coat, with the edges thinning out gradually. It also results from inadequate sanding. Get back up there with your sanding sponge and sand the repair more aggressively, extending well beyond the edges of the visible area. If you’ve already painted, you’ll need to sand off the paint, reapply a thin coat of compound extending farther out, sand again with better feathering technique, and repaint. Wet sanding works particularly well for fixing these situations because it creates very smooth transitions.
Compound Won’t Dry Completely
Hours or even a day later, your compound still shows dark or gray areas instead of turning bright white. Thick coats take longer to dry because moisture has to evaporate from deep within the application, not just the surface. Cold temperatures and high humidity slow drying significantly. Poor air circulation keeps moist air trapped against your repair. The fix involves patience and environmental control. Run a dehumidifier in the room if humidity is high. Improve air circulation with fans, though don’t aim them directly at the repair or they’ll cause uneven drying. Keep room temperature above 60 degrees for proper drying. Most importantly, commit to thin coats in your next application. A thin coat might dry in four to six hours, while a thick coat can take 24 to 36 hours or longer.
Texture Doesn’t Match Surrounding Ceiling
Your repair looks smooth and perfect, but the texture you applied doesn’t quite match the rest of the ceiling. Texture matching is genuinely difficult and takes practice. The spray distance, amount of material, application technique, and drying time before knockdown all affect the final appearance. Professional texture applicators develop this skill over years. For DIY repairs, practice your technique on scrap drywall or cardboard before you spray your actual repair. Commercial texture products designed specifically for patches often work better than trying to mix and spray your own. If you can’t get an acceptable match after several attempts, you have two options. You can texture a larger area, blending the repair zone into a freshly textured section several feet across. The larger application makes minor variations less noticeable. Or you can make the decision to texture the entire ceiling uniformly. That guarantees perfect matching but obviously involves more work.
Final Words
Ceiling cracks don’t have to live rent-free in your head every time you look up.
Most repairs come down to clean prep, the right materials, and patience while each coat dries. If you work in thin layers and give the compound time to cure, you’ll get a solid, lasting fix.
When cracks keep coming back or you spot sagging and water stains, that’s your cue to bring in a pro. Sometimes the smartest move is knowing when to step back.
But for everyday settling cracks and seam splits? You’ve got this. Take your time, repair ceiling drywall crack the right way, and you’ll have one less thing to worry about.
FAQ
How to repair a small crack in ceiling drywall?
To repair a small crack in ceiling drywall, clean the crack edges with a utility knife, apply a thin coat of spackle or joint compound with a putty knife, let it dry completely (it turns bright white), then lightly sand smooth and prime before painting.
What is the best filler to use on ceiling cracks?
The best filler to use on ceiling cracks depends on the crack width: spackling works well for very thin hairline cracks, while joint compound paired with mesh or paper drywall tape provides the strongest repair for cracks wider than 1/8 inch.
Are ceiling cracks easy to fix?
Ceiling cracks are easy to fix for most homeowners with basic DIY skills, especially hairline and small cracks that require simple spackling, though wider cracks need tape reinforcement and multiple coats with 24-hour drying time between applications.
Is it normal for ceiling drywall to crack?
It is normal for ceiling drywall to crack as homes settle over time, experience temperature fluctuations, or develop minor stress from building movement, though large cracks, recurring cracks, or cracks with ceiling bowing indicate serious structural problems requiring professional assessment.
When should I call a professional for ceiling crack repair?
You should call a professional for ceiling crack repair when cracks reappear in the same location, show discoloration indicating water damage or mold, accompany ceiling sagging or bowing, extend down walls suggesting foundation issues, or appear throughout multiple rooms.
How long does ceiling crack repair take?
Ceiling crack repair takes 2-4 days for most DIY projects due to required drying time between coats (24 hours per coat), though actual hands-on work time is only a few hours spread across applying compound, sanding, and painting.
Can I just paint over a ceiling crack?
You cannot just paint over a ceiling crack because paint won’t fill the gap or stop the crack from widening, and the crack will remain visible through the paint, requiring proper filling with joint compound or spackle first.
Why do ceiling cracks keep coming back?
Ceiling cracks keep coming back when the underlying cause hasn’t been addressed, such as ongoing foundation movement, unresolved water leaks, temperature fluctuations causing expansion and contraction, or joint compound applied too thickly causing shrinkage as it dries.
What causes spider web cracks in ceiling drywall?
Spider web cracks in ceiling drywall are caused by foundation settling issues creating stress in multiple directions, or by joint compound applied too thickly that shrinks as it dries, pulling away from the surrounding surface in a web pattern.
Do I need to use tape for all ceiling cracks?
You do not need to use tape for all ceiling cracks, only for cracks wider than 1/8 inch, while very thin hairline cracks can be filled with spackling alone, though tape reinforcement prevents wider cracks from reappearing.
How do I match popcorn texture after ceiling repair?
To match popcorn texture after ceiling repair, use spray texture products specifically designed for patching popcorn ceilings, though you should know that popcorn ceilings installed before 1978 may contain asbestos requiring professional handling.
What’s the difference between mesh tape and paper tape for ceiling cracks?
The difference between mesh tape and paper tape for ceiling cracks is that mesh tape is self-adhesive and easier for DIYers to apply, while paper tape creates a stronger repair but requires more skill to embed properly in wet joint compound.