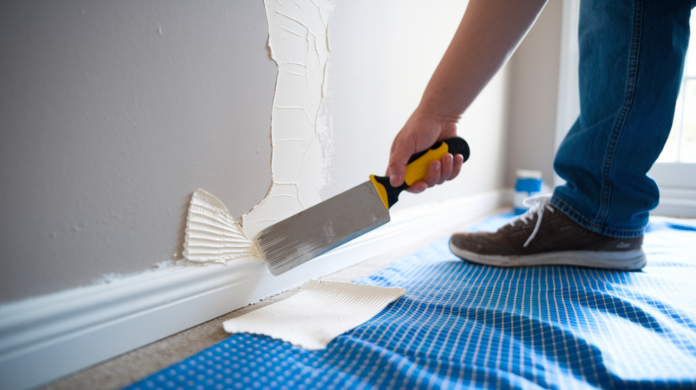

You’ve noticed that corner crack before, maybe ignored it for months, but now it’s bugging you every time you walk past. Most corner cracks show up from natural settling or seasonal temperature swings, and fixing them is simpler than you’d think. With basic tools, a few coats of joint compound, and a weekend afternoon, you can patch that crack so it stays fixed. This guide walks through exactly what causes corner cracks, when they’re a bigger problem, and how to repair them step by step so the crack doesn’t come back.
Step-by-Step Corner Crack Diagnosis and Repair Overview

Drywall corner cracks show up where walls meet other walls or ceilings. Inside corners, outside corners, wall corners, and ceiling corners. Most of these cracks are fixable with basic tools and a weekend afternoon.
Assessing Crack Severity: Normal vs. Serious
Hairline cracks from natural building settling are normal. They’re thin, stable, and don’t come with other warning signs.
Serious cracks are different. Look for cracks wider than ¼ inch, bulging walls around the damaged area, water stains, mold spots, or a musty smell. If the crack keeps coming back after you fix it, or if you see multiple cracks radiating from one corner, that’s worth a closer look.
When a crack appears with discoloration, soft drywall, or visible moisture, call for a professional assessment. Those signs point to active water damage or structural movement that cosmetic repair won’t solve.
Common Causes of Corner Cracking
Natural building settling and foundation movement create stress at corners. Every house settles over time, especially in the first few years. That movement shows up as small cracks where drywall panels meet.
Temperature changes and humidity swings make drywall expand and contract. Seasonal cottages see this often. Winter cold followed by summer heat creates stress at corners, especially around windows and doors.
Physical impact from moving furniture, bumping corners with vacuum cleaners, or general wear in high traffic hallways damages outside corners. Kids running through doorways, pets brushing past walls, or leaning furniture against corners all add up.
Water damage around pipes, windows, and roofs weakens drywall. A slow leak behind a wall softens the material until it cracks under normal stress.
Basic Repair Process Overview
The repair sequence is straightforward. You’ll prepare the damaged area by cutting out loose material with a utility knife or jab saw. Then you’ll apply tape embedded in joint compound to reinforce the corner.
Multiple thin coats of joint compound follow, with drying time between each layer. After the final coat dries completely, you’ll sand the area smooth and finish with primer and paint. The whole process spans a few days because of drying time, but the actual work time is measured in minutes per step.
When Underlying Issues Must Be Addressed First
Sometimes the crack is just a symptom. Active water leaks need to be fixed before you patch the corner, or the crack will come right back. Same with ongoing foundation movement. If your house is still actively settling in that area, a cosmetic repair won’t hold.
Identifying the root cause matters. Check for moisture sources, look for foundation cracks in your basement or crawlspace, and watch for signs that the problem is bigger than surface damage. If you’re seeing foundation problems like diagonal cracks or separating walls, address those first.
The following sections walk through exactly what tools you’ll need, what materials to buy, and how to complete each step of the repair so it stays fixed.
Tools and Materials Needed for Corner Crack Repair

Having everything ready before you start saves trips to the hardware store mid project. Most items are inexpensive and available at any home center.
Essential Tools for Corner Crack Repair
Utility knife cuts through drywall, creates V grooves along cracks, and trims tape to length. Keep extra blades handy.
6 inch taping knife applies compound in tight spaces and embeds tape in corners.
10 inch taping knife feathers compound over larger areas and creates smooth transitions.
Putty knife handles detail work, scraping loose material, and applying compound in small spots.
Mud pan holds joint compound at a comfortable working level and makes loading your knife easier.
Sandpaper (80 grit, 150 grit, 220 grit) removes high spots with coarse grit, creates smooth finish with fine grit.
Sanding block provides flat, even pressure when smoothing compound. Better control than hand sanding alone.
Drywall jab saw removes larger sections of damaged drywall when corner bead replacement is needed.
Corner tools are specialized knives designed for inside and outside corner application, though standard taping knives work fine.
Hammer or screwdriver secures corner bead with nails or screws.
Dust mask protects you from fine dust that you don’t want in your lungs. Sanding joint compound creates a lot of it.
Painter’s tape masks adjacent surfaces and protects areas you don’t want compound on.
Drop cloths protect floors and furniture from dust and compound drips.
Joint Compound and Tape Selection
All purpose joint compound is the easiest to work with. It stays workable longer, which gives you time to smooth and adjust. The tradeoff is longer drying time, usually 24 hours between coats.
Setting compound dries faster and shrinks less. If you’re working on a tight timeline, setting compound lets you apply multiple coats in one day. The catch is that once it starts to set (usually 20 to 90 minutes depending on the type), you can’t rework it. It’s also harder to sand than all purpose.
Lightweight compound sands easier than standard compound. If you’re new to drywall repair, lightweight compound is more forgiving when you’re learning to feather edges smooth.
Topping compound is designed for final coats. It goes on smooth and sands to a fine finish, but it’s not meant for embedding tape or filling gaps.
Paper drywall tape is stronger than mesh and less likely to bubble. Before pressing paper tape into compound, run it through water or wipe it with a wet sponge. Dry tape absorbs moisture from the compound too fast and creates bubbles you’ll spend extra time fixing.
Fiberglass mesh tape is self adhesive and easier to position. It works well for small cracks and inside corners. Some pros avoid it for outside corners because it’s not as strong as paper tape under stress.
Corner Bead Options and When Replacement Is Needed
Metal corner bead is the traditional choice. It’s durable, protects the corner from future impacts, and creates a crisp edge. The downside is that metal can rust if moisture gets behind it, and it’s less forgiving if your corner isn’t perfectly straight.
Plastic corner bead is easier to cut and install. It won’t rust, and it’s flexible enough to conform to slightly irregular corners. It’s not as tough as metal for high traffic areas, but it’s plenty strong for most residential applications.
Corner bead replacement becomes necessary when the bead itself is damaged, loose, or missing. If you can see the metal or plastic bead bent, dented, or pulling away from the wall, it needs to come out. Small cracks in compound over an intact bead can be repaired without replacing the bead.
Flexible composite corner beads like Levelline and Strait Flex resist cracking better than rigid metal or plastic. If you’re repairing a corner that’s cracked before, composite bead helps prevent the problem from coming back.
| Item | Type/Options | Purpose | Key Selection Criteria |
|---|---|---|---|
| Taping Knives | 6 inch, 10 inch stainless steel | Applying and smoothing joint compound | Flexible blade, comfortable handle, rust resistant |
| Joint Compound | All purpose, setting, lightweight, topping | Filling cracks and building smooth surface | Drying time needs, ease of sanding, project timeline |
| Tape | Paper, fiberglass mesh | Reinforcing crack and preventing re cracking | Strength requirements, ease of application, corner type |
| Corner Bead | Metal, plastic, flexible composite | Reinforcing and protecting outside corners | Durability, installation ease, crack history, traffic level |
| Primer | Drywall primer, PVA primer | Sealing compound and ensuring paint adhesion | Coverage, drying time, compatibility with topcoat |
| Paint | Match existing wall color and sheen | Final finish that blends repair invisibly | Color match accuracy, sheen match (flat, eggshell, satin) |
| Sandpaper | 80 grit, 150 grit, 220 grit | Smoothing compound and feathering edges | Grit progression from coarse to fine, backing type |
Surface Preparation Before Corner Crack Repair
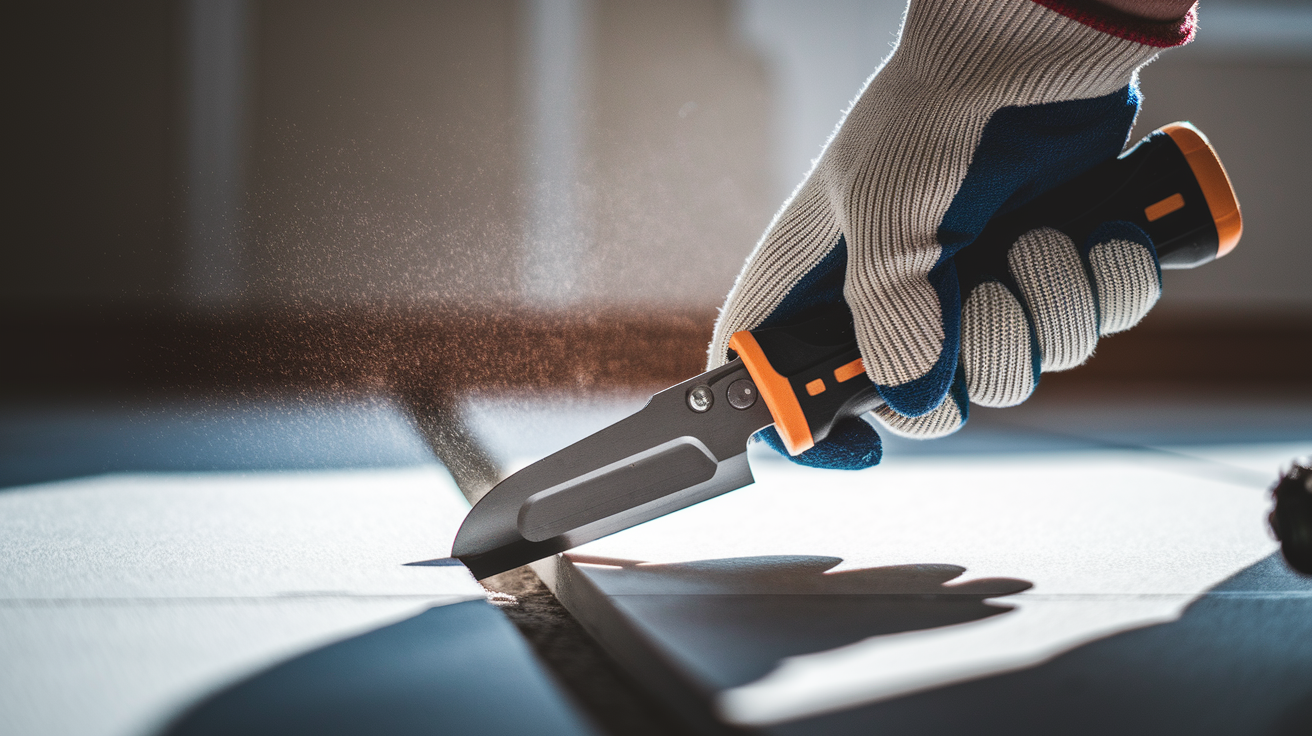
Skipping prep work is the main reason repairs fail. Joint compound only sticks to clean, solid drywall. Not to dust, loose paper, or crumbling material.
Cut a V shaped groove along the full length of the crack, going ⅛ to ¼ inches deep. This technique is called undercutting, and it gives the joint compound something to grip. Run your utility knife along each side of the crack at a slight angle so the groove is wider at the surface than at the bottom. The compound fills this profile and locks in place as it dries.
Remove all loose or crumbling drywall completely. Use your utility knife for small areas and a drywall jab saw for larger damaged sections. Peel away any torn paper facing. It won’t bond properly and will create bumps under your repair. Brush or vacuum the area to remove all dust and debris. Even a thin layer of dust prevents good adhesion.
Protect your workspace before compound starts flying. Lay drop cloths on the floor and tape plastic sheeting over furniture you can’t move. Open windows for ventilation if weather permits. Joint compound dust is fine and travels farther than you’d expect. A dust mask protects your lungs during prep and sanding.
Step by Step Process to Repair Inside Corner Cracks

Inside corners need a specific approach because you’re working with two surfaces meeting at 90 degrees. The tape has to fold cleanly into that angle without air pockets.
Apply a thin base coat of joint compound to both sides of the prepared crack. Use a 6 inch taping knife and spread compound about 3 inches wide on each wall surface. Don’t pile it on. This first layer just gives the tape something to stick to.
Fold and position your tape into the corner. If you’re using paper tape, run it through water first or wipe it with a damp sponge. Mesh tape is self adhesive, so just press it into place centered on the corner. Paper tape is stronger, but mesh is easier to position straight.
Embed the tape with your putty knife. Start at the top and work down, pressing firmly with the edge of your knife right into the corner fold. Push out from the center toward the edges on each side to remove air bubbles. You should see compound squeeze through the tape slightly. That means it’s making good contact.
Apply the first coat over the embedded tape. Load your 6 inch knife with compound and smooth it over the tape, extending 4 to 5 inches onto the drywall on each side. Feather the edges by lightening pressure as you move away from the corner. The goal is a smooth transition, not a visible ridge where compound ends.
Let it dry according to compound instructions. Setting type compound might be ready for the next coat in 20 to 90 minutes. All purpose compound needs at least 24 hours. Don’t rush this step. Wet compound under a second coat will crack.
Apply your second coat with a 10 inch knife for better feathering. This coat should extend 8 to 10 inches on each side, smoothing out any tool marks from the first pass. You’re building the surface gradually rather than trying to fill everything at once.
Check for smoothness before calling it done. Run your hand over the dried area. You shouldn’t feel ridges or valleys. If you do, a third thin coat might be needed. Most inside corner repairs look good after two coats.
Thin coats that dry completely beat one thick coat that takes days to dry and cracks as it shrinks.
Repairing Outside Corner Cracks with Corner Bead

Outside corners take more abuse than inside corners. Vacuum cleaners, moving furniture, kids running through hallways. All that contact shows up as cracks and dents.
Check whether the existing corner bead is still solid. Press on it gently. If it flexes or you can see gaps between the bead and the wall, it needs to be replaced. If the bead is tight and only the compound on top is cracked, you can repair without replacement.
Repairing Without Replacing Corner Bead
Minor damage over solid corner bead is the easiest fix. Fill the crack with joint compound just like you’d patch any drywall surface. Apply a thin first coat, let it dry completely, then build up additional coats until the surface is flush with the surrounding wall.
Use your taping knife at a slight angle, pulling compound smooth along the corner. The metal or plastic bead underneath guides your knife to maintain a straight edge. Feather the compound 6 to 8 inches onto the flat wall surfaces so the repair blends invisibly.
Two or three thin coats work better than one heavy application. Heavy coats crack as they dry and shrink away from the bead edge.
Installing Traditional Metal or Plastic Corner Bead
When the bead itself is damaged, it has to come out. Use a pry bar or claw hammer to pull nails, or back out screws with a drill. The bead usually comes off in pieces. That’s normal. Cut away any torn drywall paper left behind.
Measure the corner height and cut your new bead to length with tin snips for metal or a utility knife for plastic. Test fit the bead first. It should sit flush against both walls without rocking or gaps.
Position the bead centered on the corner with equal amounts of overlap on each wall. Starting at one end, drive drywall screws or nails through the bead flanges into the studs behind, spacing fasteners about 8 inches apart. Alternate sides as you work down the corner to keep the bead straight.
Check alignment as you go. Sight down the corner from both ends. The bead edge should form a perfectly straight line. If it bows out or dips in, back out nearby fasteners and adjust.
Apply joint compound over the installed bead with a 10 inch knife. The first coat fills the space between the bead flanges and the wall surface. Pull compound smooth from the bead nose outward, feathering onto the wall 8 to 10 inches on each side.
Let this coat dry completely, then apply a second coat that extends 10 to 12 inches. A third coat smooths any remaining imperfections. Each layer should be thinner than the last as you refine the surface.
Flexible Composite Corner Bead Installation
Composite corner beads like Levelline and Strait Flex are a different approach. Instead of rigid metal or plastic, they’re made from flexible materials that move slightly with building settlement.
These beads work especially well on corners that have cracked before, on corners that aren’t perfectly straight, or in high traffic areas where impact is common. They’re easier to install than traditional beads because they don’t require fasteners.
Cut the composite bead to length with a utility knife or scissors. Apply a layer of joint compound to both walls forming the corner, about 4 to 6 inches wide. The compound should be thick enough to hold the bead but not so thick it squeezes out excessively.
Press the bead into the wet compound, centered on the corner with edges contacting both walls. Use your taping knife to smooth compound through the bead’s mesh or perforated surface, working from the center outward. The compound embeds into the bead material, creating a bond that’s stronger than mechanical fasteners.
Smooth the area with your knife, feathering edges 6 to 8 inches onto the surrounding walls. The bead disappears into the compound layer. After it dries, apply additional coats just like traditional bead repairs. The finished corner looks identical to metal bead installation but resists re cracking better.
Sanding and Smoothing Your Corner Repair

A good sanding job makes the difference between a visible patch and an invisible repair. The goal is to blend feathered edges into the existing wall so smoothly that paint hides the transition completely.
Wait for complete drying before touching sandpaper to the repair. All purpose compound needs a full 24 hours minimum. Setting compound might be ready in a few hours, but check the manufacturer’s recommendation. Sanding too early gums up your paper and damages the repair.
Start with 80 to 120 grit sandpaper for knocking down high spots, ridges, and tool marks. This coarse grit removes material quickly but leaves visible scratches.
Progress to 150 grit sandpaper for the main smoothing pass. This intermediate grit refines the surface and removes scratches left by coarse paper.
Finish with 220 grit sandpaper for the final smooth surface. Paint adheres best and hides imperfections better over this finer finish.
Use a sanding block for flat, even pressure across the surface. Hand sanding creates waves and low spots that show up after painting. A block keeps everything level.
Sand with a circular or figure eight motion rather than straight lines. Light pressure is key. You’re smoothing the surface, not removing material. If you sand through to the tape, you’ll have to apply more compound and start over.
Feathering is the technique that makes repairs disappear. The compound edge needs to taper gradually from the repair area onto the surrounding wall. Hold your sanding block at a slight angle and work the outer edges more than the center. When you can’t feel a ridge where compound meets original drywall, the feathering is good.
Check your work with a bright light held at a sharp angle to the wall. Shadows reveal bumps, ridges, and low spots you can’t see under normal room lighting. A flashlight or work light positioned low and parallel to the wall shows every imperfection. Keep sanding and checking until the surface looks uniform under angled light.
Dust control matters more than you’d think. Fine joint compound dust settles everywhere and takes hours to vacuum up completely. Wet sanding with a damp sponge instead of sandpaper eliminates dust, though it takes more time and technique. Dustless sanding screens or vacuum equipped sanders capture dust as you work. At minimum, wear a dust mask and open windows for ventilation. After sanding, vacuum the repair area and wipe it with a barely damp cloth before priming.
Priming and Painting Corner Repairs

Primer creates a uniform surface that helps paint adhere properly and prevents the repaired area from looking different than the rest of the wall.
Primer Application and Purpose
Joint compound is porous and absorbs paint differently than existing painted drywall. Without primer, the repair area soaks up more paint and appears as a dull, flat spot even when you use the exact same paint color. This is called flashing.
Primer seals the porous compound and creates consistent absorption across the entire surface. It also provides better adhesion for the finish coat and helps prevent the compound from reabsorbing moisture from the paint, which can cause texture differences.
Apply primer to the entire repair area plus 2 to 3 inches beyond onto the existing painted surface. Use a small brush for corners and a roller for larger areas. One coat of primer is usually enough. Let it dry completely according to the product label before painting, usually 1 to 2 hours.
Texture Matching and Paint Application
Look at your existing wall texture before you start painting. Smooth finish is easiest. Just roll on paint and you’re done. Orange peel texture (fine, bumpy surface) is common on walls. Knockdown texture has flattened peaks. Spray texture or popcorn texture has raised bumps.
For smooth walls, apply paint with a roller in thin, even coats. Two thin coats cover better than one heavy coat.
For textured walls, you need to match the texture pattern before painting or the repair will stand out as a smooth spot. Aerosol spray texture works for small areas. Test the pattern on cardboard first, then apply to the primed repair. Let it dry, then paint normally. For orange peel texture, thin joint compound slightly and apply with a sponge or special texture roller, then paint after it dries.
Color matching is tricky if you don’t have leftover paint from the original job. Take a paint chip from an inconspicuous area (inside a closet works) to a paint store for color matching. Even with a perfect match, fresh paint often looks slightly different than paint that’s been on the wall for years. The difference usually disappears as the new paint cures.
Apply paint with a small roller for the main area and a brush for tight corners. Use the same type of paint that’s on the wall now. Flat, eggshell, satin, or semi gloss. Paint sheen matters as much as color for blending repairs.
Extend paint coverage several inches beyond the repair area, feathering it into the existing painted surface. This gradual transition hides the repair better than a sharp line where new paint stops. Multiple thin coats blend better than one thick coat. Let each coat dry completely before applying the next.
Troubleshooting Common Corner Repair Problems

Even careful work hits snags sometimes. Most issues are fixable without starting over.
| Problem | Cause | Solution |
|---|---|---|
| Crack reappears after repair | Underlying structural movement, insufficient tape reinforcement, or moisture intrusion continues | Address root cause first. Fix leaks, allow settling to stabilize. Use fiberglass mesh or paper tape if crack wasn’t taped initially. Consider flexible corner bead for outside corners. |
| Joint compound shrinks or sinks | Compound layer too thick, inadequate drying time between coats, or low quality compound | Apply thinner coats and allow full drying time. Fill sunken areas with additional thin layers. Switch to setting type compound which shrinks less. |
| Air bubbles under tape | Insufficient compound under tape, not pressing firmly during installation, or dry paper tape absorbing moisture too fast | Cut out bubbled section with utility knife. Moisten paper tape before embedding. Press firmly with putty knife to push out air and ensure full contact with compound. |
| Rough or uneven texture after drying | Tool marks not smoothed out, compound applied too thick, or dried compound dragged across wet surface | Sand rough spots with 150 grit sandpaper. Apply thin skim coat and smooth while wet. Clean taping knife between passes to avoid dragging dried bits. |
| Visible seam line after painting | Edges not feathered properly, inadequate sanding, or primer skipped | Sand edges more aggressively to create gradual transition. Apply primer before painting. Add thin skim coat if edge remains visible, then sand and reprime. |
| Paint flashing (different sheen) | Unpainted joint compound absorbs paint differently than sealed surface, or primer not applied | Always prime repaired areas before painting. If flashing appears after one coat, apply additional paint coat. Use same paint sheen as existing wall. |
Most problems trace back to rushing through steps or skipping drying time. Joint compound needs to dry completely between coats or it will crack, shrink, or fail to adhere properly. If you’re not sure whether a coat is dry, wait longer. An extra few hours of drying prevents redoing the entire repair.
Addressing moisture or structural issues before cosmetic repair saves time. A crack that comes back after patching means the underlying cause is still active. Check for leaks, foundation movement, or ongoing settling. Fix those first, then repair the visible damage. Otherwise you’re just covering up a problem that will reappear.
When to Call a Professional for Corner Cracks
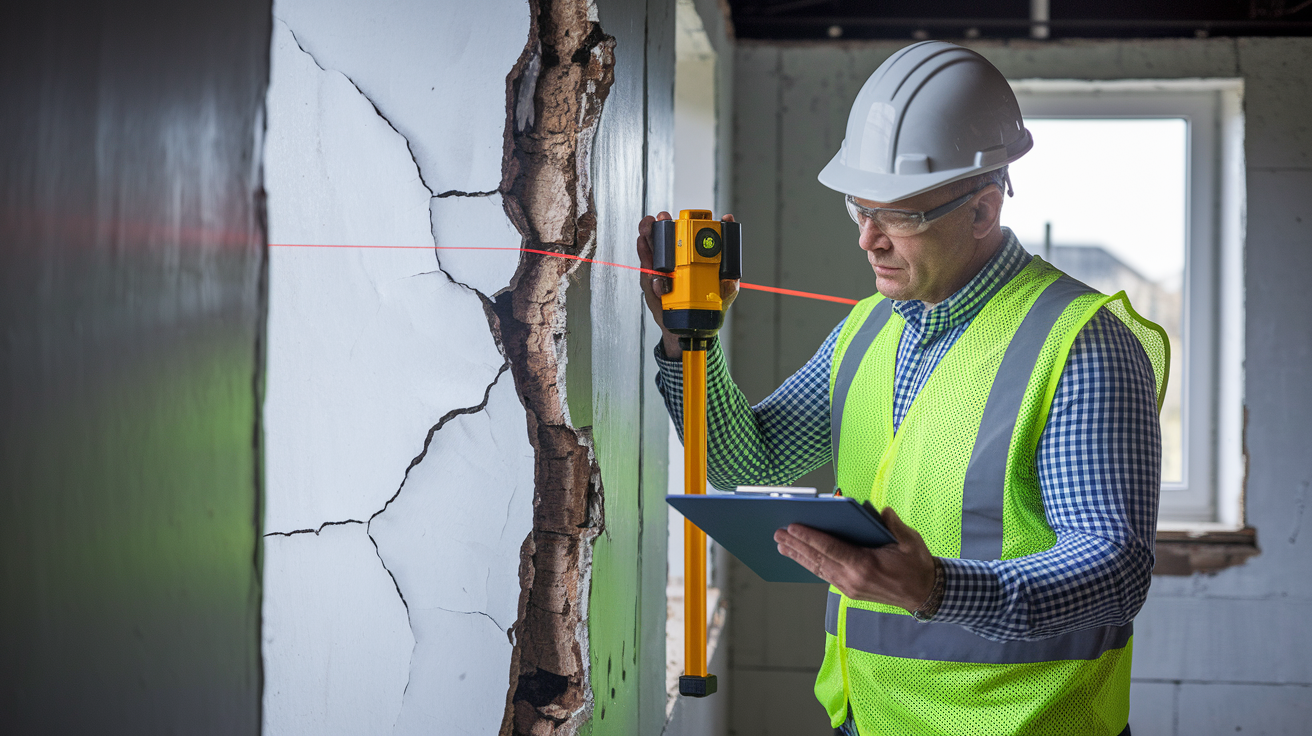
Some corner cracks are beyond DIY scope. Recognizing the warning signs saves you from wasting time on repairs that won’t hold.
Cracks wider than ¼ inch suggest significant movement or structural stress rather than normal settling.
Cracks that keep returning after repair mean the underlying cause hasn’t been addressed. The crack is a symptom, not the problem.
Multiple cracks radiating from a single corner create a spiderweb pattern that often indicates stress concentration from framing issues or foundation movement.
Bulging or bowing walls near cracks mean the wall itself is moving, not just the drywall surface. This is a structural concern.
Water stains or moisture around cracks point to active leaks that need repair before cosmetic patching makes sense.
Mold growth or musty odors near corners indicate ongoing moisture problems that drywall repair won’t solve.
Cracks in load bearing walls may signal serious structural issues that need professional evaluation before any cosmetic work.
Foundation cracks visible in basement or crawlspace below the corner crack location suggest settlement issues that require engineering assessment.
Professional structural assessment involves inspecting framing, checking foundation levelness, identifying moisture sources, and determining whether movement is complete or ongoing. Engineers use specialized tools to measure deflection and compare to building code requirements. This level of diagnosis isn’t possible with basic DIY tools.
Underlying issues take different forms. Foundation problems like settlement create stress patterns that show up as corner cracks upstairs. Framing problems from undersized headers over windows or doors concentrate stress at corners. Moisture intrusion from roof leaks, plumbing problems, or poor exterior drainage weakens drywall and creates recurring cracks even after careful repair.
When multiple warning signs appear together, or when you’re not confident in the structural stability of the repair area, call HomeRecoveryPro or a similar service for evaluation. Professional assessment includes identifying the root cause, explaining repair options with realistic cost estimates, and warranty coverage for the work. You’ll know exactly what’s causing the problem and what needs to happen to fix it permanently. Time constraints, lack of DIY confidence, or desire for warranted work are all valid reasons to bring in professional help even on straightforward corner crack repairs.
Preventing Future Corner Cracks in Drywall

Some settling cracks are part of owning a house, but many corner cracks are preventable with basic precautions.
Protecting corners from the start costs less than repeated repairs. Prevention focuses on three areas: physical protection, moisture control, and structural maintenance.
Physical Protection Strategies
Corner guards shield outside corners from impact in high traffic areas. Metal guards are most durable for heavy use hallways and commercial spaces. Plastic guards work well for residential applications and come in paintable versions that blend with wall color. Rubber corner guards absorb impacts in areas where furniture gets moved frequently.
Install guards on corners near doorways, at the ends of hallways, and anywhere furniture or equipment passes close to walls. They attach with adhesive or small screws and take minutes to install. The protection is permanent.
Furniture pads on table edges, chair backs, and anything that sits near walls reduce accidental bumps. Self adhesive felt pads cost a few dollars and prevent most casual impact damage from everyday use.
Maintain clear walkways so people aren’t squeezing past corners. Rearrange furniture if foot traffic regularly brushes against outside corners. Be careful when moving furniture. A couch corner hitting drywall creates damage that takes hours to fix properly.
Moisture and Humidity Control
Keep indoor humidity between 30 and 50% year round. Too much humidity causes drywall to swell, then crack as it dries. Too little humidity makes drywall brittle and prone to cracking from normal movement.
Ensure proper ventilation in bathrooms and kitchens where moisture concentrates. Run exhaust fans during showers and cooking, and leave them running for 10 to 15 minutes after to clear moisture. Fix any plumbing leaks immediately. Water behind walls damages drywall and creates conditions for mold growth.
Regularly inspect areas around pipes, windows, and roofs for water damage signs. Look for discoloration, soft spots, or peeling paint. Catching leaks early prevents major damage. Check corners near these areas especially. Water follows gravity and concentrates at corners.
Structural Maintenance
Monitor for foundation movement signs including new cracks, doors that stick, or windows that won’t open smoothly. Small foundation settlement is normal, but active ongoing movement needs attention before it causes extensive drywall damage.
Address settling issues promptly by identifying and correcting the cause. Poor drainage around the foundation, plumbing leaks undermining soil, or inadequate compaction during construction all cause settlement that shows up as corner cracks. Fix the drainage or soil problem, then repair cosmetic damage.
Ensure proper drainage around your home exterior by keeping gutters clean, downspouts extended at least 6 feet from the foundation, and soil graded to slope away from the house. Water pooling near the foundation causes settlement, which causes corner cracks.
Consider flexible corner bead installation in crack prone areas during initial construction or renovation. These beads accommodate normal building movement better than rigid metal, reducing the chance of future cracks. The small additional cost pays off in corners that stay smooth through years of normal settling.
Cost and Time Expectations for Corner Crack Repair
Corner crack repair ranks among the most affordable DIY home fixes. Materials are inexpensive and the skills are learnable in one project.
Material costs for basic repair total $30 to $50 for most jobs. Joint compound runs $8 to $15 for a gallon container that handles multiple repairs. Tape costs $3 to $8 depending on type and length. Corner bead if needed is $2 to $10 per piece. Primer is $10 to $20 for a quart. Sandpaper is $5 to $10 for an assortment pack. If you already own basic tools like putty knives and a utility knife, material cost is your only expense.
Time investment spans 2 to 3 days because of drying time between coats, but actual work time is much shorter. Preparation takes 30 to 60 minutes including cleaning the area, cutting the V groove, and setting up your workspace. First application takes 20 to 30 minutes to apply compound and embed tape. Drying time varies from 5 to 10 minutes for fast setting compound to 24 hours for all purpose compound. Additional coats take 15 to 20 minutes each plus drying time. Most repairs need 2 to 3 total coats. Sanding takes 30 to 45 minutes. Priming and painting adds 1 to 2 hours total including drying time between primer and paint. The whole process fits into a weekend with time to spare, though the repair spans multiple days while compound dries.
| Repair Scope | Material Cost | Time Investment | Skill Level |
|---|---|---|---|
| Simple hairline crack (no tape needed) | $15 to $25 | 2 to 3 hours over 2 days | Beginner, straightforward fill and sand |
| Inside corner crack with tape reinforcement | $25 to $40 | 4 to 6 hours over 2 to 3 days | Beginner to intermediate, tape technique required |
| Outside corner with bead replacement | $35 to $60 | 5 to 8 hours over 3 to 4 days | Intermediate, cutting, fastening, multiple coats |
| Multiple corners with structural assessment | $50 to $100 plus professional inspection | 8 to 12 hours plus wait for diagnosis | Professional recommended, underlying issues likely |
Final Words
Corner cracks happen in nearly every home as the structure settles and adjusts to temperature swings.
Most of them are cosmetic fixes you can handle yourself with basic tools, joint compound, and a little patience between coats.
The key is knowing when a crack signals something bigger, like moisture intrusion or foundation movement, versus normal settling you can patch and forget about.
When you repair drywall crack in corner issues the right way—cleaning out loose material, building thin layers, and addressing any underlying problems first—you’re not just covering up the problem. You’re restoring the corner so it works and looks right again.
FAQ
How do you fix a drywall crack on a corner?
To fix a drywall crack on a corner, start by cutting out loose material with a utility knife to create a clean V-groove about ⅛ to ¼ inches deep. Apply a thin layer of joint compound to both sides of the prepared crack, then embed paper tape or fiberglass mesh into the corner, pressing firmly to remove air bubbles. Smooth the first coat over the tape with a putty knife, feathering the edges onto the surrounding drywall. Allow the compound to dry completely (24 hours for all-purpose compound, or 5-10 minutes for setting compound), then apply a second and third coat as needed, letting each layer dry fully. Sand the repair smooth using fine-grit sandpaper, working carefully to avoid exposing the tape underneath. Prime the patched area before painting to match the existing wall.
Is it normal for drywall to crack in corners?
Yes, it is normal for drywall to crack in corners as homes naturally settle over time. Most corner cracks are cosmetic issues caused by temperature fluctuations, humidity changes, or minor foundation movement that happens in all houses. These hairline cracks and small settling cracks don’t usually indicate serious problems. However, if corner cracks are wider than ¼ inch, keep returning after repair, or appear alongside bulging walls, water stains, mold, or musty odors, they may signal structural or moisture issues that need professional assessment.
How do you fix cracks in the corners of walls with tape?
To fix cracks in wall corners with tape, first apply a thin layer of joint compound to both sides of the prepared crack. If using paper tape, moisten it lightly with water to prevent air bubbles, then fold it lengthwise and press it into the corner. Smooth the tape firmly with a putty knife, working from the center outward to eliminate bubbles. Apply a thin coat of joint compound over the embedded tape, feathering the edges 2-3 inches onto the surrounding wall. Let the first coat dry completely, then apply a second and third coat as needed, sanding smooth between layers. The tape reinforces the corner and prevents the crack from reappearing.
Should you use tape or mesh for drywall repair?
For corner drywall repair, both paper tape and fiberglass mesh tape work well, but paper tape generally provides stronger reinforcement for inside corners when properly embedded in joint compound. Paper tape requires moistening before application and careful technique to avoid air bubbles, but it creates a flatter finish. Fiberglass mesh tape is self-adhesive and easier for beginners to work with, though it can create a slightly thicker repair. For outside corners, mesh tape works well on minor repairs, but damaged corners often need corner bead replacement instead. Choose paper tape for maximum strength on inside corners, or mesh tape for easier application on straightforward repairs.