
If your toilet refills on its own every few hours without anyone touching the handle, that random running is costing you 20 to 40 gallons per day. That adds up to $50 or more on your monthly water bill from a single worn part inside the tank. The good news is most intermittent running issues come from basic components like the flapper or fill valve, and you can usually fix them yourself with a $10 part and about 15 minutes.
What Causes a Toilet to Run Intermittently and How to Fix It

A toilet that runs intermittently (some people call it phantom flush or ghost flushing) refills for a few seconds even though nobody touched the handle. Water flows into the tank randomly, stops, then starts again minutes or hours later. If you’ve been hearing your toilet kick on by itself at odd hours, that’s intermittent running.
The problem usually comes from worn or misaligned parts inside the tank. Here are the four main causes:
Worn flapper valve. The flapper seals the bottom of the tank where water flows into the bowl. When it gets cracked, warped, or covered in mineral buildup, it doesn’t seal properly. Water slowly leaks from the tank into the bowl. When the tank level drops low enough, the fill valve kicks on to refill it.
Faulty fill valve. The fill valve controls water entering the tank after a flush. When it’s damaged, clogged with debris, or improperly adjusted, it opens and closes randomly instead of staying shut between flushes.
Incorrect float height. The float tells the fill valve when to stop adding water. If the float sits too high, water continuously rises above the normal level and spills into the overflow tube. This makes the toilet run intermittently to maintain that overfilled level.
Loose or worn internal parts. Screws, levers, plastic fittings, or cracked tubes create leaks or prevent components from closing completely. Weakened connections allow small amounts of water to escape, which triggers periodic refills.
A toilet that runs intermittently can waste 20 to 40 gallons per day depending on how bad the leak is. Even small, silent leaks add up to thousands of gallons per month. That’s $50 to $200 or more added to your monthly utility bill just from one running toilet. Most causes are simple to diagnose and fix with basic tools and inexpensive parts. Quick repairs pay for themselves within weeks through reduced water bills.
How to Fix Common Causes of Intermittent Running Toilets

Most intermittent running issues are DIY friendly if you’re comfortable turning off the water supply and working inside the tank. Always turn off the shut-off valve (usually on the wall behind the toilet) before starting repairs to prevent water from flowing while you work.
Start by gathering necessary tools and materials. You’ll need rubber gloves, a sponge or towels for cleanup, cutting pliers, and a multi-bit screwdriver. Most hardware stores carry universal toilet parts that fit standard tanks. If you’re unsure which part you need, remove the old component and bring it to the store for matching. Replacement parts are typically inexpensive. Flappers cost $5 to $10, fill valves run $15 to $25, and complete repair kits with multiple components cost around $30.
Replacing a Worn Flapper Valve
Turn off the shut-off valve behind the toilet, then flush to empty the tank. The old flapper hooks onto two small rubber or plastic “ears” on the sides of the flush valve (the opening at the bottom of the tank). Unhook the flapper from these ears, then disconnect the chain from the flush handle lever.
Take the old flapper with you to match the size and style. Flappers come in 2 inch and 3 inch sizes, and some flush valves use specific designs. Hook the new flapper onto the flush valve ears, making sure it sits centered over the opening. Reconnect the chain to the handle lever, leaving about half an inch of slack. If the chain is too tight, it holds the flapper partially open. If it’s too loose, it gets caught under the flapper.
Turn the water back on and let the tank fill. Test by flushing once, then wait several minutes to see if the toilet runs again. The flapper should drop straight down and seal completely each time.
Adjusting Float Height and Fill Valve
The float mechanism controls when the fill valve shuts off. For older toilets with a ball float on an arm, loosen the adjustment screw at the base of the arm, push the float down about an inch, then tighten the screw. For newer toilets with a cup style float that slides on the fill valve shaft, pinch the adjustment clip and slide the float down.
The water level should sit about one inch below the top of the overflow tube. If the fill valve is clogged with sediment or mineral deposits, you’ll see the valve cycling on and off even after adjusting the float. Try removing the cap and rinsing debris from inside the valve body. If cleaning doesn’t help or the valve is cracked or corroded, replacement is straightforward. Turn off the water, disconnect the supply line from the bottom of the tank, unscrew the lock nut holding the old valve, and lift it out. Install the new valve following the manufacturer’s instructions.
Fixing Chain Length and Refill Tube Position
The flapper chain should have about half an inch of slack when the handle is at rest. If it’s too long, trim a few links with cutting pliers and reattach it to the handle lever. Make sure the chain doesn’t tangle or kink. Some chains have a clip that lets you adjust length without cutting.
The refill tube is the small flexible tube that runs from the fill valve to the overflow tube. It should clip onto the side of the overflow tube with the end positioned just above the tube opening, not hanging down inside it. If the refill tube is too long or improperly positioned, it creates a suction effect that continuously pulls water into the bowl. Pull the tube from its clip, hold it above the overflow opening, trim if needed, and clip it back in place.
| Part | Typical Cost | When Needed |
|---|---|---|
| Flapper | $5-$10 | Cracked, warped, or won’t seal; toilet hisses or trickles between flushes |
| Fill Valve | $15-$25 | Valve cycles randomly; water level inconsistent; cleaning doesn’t fix issue |
| Flapper Chain | $3-$5 | Chain broken, tangled, or wrong length; included with most flappers |
| Flush Handle | $8-$15 | Handle loose, corroded, or lever doesn’t return to rest position |
| Complete Repair Kit | $25-$35 | Multiple worn parts; age-related wear; good for preventive replacement |
Diagnosing the Problem: Identifying What’s Causing Your Toilet to Run
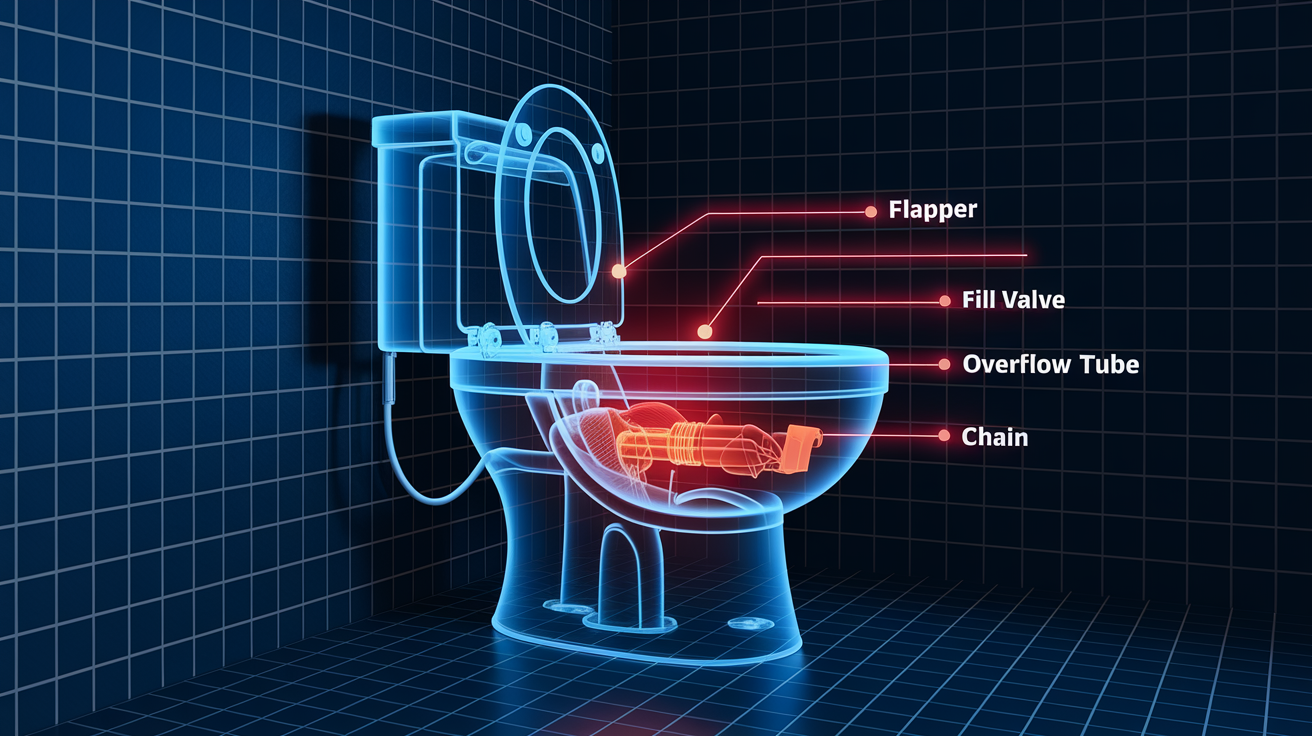
Remove the tank lid and place it on a towel on a flat surface where it won’t get bumped. Tank lids are fragile and expensive to replace. If you need to turn off the water during diagnosis, locate the shut-off valve on the wall behind the toilet.
Work through a systematic inspection instead of guessing at the problem. Document what you find before attempting repairs. Sometimes multiple issues contribute to intermittent running.
Listen for refilling sounds and hissing. Stand near the toilet during a quiet time and listen for the fill valve turning on by itself or continuous hissing near the tank.
Perform a food coloring test for silent leaks. Add several drops of food coloring to the tank water, wait 15 to 20 minutes without flushing, then check if color appears in the bowl. Color in the bowl confirms a leak.
Visually inspect all tank components. Look at the flapper, fill valve, float, overflow tube, refill tube, and chain. Check for obvious damage, misalignment, or mineral buildup.
Test each component individually. Push down on the flapper to see if it seals, adjust the float to see if water level changes, flush and watch the full cycle.
Note all findings before attempting repairs. Sometimes fixing one issue reveals another, and knowing what you saw initially helps with troubleshooting.
Checking the Flapper Valve
The flapper seals the opening at the bottom of the tank. When you flush, the chain lifts the flapper, water rushes into the bowl, then the flapper drops back down to seal the tank so it can refill. A worn flapper is the most common cause of intermittent toilet running.
Look for cracks, brittleness, or warping in the rubber or silicone flapper material. Press down on the flapper while water is in the tank. If the running stops, the flapper isn’t sealing properly on its own. Check if the flapper closes completely after a flush or if it hangs partially open. Flappers that don’t close fully or get stuck open let water leak continuously.
Listen for hissing or trickling sounds near the bottom of the tank. These sounds indicate water escaping past the flapper seal even when the toilet isn’t in use. Mineral deposits and calcium buildup on the flapper or the flush valve seat prevent proper sealing. Even small amounts of buildup create gaps that allow slow leaks, which trigger the fill valve to refill the tank periodically.
Inspecting Fill Valve and Float Settings
The fill valve controls water entering the tank after each flush. It should open when the tank empties and close when water reaches the proper level. Debris, sediment, or mineral deposits inside the valve interfere with the closing mechanism. This causes the valve to open and close randomly instead of staying shut between flushes.
Remove the fill valve cap (if your model allows) and look inside for dirt or calcium buildup. Even small particles prevent the valve from closing completely. Modern fill valves have a cup style float that slides on the valve shaft. Older toilets use a ball float on a metal or plastic arm. Both types use the float position to determine when to shut off water flow.
Check the float height by looking at the water level when the tank is full. Water should sit about one inch below the top of the overflow tube. If the float is set too high, water continuously rises above the normal level and spills into the overflow tube. This makes the toilet run intermittently as it tries to maintain that overfilled level. The fill valve never fully shuts off because water keeps escaping through the overflow.
Test by manually pushing the float down. If the water shuts off immediately, the float is positioned too high and needs adjustment.
Examining Overflow Tube and Refill Tube
The overflow tube is the vertical pipe in the center of the tank. It prevents flooding by providing an escape route if the fill valve doesn’t shut off properly. Water that rises too high spills into the overflow tube instead of overflowing the tank edges.
Check the overflow tube for cracks, especially near the base where it connects to the flush valve. Damaged tubes leak water directly into the bowl, creating the same symptom as a bad flapper. Look at the water level when the tank is full. If water is flowing into the overflow tube, the float is too high or the fill valve isn’t shutting off completely.
The refill tube is the small flexible tube running from the fill valve to the overflow tube. After a flush, it directs a small stream of water down the overflow tube to refill the bowl’s trap seal. The tube should clip onto the side of the overflow tube with the end positioned just above the tube opening. If the refill tube hangs too far down inside the overflow tube, it creates a suction effect that continually pumps water into the bowl. This triggers intermittent refills even though nothing is technically broken.
Assessing Chain and Flush Handle Operation
The chain connects the flush handle lever to the flapper. When you push the handle, the chain lifts the flapper to start the flush cycle. Proper chain length should provide about half an inch of slack when the handle is at rest. You should be able to slip a finger under the chain, but it shouldn’t be so loose that it coils on the bottom of the tank.
A chain that’s too long gets caught under the flapper when it closes, preventing a complete seal. Water slowly leaks past the partially open flapper, triggering periodic refills. A chain that’s too short holds the flapper partially open all the time, creating a constant leak. Check for tangles and kinks in the chain that restrict movement or prevent the flapper from dropping straight down.
Look at the flush handle and lever assembly. A loose handle allows the lever to shift position, which changes the chain length during operation. Corroded or mineral encrusted handles don’t return smoothly to the rest position, leaving the chain slightly taut. The lever should snap back quickly and rest in a horizontal position after you release the handle. If the lever doesn’t return completely, it holds tension on the chain and prevents the flapper from sealing properly.
Preventing Future Intermittent Running in Your Toilet

Preventive maintenance is easier and cheaper than emergency repairs. Catching small issues before they turn into persistent problems saves water, money, and the hassle of middle of the night troubleshooting.
Set a reminder to inspect your toilet’s internal components every three to six months. The inspection takes only a few minutes. Remove the tank lid and look at the flapper for early signs of wear, check the fill valve for mineral buildup, make sure the float moves freely, and verify the chain has proper slack. This quick visual check lets you spot deteriorating parts before they fail completely.
Avoid drop in tank cleaners that sit in the tank. These tablets contain harsh chemicals that damage rubber and plastic components over time. The chlorine and other chemicals break down flapper material and degrade valve seals, leading to premature failure.
Check components every 3 to 6 months. Look for early signs of wear including slight discoloration of the flapper, stiffness in moving parts, and mineral deposits on valve surfaces.
Address hard water issues. Install a water softener if you have significant calcium or mineral deposits. Hard water accelerates component deterioration by coating surfaces with scale.
Monitor water pressure. High water pressure stresses valves and accelerates wear. If your home has pressure above 80 psi, consider installing a pressure regulator.
Replace parts showing early wear. Don’t wait for complete failure. If the flapper feels slightly stiff or shows small cracks, replace it during your next scheduled check rather than waiting for it to leak.
Component lifespan varies by water quality and usage patterns. Flappers typically last three to five years under normal conditions. Fill valves usually last five to seven years. Hard water and high pressure accelerate wear significantly. If you notice parts failing more frequently than expected, the water conditions in your home are likely contributing to faster deterioration.
When to Call a Professional Plumber for Toilet Running Issues
Most intermittent running issues are DIY fixable with basic tools and inexpensive parts. Try the troubleshooting and repair steps first. But some situations require professional tools, expertise, or diagnostic equipment that homeowners don’t typically have.
DIY repairs didn’t work. You replaced the flapper and adjusted the float, but the toilet still runs intermittently. This suggests a hidden issue that’s not immediately visible.
Visible cracks in tank or bowl. Cracks in the porcelain require toilet replacement. Attempting to repair cracked porcelain is not reliable and can lead to flooding.
Persistent running after component replacement. You installed a new fill valve and flapper, but water keeps dripping or the toilet cycles randomly. This indicates issues with the flush valve seat, supply line problems, or water pressure.
Suspected supply line issues. If you see water where the supply line connects to the tank or shut-off valve, the connection may be damaged or improperly sealed.
Need for toilet replacement decision. The toilet is old, has needed multiple repairs, or you’re unsure whether repair or replacement makes more sense. A professional can assess condition and recommend the most cost effective solution.
Water damage concerns. If intermittent running has been happening for an extended period, moisture around the toilet base or on the bathroom floor may indicate secondary damage requiring inspection.
Licensed plumbers diagnose complex issues that aren’t visible to homeowners. High water pressure that’s stressing all the valves. Damaged flush valve seats that need specialized tools to resurface. Drainage problems that create back pressure in the system. Supply line restrictions that affect how the fill valve operates. These problems often look like simple component failures until you start replacing parts and the issue continues.
Professional repair costs typically run $150 to $400 depending on the issue and your location. That might seem high compared to a $10 flapper, but consider the cost of continued water waste while you troubleshoot through trial and error. A toilet wasting 30 gallons per day costs roughly $3 to $5 per month in water and sewer charges. Over six months of unsuccessful DIY attempts, you’ve spent more on wasted water than professional diagnosis would have cost. Proper diagnosis also prevents buying parts you don’t actually need.
For professional toilet repair when DIY troubleshooting doesn’t resolve the issue, Home Recovery Pro services can diagnose and fix running toilet problems including hidden leaks, damaged valves, and water pressure issues.
Signs Your Toilet Needs Replacement Instead of Repair

Toilets older than 20 years may be more cost effective to replace than repeatedly repair. Multiple repair cycles within a short period indicate systemic problems rather than simple component wear. Pre 1994 toilets use 3.5 to 7 gallons per flush compared to modern toilets that use 1.28 to 1.6 gallons. If you’re repairing an older toilet for the third time in two years, replacement saves money long term through reduced water bills and fewer service calls.
| Feature | Pre-1994 Toilets | Modern Toilets |
|---|---|---|
| Water Per Flush | 3.5-7 gallons | 1.28-1.6 gallons |
| Annual Water Usage (family of four) | 25,000-50,000 gallons | 9,000-12,000 gallons |
| Common Issues | Frequent clogs, weak flush, outdated parts hard to find | Efficient flush, readily available parts, WaterSense certified options |
| Typical Lifespan | 15-25 years before major repairs needed | 20-30 years with proper maintenance |
Calculate the total spent on repairs over the past two years, then compare that to replacement cost. Replacement typically runs $300 to $600 installed for a standard toilet. Modern toilets pay for themselves through water savings, usually within three to five years depending on household size and local water rates. A family of four switching from a 3.5 gallon toilet to a 1.28 gallon model saves roughly 15,000 gallons per year. That translates to $60 to $100 in annual water and sewer cost reduction. Add in fewer repair calls and longer component life, and replacement becomes the practical choice for older toilets showing multiple problems.
Final Words
A toilet running intermittently wastes real money and usually points to a worn flapper, faulty fill valve, or simple adjustment issue.
Most of these fixes take under an hour with basic tools and parts from any hardware store.
Catching it early keeps your water bill in check and prevents bigger problems down the road. If you’ve replaced parts and it’s still cycling, that’s when a pro can spot what you can’t see.
Either way, you’ll have it working right again soon.
FAQ
How do you fix a toilet that runs intermittently?
You can fix a toilet that runs intermittently by replacing a worn flapper valve, adjusting the float height, or repositioning the refill tube. Turn off the water supply at the shut-off valve, flush to empty the tank, and replace any damaged parts. Most repairs use common tools and cost under $20 in parts.
What is the most common cause of a constantly running toilet?
The most common cause of a constantly running toilet is a worn or cracked flapper valve that fails to seal properly. When the flapper doesn’t create a watertight seal, water slowly leaks from the tank into the bowl, triggering the fill valve to refill periodically. Replacing the flapper typically solves the problem.
What does it mean when a toilet automatically runs a bit of water randomly?
When a toilet automatically runs a bit of water randomly, it means you have a phantom flush or ghost flush caused by a slow leak from the tank to the bowl. This triggers the fill valve to refill the tank periodically. Common causes include a worn flapper, faulty fill valve, or incorrect float height.
Why put aluminum foil in a toilet tank?
Putting aluminum foil in a toilet tank is an old trick to test for condensation or leaks, but it’s not a recommended repair method. For diagnosing leaks, use the food coloring test instead: add food coloring to the tank, wait 15 minutes without flushing, and check if color appears in the bowl.
How much water does an intermittently running toilet waste?
An intermittently running toilet wastes 20 to 40 gallons of water per day depending on the severity of the leak. This can add $50 to $200 or more to your monthly water bill. Even small, silent leaks add up to thousands of gallons per month.
How long does a toilet flapper typically last?
A toilet flapper typically lasts 3 to 5 years under normal conditions. Hard water, mineral deposits, and harsh tank cleaners can shorten flapper lifespan. If your flapper appears brittle, cracked, or warped during inspection, replace it to prevent water waste and intermittent running.
Can I use drop-in toilet tank cleaners?
You should avoid drop-in toilet tank cleaners because they can damage plastic and rubber parts over time, including flappers and fill valves. These harsh chemicals accelerate component deterioration. Instead, clean your toilet bowl directly and inspect tank components every few months for mineral buildup.
What is the food coloring test for toilet leaks?
The food coloring test for toilet leaks involves adding food coloring to the tank, waiting 15 to 20 minutes without flushing, and checking if color appears in the bowl. If the bowl water shows color, you have a leak, most likely from a worn flapper that needs replacement.
How do you adjust toilet float height?
You can adjust toilet float height by loosening or tightening the screw on a ball float arm or adjusting the clip on a cup float. Lower the float if water continuously spills into the overflow tube. The water level should sit about one inch below the top of the overflow tube.
When should I call a plumber for a running toilet?
You should call a plumber for a running toilet when DIY repairs don’t work, you see visible cracks in the tank or bowl, running continues after replacing parts, or you suspect supply line issues. Professional plumbers can diagnose hidden problems like high water pressure or damaged valves not visible to homeowners.